Tips For Making Wooden Boxes For,T Track Home Hardware Ltd,Kreg Tools Pocket Hole Year,Sierra Ballpoint Pen Hardware Kit Exercise - And More
Measure the inside length and width to determine the size of the bottom of the box. With these measurements, cut your bottom board using a saw. Place the board inside the box. Use a drill and galvanized screws to attach the bottom board through the sides of the box. Drill drainage holes in the bottom of the box. Turn your now fully-formed box over and use your drill to create four or five drainage holes in the bottom of the box.
If you have constructed a much larger planter box, you should consider adding a few more drainage holes. Again, if your planter will be over soil, this is not necessary.
Simply use flattened cardboard as the bottom of your box. Part 3 of Place a layer of nylon or vinyl screen inside the planter. Doing this will protect the wood of your planter. Cut the screen so that it is the same size as the board you used for the bottom of the planter. Lay it in the bottom of the planter and fix in place with some small nails.
Make sure that you remember to drill drainage holes in the screen that line up with the drainage holes in the bottom board if your box has a bottom. Sand any rough edges. Doing this will give your box a nice finished look, but it is not absolutely necessary to do.
Take a sander or a piece of sandpaper and run it along the edges and corners of the box. Run it along the sides of the boards to vanquish any potential splinters. Paint, prime, or stain the outside of your planter. You can also choose to leave your wood alone, as cedar is a beautiful wood all by itself. Do not treat the inside of your planter, as this may contaminate the soil and your plants. Instead, use use a plastic liner with holes to protect the wood.
Add a thin layer of gravel, then add the compost or potting soil. The gravel will help to drain the planter box. The type of soil or compost you use will depend on the types of plants or flowers you intend to add to your planter box. Add your flowers, plants, or whatever seeds you plan to cultivate.
Don't forget to water! For ideas on types of flowers and plants you can add to a planter box, click here. Did you know you can read expert answers for this article?
Unlock expert answers by supporting wikiHow. Andrew Carberry, MPH. Support wikiHow by unlocking this expert answer. Not Helpful 26 Helpful Not Helpful 16 Helpful There is no reason why not. I am building 4 planter boxes to put in an area between fences and the whole area is rocky. I am not putting bottoms on them because once they are filled with dirt, the rocks should provide good drainage.
Not Helpful 1 Helpful I prefer fiberglass screening, it seems to last longer, and I line my planters with landscape fabric. Yes, but consider adding 'feet' to elevate the box off the grass or soil, or it will rot. Not Helpful 12 Helpful If you use inch-wide boards 1" x 12" x 8 ft.
Not Helpful 7 Helpful Many sizes would work depending on the wood that you use. When working outside, deck screws are a great choice, probably 2 inch deck screws. Not Helpful 5 Helpful 9. Cedar, redwood, and pressure-treated woods are all great choices. Cedar and redwood are both naturally resistant to insects and weathering.
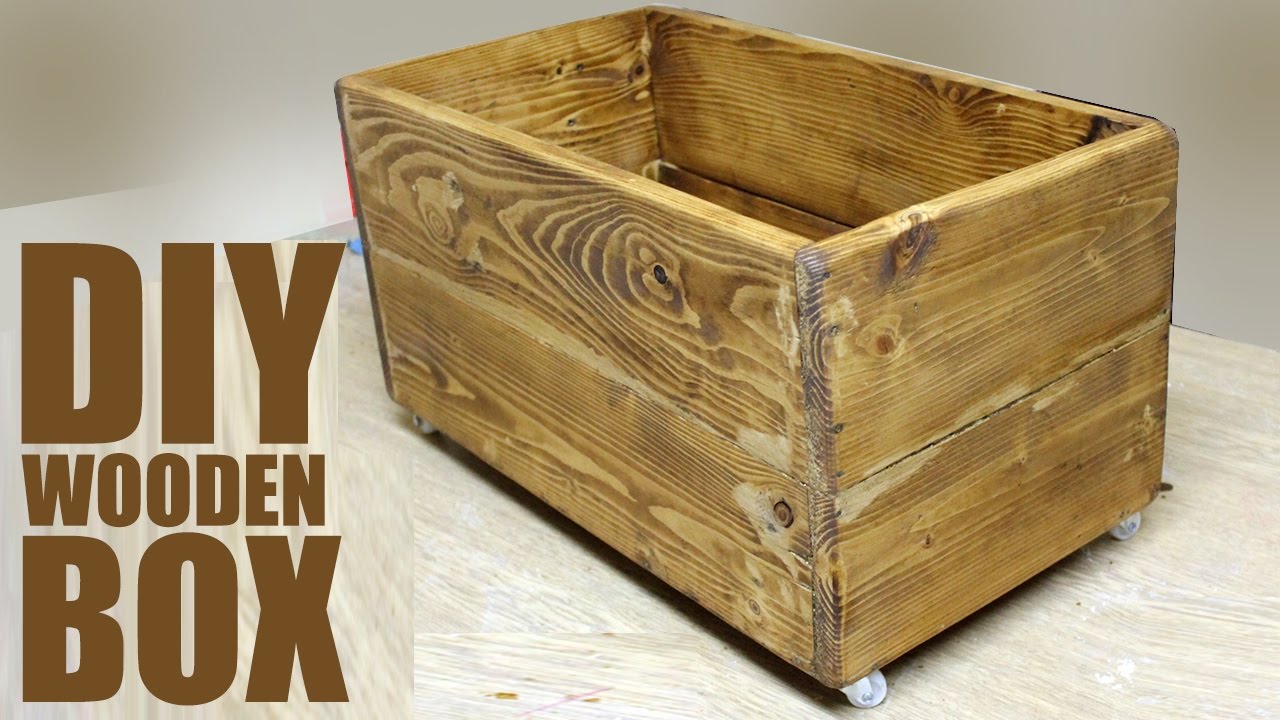
Pressure-treated wood uses chemicals to make it insect and weather resistant, so it may not be great for areas with children or pets. Cedar and redwood are safe for children and pets because they are natural, but they can also be more expensive than pressure-treated wood. Not Helpful 28 Helpful Drill holes every 6 inches for drainage, or use the cut end boxed end of the cedar to place them randomly. Not Helpful 3 Helpful 2. You can even attach wheels to the bottom of them for mobility.
But, when raising your planter off the ground, you will need to add thin strips of wood to the inside bottom of the box for support. The corners of the bottom board will have to be cut to accommodate the 3x3 legs.
If you don't want the legs to be visible from the dirt surface, don't bring them up to then top of your box. Not Helpful 3 Helpful 4. Include your email address to get a message when this question is answered. By using this service, some information may be shared with YouTube. You can take these plans and scale them down for a window box.
Helpful 1 Not Helpful 0. As always, when working with tools, don't forget to use the necessary eye and hand protection. Helpful 20 Not Helpful 6. Related wikiHows How to. How to. About This Article. Co-authored by:. Co-authors: Updated: March 2, Categories: Garden Projects Woodworking.
Article Summary X To build a wooden planter box, start by cutting some wooden planks so you have 2 that are 2 feet long and 2 that are 4 feet long. Italiano: Realizzare una Fioriera in Legno. Bahasa Indonesia: Membuat Pot Kayu.
Nederlands: Een houten plantenbak maken. Thanks to all authors for creating a page that has been read , times. I'm an 8th grader and I'm assistant reporter, just using this help me. We always have a silent auction. This helped me. We've been helping billions of people around the world continue to learn, adapt, grow, and thrive for over a decade. Every dollar contributed enables us to keep providing high-quality how-to help to people like you.
Please consider supporting our work with a contribution to wikiHow. Log in Social login does not work in incognito and private browsers. Please log in with your username or email to continue. No account yet? Create an account. Edit this Article. We use cookies to make wikiHow great. By using our site, you agree to our cookie policy. Cookie Settings. Learn why people trust wikiHow. Download Article Explore this Article methods. Tips and Warnings. Things You'll Need.
Related Articles. Article Summary. Method 1 of All rights reserved. This image may not be used by other entities without the express written consent of wikiHow, Inc.
Smooth the surface of the box with —grit sandpaper. Use small circular motions across the flat surfaces and apply firm pressure to smooth out any raised areas so the paint can adhere to the wood easier. Avoid using lower grit sandpaper since you could leave scratches or marks on the surface that become more noticeable after you paint the box. Choose and mix the paint color you want to use for your box.
Opt for an acrylic paint if you want the box to have a semi-glossy appearance. Open the paint and stir it thoroughly to ensure the color spreads through it evenly. Avoid using oil paints since they take a long time to dry. Apply a thin coat of paint to the outside of the box and let it dry for 15—20 minutes. Put a thin layer of paint on the end of a natural-bristle or foam paintbrush and spread it evenly over the wood.
After painting the exterior of the box, let it dry for 15—20 minutes. Paint 1—2 more coats on the box if you want a more solid color. Paint the next coat of paint in the opposite direction as the first one to help hide the brush strokes more.
Make sure each layer has the same thickness so it dries evenly. Allow each coat of paint to dry for at least 15—20 minutes before you apply the next one. Otherwise, leave the box open on the hinges. Paint around each of the edges and the interior of the box with a thin layer of acrylic or farmhouse paint. Allow the coat to dry for at least 15—20 minutes before applying the next coat.
Use 2—3 coats total on the inside of the box. Try using a different color of paint if you want the inside of the box to add an accent. For example, you may paint the outside of the box white and the interior a metallic gold color. Use a paint marker if you want to draw intricate designs.
Shake the paint marker thoroughly so the paint evenly spreads inside. Remove the cap from the marker and draw any designs you want. You may try writing names, making letters, or adding detailed line work as decoration. Distress the edges of the box with sandpaper if you want a rustic look. Use a piece of or grit sandpaper and apply light pressure around the sharp edges of the box to lift up the paint.
Press slightly harder if you want to remove more paint and expose some of the natural wood underneath it. Try to focus around areas that would naturally distress over time, such as around the hinges or clasp. Apply 2 coats of varnish to protect the painted surface. Dip the ends of a natural bristle paintbrush in the varnish and pull it in long, straight lines across the surfaces of the box. Then apply a second coat. You can choose glossy or matte varnish depending on how much you want the box to shine.
Varnish can create harmful fumes, so be sure to work in a well-ventilated area to avoid any irritation. Method 2 of You can use any color of acrylic paint you want as the undercoat for your box. Dip a natural-bristle or foam brush in the paint and start painting the exterior of the box in long, straight strokes. Allow the outside of the box to dry for 15—20 minutes before painting the inside of the box. You do not need to prime the box before you paint it.
Avoid applying thick layers of paint since they will dry unevenly and may affect the color of the box. Sand the paint smooth with a piece of grit sandpaper. Only apply light pressure as you go over the surface of the box with the sandpaper to get rid of any raised areas of paint.
Be careful not to press too hard, or else you may expose the wood underneath the paint. Print the image you want to attach to the box. Turn the image settings to the highest quality before clicking the Print button. Apply a layer of decoupage glue on the box where you want your image.
Dip a foam brush into the decoupage glue and wipe off any excess that's dripping off. Paint a thin layer of the glue on the surface of the box where you want to attach the image. Decoupage glue will start to dry within an hour, so be sure to work quickly as soon as you apply it. Lay the printed image flat on the box. Carefully set the image down on the wood and press it down firmly. Push out any bubbles or wrinkles from the center toward the edges of the image with your fingers to smooth it out.
Brush the decoupage glue over the image and let it dry for 1 day. Dip your brush in the decoupage glue again and wipe off any excess. Work from the center of the image toward the edges so you apply a thin layer across the entire surface.
Let the decoupage glue set completely for 24 hours. Carefully wipe off any excess decoupage glue with a paper towel if there are still large drops left on the box.
Rub away any edges around the image with a damp sponge. Wipe away any balled-up paper that forms around the edges so only the parts of your design are left attached to the box.
Spread a layer of acrylic varnish on the box to seal it. Get a glossy or matte finish varnish and mix it slowly with a stir stick.


|
Letter J In Morse Code Review Digital Tape Measure Kenya Update Build A Frame For A Shed Light |

I_am_Virus
25.02.2021 at 14:57:49
ZAKIR212
25.02.2021 at 22:23:31
ValeriA
25.02.2021 at 11:33:34
10_ON_010
25.02.2021 at 23:28:12