Mission Side Table Woodworking Plans,Rt0701cx7 Review Updates,Small Wood Craft Project Ideas,Custom Electric Branding Iron - Plans Download

Made entirely with mortise and tenon joinery for a strong, long lasting piece of furniture you will pass down through generations. The project u Our Mission style chair with its gentle sweep of the legs make it a beautiful design. Complete mortise and tenon construction but you could use screws instead.
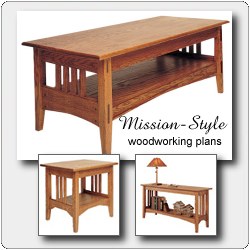
Match it with our Mission style Dining T Our Mission style table with its gentle sweep of the legs make it a beautiful design. Match it with our Mission style Dining A project that is pretty enough to be by itself. Our Mission style quilt rack is a perfect compliment to our other Mission style furniture.
Use whatever wood material your bud One or more of these Mission style end tables would look great indoors or outdoors. A feature of this Mission style furniture piece is that the cabinet top is built separate from the table bottom. This aids in moving the piece and allows you to build one or the other. Complete mo With our full size drawings you can build this folding Mission style chair. Useable as a sitting chair or as a ladder.
Traditionally found in a library hence the name , but also handy in the kitchen Complimenting our Mission style collection, the interior of this cabinet measures approximately Choose to use tempered glass for a see through p Complimenting our Mission style collection, this bar stool measures 30 inches from the floor to the seat. Choose to include the storage area in between the rear legs, perfect for magazines, newspapers, laptop, et Complimenting our Mission style collection, this desk has a work surface of 29 x 47 inches PLUS the desktop organizer.
Use wha Complimenting our Mission style collection, this sitting bench will look beautiful in any location. Use whatever wood material your budget will allow, best built using a hardwood. Complete mortise and Complimenting our Mission style collection, this cabinet is ideal as a stand alone unit or as a bathroom vanity has a top surface of 18 x 24 inches.
Complete mortise and tenon construction but you cou Our Mission style bed is an extensive building project, with lots of mortise and tenon joints. We do not recommend this for a beginner project. This mission style small table is suitable was a side table or to be used as a pedestal for a potted plant. This simple assembly consist of 4 parts and can be made with as little a one piece of 1 x Make this eight drawer companion chest for a Mission style bedroom group our other plans can help you to build.
Four graduated drawers below and four small drawers at the top of this chest provide amp The long and short apron pieces and the shelf rails are connected to the legs with simple mortise-and-tenon joinery. Cut the mortises in the legs first, then cut the corresponding tenons to fit.
Do not create the arched cutouts on the aprons just yet. The wedged tenon joints where the shelf passes through the shelf rails must be cut Woodworking Plans Outdoor Side Table Tennis neatly and accurately. Next, cut four through mortises in the shelf rails. After marking their locations with a pencil, cut from both sides, drilling out the majority of the waste, and clean up with a chisel and file.
The mortises must be square and neat on both sides. While there are measurements on the plans that correspond to my table, there can easily be slight variances when you build. Next, measure the actual distance between the two shelf rails. This distance is the between-the-tenons length of the shelf. Cut your shelf panel to length and mark out the locations of the tenons directly from the rails.
Use a bandsaw or jigsaw to cut away the outside corners. In order to get a straight cut for the cutout between the tenons, use a jigsaw with a cutting guide clamped to the shelf. Or make this cut quickly and accurately with a plunge cut on your tablesaw. Set the fence the required distance away from the blade and raise the blade until it is just higher than the thickness of the wood. Then lower the blade and turn on the saw.
Hold the shelf against the fence so the mark for the back of the blade aligns with the cutout for the rearmost tenon. Slowly feed the wood into the blade until the mark for the foremost tenon reaches the mark you made earlier on the fence for the front of the blade.
Hold the board securely on the table and against the fence, then shut off the saw. Wait for it to come to a stop before lowering the blade. The saw blade is curved, so the cut will be arc-shaped. You can square it with a jigsaw or handsaw. Dry-fit the shelf and shelf rails together to ensure that the shelf tenons fit through the mortises perfectly. Again, to prevent chipping during your test-fits, make slight chamfers on the mating pieces.
Next, cut the small mortises that go right through the tenons. These accommodate the wedges that hold the shelf in place. The best way to find their location is to mark the point at which the shelf tenons exit the rail mortises with a pencil line.
See the plans for details. Also, be sure to clamp a board to the bottom edge of the hole to prevent tearing out the edges when chiselling. You could make a jig to cut the wedges themselves, but since you only need four, I recommend a simpler method.
Use a plane to develop the wedge fit. Test each wedge in a different mortise while the base is dry-fitted together and mark which ones correspond. Use a block plane to adjust the fit. Next, cut the arcs on the bottom of the apron pieces. Make the cuts with a bandsaw or jigsaw, cleaning up the cuts with a compass plane, belt sander or file.
Your last step before assembling the base is to cut chamfers with a block plane on the shelf tenons and sand all the surfaces of the base pieces. Quartersawn white oak can be difficult to finish smoothly, especially if there are small, torn-out chips from the preliminary milling stages.
I find a cabinet scraper ideal for cleaning up any problem areas. Assemble the base with wood glue. Bring the end frames together, then join them with the shelf and the long apron pieces. Clamp up everything and be sure to check for square as you go. I stained and finished my table before tiling so that the wooden edges adjacent to the tiles would be somewhat sealed against the moisture in the tile grout.
With the last coat of finish dry, I attached the top to the base with table irons. While this hardware looks contemporary, it is a historically accurate method for attaching tops to carcasses that allows for seasonal movement. Next, turn your attention to grouting. Non-sanded wall grout is best for this application. I used a small grout float to spread the grout. Give the grout time to set partially, then carefully sponge off the excess.


|
Wood Carving Ideas Pinterest Order Hand Carved Pool Cue Good Wood Projects To Sell Result Inflatable Bowl Sanders 2019 |

FRIEND_DRONQO
01.01.2021 at 17:58:26
KaRtOf_in_GeDeBeY
01.01.2021 at 17:52:37