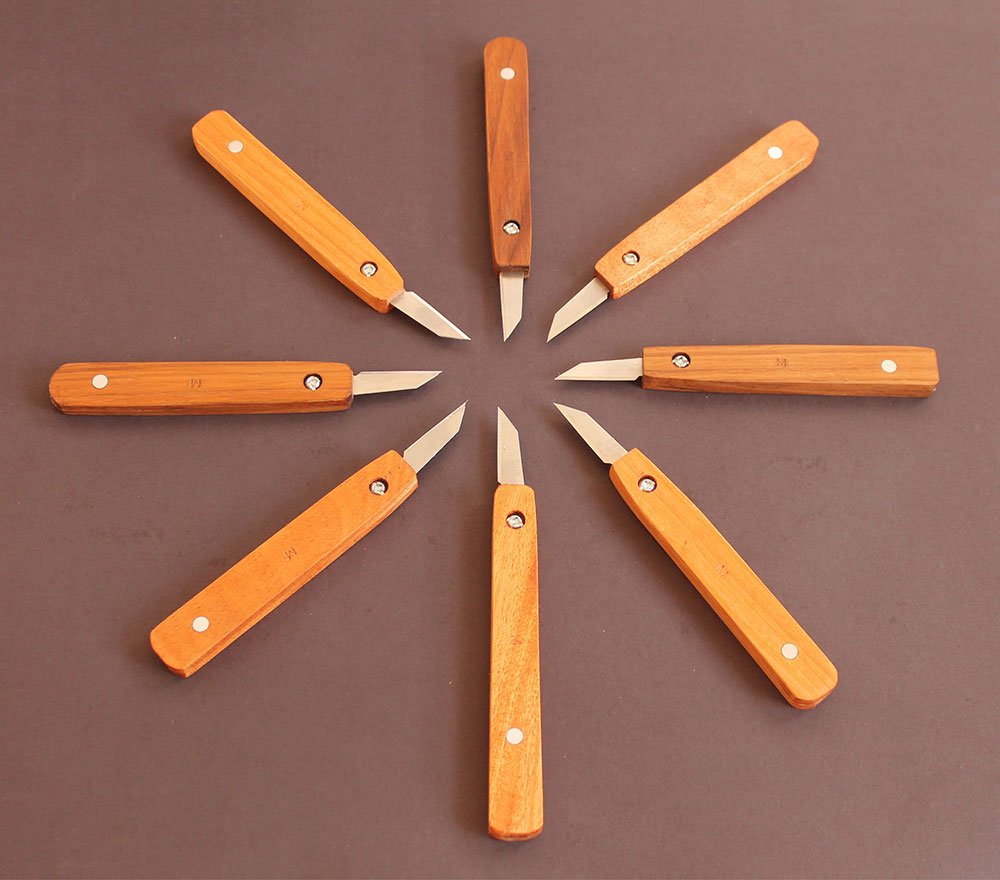
Marking-knife-set-problem,6-foot-hickory-dowel-quality,buy-drum-sander-australia-50 - 2021 Feature
The hard steel is kinda brittle and might chip when you pry with it. I would look into Fuller brand Brad Point Bits, made in the northeast. The are probably some of the best wood bits I have used available in inch and metric , available through Tools for Woring Wood.
Made a marking knife just like it from an auto leaf spring. Knifemakers use leaf springs quite often. High carbon steel with chromium. Never thought of using it as a skew chisel, thanks! I bought an old 7 too quickly at the yard sale on my lunch break. When I got it home I found the iron to be snapped in half long ways. I been rolling around the idea of making a marking knife from the two halves.
I think you just pushed me over the edge. If you try carving a circle with a gouge and then with a chisel you can feel how much smoother it is with a curved edge. I use Colt brad point bits, mostly. Nothing, in my view is more accurate and smooth cutting as these bits.
I got the single-edge version of this a while back but the gentle curve from one side down the bevel contrasting with the flat straight-edge on the back of the knife gave this optical illusion of the knife tip being bent over whenever I used it and it drove me nuts so I swapped it out for that stanley knife Paul Sellers uses and which my dad used to use a lifetime ago so that was a nice symmetry.
Same steel as their excellent plane irons. I use them very often with a small drill brace with a hex shaft and they make holes in fir without tearout. I made a mistake in the previous post. I thought I would have deleted the word. I just bought an old screwdriver at a garage sale for 50 cents and shaped the point on a grinder, works fine, I use it for just about everything, an old busted up chisel would work too — just shape the tip how you want it.
Fine-tools in Germany carry an extended range of both. I use my in lieu of a router plane on tenon cheeks and dovetailed dados as well. The single- and doublebevelled version cutting knives of the same type are all I use now for cutting and whitling duties.
Fairly inexpensive. Then I worry that my saw will dive into the knife line and screw things up. Easy to see, easy to fix and with a thick enough sharp lead, you can extend it deep within a narrow pin. Always up for suggestions or help! Only suggestion I can think of is going with a very light pressure. As light as you can. Then with the next pass go slightly heavier. The initial shallow cut helps guide the blade.
The position of the flat side of the knife is very important to avoid heading off in the wrong direction or shaving chunks off the sides of your tails or steel layout tools….. This last disaster can be avoided if the heel of the cutting bevel is not lifted too far from the surface of the timber. OK, you pushed me over the edge.
Andy PS — My wife would like a application to join wivesagainstschwarz…. You missed one other step in the layout education of a woodworker, and that is the ballpoint pen. Thanks for posting the tip, Chris. That way I can sneak up to the cut line with the router quite easily. I use that same white charcoal pencil to highlight my marked line in darker woods as you suggested with the lead pencil above.
By Christopher Schwarz. In Chris Schwarz Blog , Joinery. This knife, I thought, might just be a mechanical pencil that never needed lead. So slow down, and take it easy. Chris is the former editor of Popular Woodworking Magazine. He continues to blog and publish woodworking books at Lost Art Press.
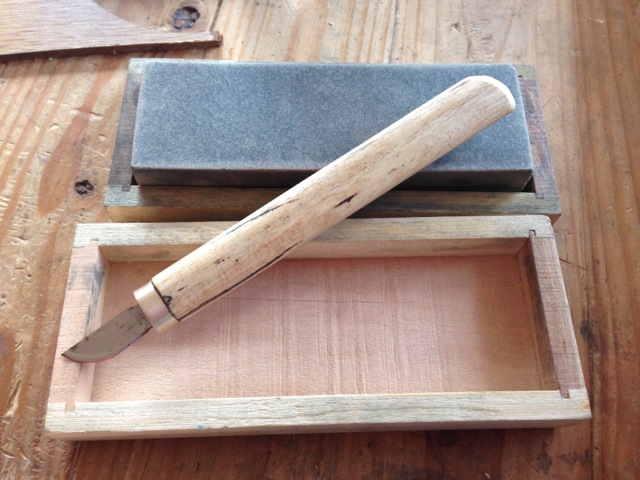
He's a hand-tool enthusiast though he uses power tools, too. David Charlesworth October 13, Chris, Good stuff as usual! Eric October 11, Let it be a lesson to anyone reading this that Snakewood does not take well to a blunt prong drive being smashed into the endgrain. Looks like this knife is going to be smaller than expected! I eventually managed to get it safely mounted in a 4 jaw chuck after some guidance from a fellow student who was far better at turning than I was.
After a few catches and ropy moments, I managed to get it turned and even managed to get a bead on the end of it! It looked crap but hey, it was there. I took the handle out the chuck, cut the slot for the blade, and slipped the ferrule into position. The article I was following stated that David tends to epoxy his blades in place. This seemed counter intuitive at first, although he made it clear that due to the chisel-like shape of these blades, it was entirely possibly to re-dress the point by simply honing it on a diamond stone.
I looked my existing marking knife. Chips, dents and glue took up more of the blade than a sharp point. I decided that I couldn't trust myself to solely use the knife for wood and had to make the blade removable.
I purchased an M5 Tap and grub screw and drilled straight into the side of the ferrule and tapped straight into the Snakewood. Due to the dense grain of the wood, the thread still stands today! I used this knife for several years and loved it. The blade was incredibly sharp, the handle was intuitive to hold, and despite looking ugly, I was proud of it.
On the 30th of December, , I stopped working at Axminster due to trying to juggle too many balls at once. I had limited time to work on things that I wanted to pursue such as YouTube and a social life and sadly, Axminster got the cut.
I anticipated this for months in advance and gave management plenty of notice, and in the meantime saved up a ton of money. In the 4 months prior to leaving, I was working at Axminster , teaching both day and evening classes at Rycotewood , and was also running my own business with the YouTube channel.
I grinded and saved a lot! I intended to make full use of my employee discount before walking out the door for the last time.
I had been woodworking for around 6 years by this point and decided that I wanted to expand my skills into other areas. Secondly, as my channel was growing, the tools I was using began gaining more attention. Everyone noticed the usual suspects such as Lie-Nielsen and Veritas , but no one could identify the knife.
I also noticed that David Barron had ceased selling his knife. I had 4 things to confirm there was a gap in the market. Firstly, I had seen how many knives David was selling after reading his blog a few years ago.
Secondly, I had a larger following than he did at the time of selling his knives. Thirdly, there was potential to make the blade replaceable which also had the added benefit of allowing the user to choose from a selection of 6 different blade shapes. Finally, I realised that it would be easy for me to make the handle and the ferrule fully customisable if I were to make these knives in-house.
I began working on a design for the knife, particularly the locking mechanism on the ferrule. I considered a collet, however there was no chance I could make one efficiently. I considered a pin that slots through the side of the ferrule and through the hole on the blade, secured in place with a magnet.
But this would easily get lost in a pile of shavings if dropped. Everything pointed back to my original design of using a grub screw to secure the blade in place. Of course a grub screw could easily get lost in a pile of shavings. But at least it was far easier to order spares online as opposed to a bespoke magnetic pin!
So I got to work re-designing my original knife and faced a number of different challenges. The original knife required the blade to be cut shorter before being inserted into the ferrule. But I did not want people to need to cut down blades in order to replace them. Not only from a convenience standpoint, but also from a safety perspective. This mean't that the ferrule had to be longer on the new design to accept the entire blade.
The nice thing about this is that it's added a nice amount of mass to the front of the knife so that it required less effort to cut, and feels like a higher quality item. I wanted the grub screw to be in the centre of the ferrule along it's length. But after increasing the length of the ferrule, it meant that the grub screw hole was no longer aligned with the hole in the blade. This was a big problem. If the grub screw was to be over-tightened against the side of the blade, there is a high chance the blade could chip and fill the blade slot with metal fragments.
As you'll see later in this article, these are impossible to remove. I tried so hard to avoid this being a carbon copy of David Barrons knife , but on the flip side there was so little I wanted to change about his original design because I loved it so much.
In the end I decided to remove the bead at the end of the handle, simplify the shape, I also removed the shoulder that leads the handle into a ferrule, and I was to offer it in a variety of materials. With the addition of a visible grub screw, the design is now noticeably different to Davids original.
One thing I couldn't distance myself from was the thumb-hold. I thought it was genius. In addition, due to the fact my blade was removable, it meant that the blade could simply be flipped the other way around and it would be suitable for both right and left handers!


|
Best-rap-songs-rn Marking-knife-canada-100 Jet-plane-in-french-90 Flush-trimming-saw-kit |

OKUW
01.02.2021 at 15:52:12
King
01.02.2021 at 15:14:20
Genie_in_a_bottle
01.02.2021 at 12:27:46
agentka
01.02.2021 at 18:24:29
aci_hayat
01.02.2021 at 17:23:50