How To Make A Frame Handle Knife,Pocket Hole Jig 310 42,Gel Stain Finishes 80 - 2021 Feature

Once again, if you purchased a kit, the pins should already be filed down for you. If How To Make A Frame Gold 5g you cut the pins yourself, there will likely be sharp burs on each end. File these down using a metal file or grinder.
You will be filing them down later so that they are flush with the scales. Line your How To Make A Conceptual Framework Pdf vise or clamps with plywood and plastic wrap. You won't be using this until you are ready to glue everything together. Epoxy glue sets quickly, however, so it would be a good idea to have everything ready. Attach a piece of plywood to each side of your vise. Fold a sheet of plastic wrap, then tuck it between the vises, like a taco.
If you don't have that, use 2 to 3 smaller vises instead. The plywood will protect the wooden scales from getting dented by the vises. The plastic wrap will keep the epoxy glue from getting everywhere. If you don't have that, you can try wax paper instead. Part 2 of Tape the scales and tang together. Stack the scales together with the sides you want to be on the outside of the handle facing out.
Set the tang on top, then wrap a piece of masking tape around the middle to hold everything together. Be careful not to cover the holes in the tang. If the scales and tang wobble, wrap a second piece of tape around the end of the tang and scales. Masking tape will work the best here because it has a strong hold but leaves little residue. Use a drill press to make the first hole using the tang's holes as a guide.
Set the knife down on your drill plate, with the tang facing up. Insert the drill bit into 1 of the holes in the tang. Start the drill and press down on it, making sure to go through both scales. Stop the drill press and lift the bit out. You may find this easiest to do with a drill press, but a handheld drill may do the job. Insert a pin into the hole, then do the remaining holes.
If your tang has 4 holes in it instead of 2, drill the second hole diagonal from the first. Insert the pin, then drill the remaining 2 holes, working How To Make A Frame Look Weathered Zoom diagonally. Insert the pins as soon as you finish the holes. Use a hammer to tap the pins in. Remove the tape and trace the tang onto the scales. Peel the piece of tape off, but leave the pins and tang in place. Trace around the tang with a marker. You will eventually sand this off.
Remove the tang and cut the scales. Lift the tang away, but leave the pins inside the scales. Use a band saw or a scroll saw to cut the scales just outside the line that you traced. You will sand the scales to fit the tang later. The pins will hold the scales together.
Sand and polish the top edge of the scales. After you assemble the knife handle, you won't be able to sand and polish the top narrow edge that touches the base of the blade. The blade will get in the way, so it's best to do this now. Simply tape the scales together, then sand and polish the top edge as desired.
Sand the edge down with and grit sandpaper. Finish off with a buffer. It would be an even better idea to insert the pins into the scales.
This will ensure that the scales are aligned and symmetrical. Part 3 of Clean the tang on both sides to remove any oils or dirt. You can use window cleaner or rubbing alcohol. Simply wipe the tang down with your desired solution, and let it dry.
Be careful not to handle the tang with your bare hands after this. You don't have to clean the wood scales. The wood is porous and textured, so it will take the epoxy readily. Scuff the tang on both sides to give the epoxy some texture to stick to. You can do this with a metal file or even a screw. You don't have to be precise for this step, but you should wipe the surface down once you are done.
You can also roughly sand the scales with grit sandpaper. Make sure that you are only sanding the sides that will be touching the tang. Prepare the epoxy glue according to the instructions. Each brand of epoxy glue is different, but in most cases, you will need to mix equal amounts of "Part A" and "Part B" in a plastic, disposable cup. Another important step is to profile the front of the scales while they are attached by the light glue bond.
First, it is very difficult to clean up the front once it is attached to the blade without scuffing and scratching the blade. Second, it ensures that the faces of the scales will match up just like the holes do. Once the holes are drilled and the rough shaping is complete, simply place the edge of your everyday carry blade on the seam between the scales.
A light tap will pop them apart easily and you are ready to add any spacer material if so desired. Trace the handle shape onto the spacer material, cut to rough shape and then glue to the inside of the scales. Super Glue or epoxy is fine for this. Different materials will need different bonding agents. I use Super Glue here because the materials are very non-absorbent. If you choose antler or unstabilized wood, an epoxy is probably a better choice.
Once the material dries, clean up the edges and drill through to match the existing pin holes. A hand drill is fine for this as the holes in the scales will guide the bit. For pins I use two simple brass bolts. The advantage is I can use the pins themselves to clamp the scales in place by simple adding a nut and snugging it down after applying epoxy.
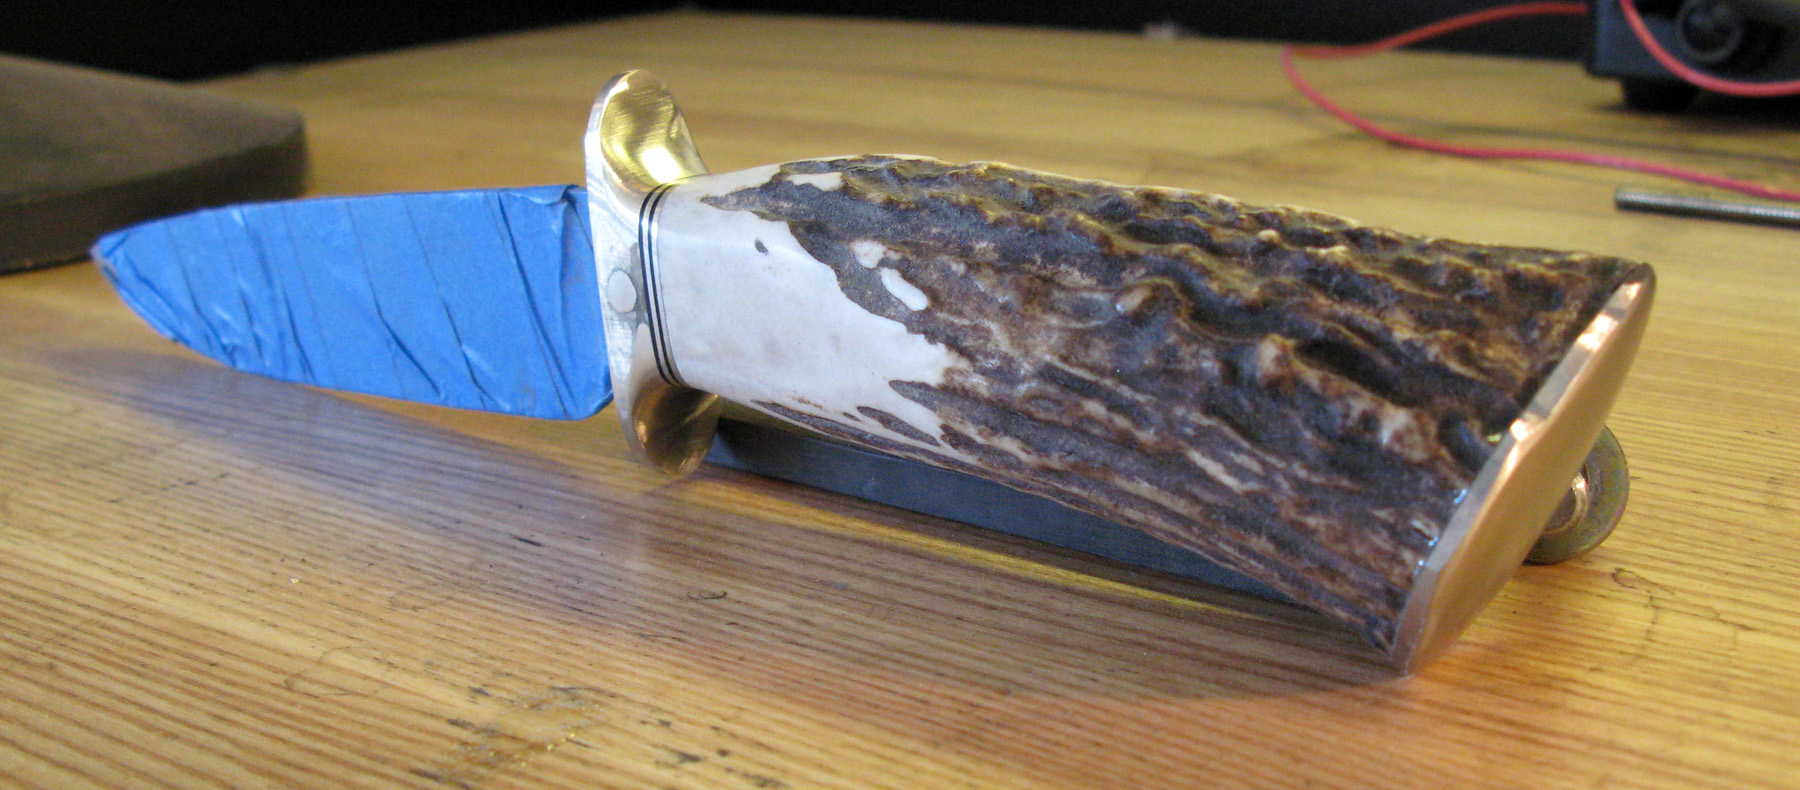
Also, the threads on the bolt help add an extra mechanical bond to the handle assembly. If not, then polish it up and enjoy. Stag handles are made out of naturally removed deer horn, which makes these handles extraordinary and quite expensive. Anyhow, the significant advantages of the stag is that the rough texture makes a sturdy grip and the shape of the stag gives it natural curves. When exposed to open flame, stag takes on that slightly burnt look.
Very stylish material for small knives. First, you need to decide is where to cut the horn to make it How To Make A Frame Lock Knife Linux flush. Then cut the stag with a hacksaw and smooth any sharp edges with a file. Place a large bowl of water on the oven and boiling it. Then place the stag into the bowl and leave it for an hour.
Boiling is softening the horn. Stag absorbs the water, and the pithy inside becomes pliable and soft. Once it has been in the boiling water for long enough pull out with tongs and wrap in a towel or a piece of old cloth. Put the knife blade into a vise. Always wrap the blade in some tape, so no accidents happen.
Then, line-up the end of the horn with the tang and push the stag onto the tang. Use a knife with a round tang in order to twist slightly and force the stag onto the tang. Once you have finished the pushing process, leave the stag to dry for 24 hours. In case the handle is loose and moves around then take tang out of the stag and glue it. G Knife Handle. Just follow the next few steps on how to make G knife handle.
Step 1 Set Up the Scales. Step 2 Scribe the Holes. Step 3 Sanding, Drilling, and Gluing. Step 5 Place the Blade Edge If the holes are drilled, and the rough profiling is finished, just place the edge of the knife blade on the seam among the scales. Step 6 Tracing, Cutting, and Gluing Trace the handle shape onto the material, cut to rough shape and then glue it with epoxy to the inside of the scales.
Step 7 Compiling Now handle is ready for assembling. Step 8 Flushing of the Pins After the epoxy dries, use an angle grinder, file, or hacksaw and clean off the head of the bolt, the extra length of bolt body on the nut side, and pins will be flush.
Step 9 Finishing. Wooden Knife Handle. Read the following steps not only how to make a custom knife handle.


|
Colonial Baseboard Router Bit Request Minecraft Carpentry Bench Varied Commodities System |

ZUZU
19.08.2020 at 22:57:46
GANGSTA_RAP
19.08.2020 at 15:47:33
FREEGIRL19
19.08.2020 at 22:52:29
cazibedar
19.08.2020 at 11:18:22
qelbi_siniq
19.08.2020 at 12:36:44