Best-router-for-making-wood-signs-zip,under-counter-drawer-ice-maker-01,woodworking-subscriptions-pdf,best-rap-songs-in-2016 - Test Out
The size and ability for it to fit in the grip of your hand also is really nice as it allows you to manipulate the router in different angles, front and back and have total control of the wood router.
Lastly, they come with a electric cord and without battery. I find I used the corded version on my CNC, however I used the battery version for specific edging and design wood routing on the work bench. The battery allows flexibility and enough power to not worry about getting around a cord. It is frustrating to deal with a cord and the battery version would definitely help you, highly recommended. Table Routers — This type of router platform is very popular and has been used for many years.
It essentially is a router placed underneath a table with the wood router bit sticking through the table. These are typically used for:. They come in many sizes and shapes and sometimes they have a fence next to the wood router bit much like a planer or table saw. They are very versatile and highly recommended for wood carving projects. It really depends on your history and opinion. Nonetheless, CNC routers do offer a great amount of flexibility and capability which will make you think twice.
If you are a hands on person who enjoys carving your wood sign with hand tools you may think the CNC is cheating. However, I have a lot of signs go out, more of a production line of products which is personalized. Basically a CNC router is a platform which uses X,Y and Z plots from a computer controlled program and plots carvings on a wood sign. This is a vast subject with many variables, however that is the bottom line.
With regard to what size router you should purchase I have found the corded handheld router to do quite well for the CNC router perspective. For the majority of the wood sign carving products I have done the inserted hand held router performs great. The router I use is a 1. If you are considering a CNC look at the purpose, size and the brand review prior to purchasing. Most times this does not include the router.
With any tool in any industry there are upgrades which can be purchased and added to your wood router. Dust Collection Attachment — As mentioned above I provided many things I would suggest you consider for your wood router and dust collection is one upgrade I would suggest heavily.
As dust is a wonderful thing to see and provides a great feeling of accomplishment when creating your wood signs, it is not great from a health perspective. Collet Upgrade Quick Collet Changer — This of course is the coupler attachment on the bottom of the router which holds the wood router bit.
It is an important item in the operation of your wood router. An upgrade this would be an quick collet changer. It is frustrating if you are constantly changing your wood router bit due to the wood sign projects that you perform. A quick collet changer would be something to consider. It replaces your collet with a collet which already has your predefined wood router bits tightened and your mount to the wood router with an Allen wrench.
It does make lite work and reduces the frustration of constantly changing wood router bits. Maintaining your woodworking tools is the key to success.
As with any set of tools in your shop or garage you need to maintain them. Cleaning, lubricating and storing them correctly keeps them working for you.
Wood routers are not different. Saw Dust — Using your wood router no matter what type or application will generate saw dust. Saw dust is no friend to your wood router.
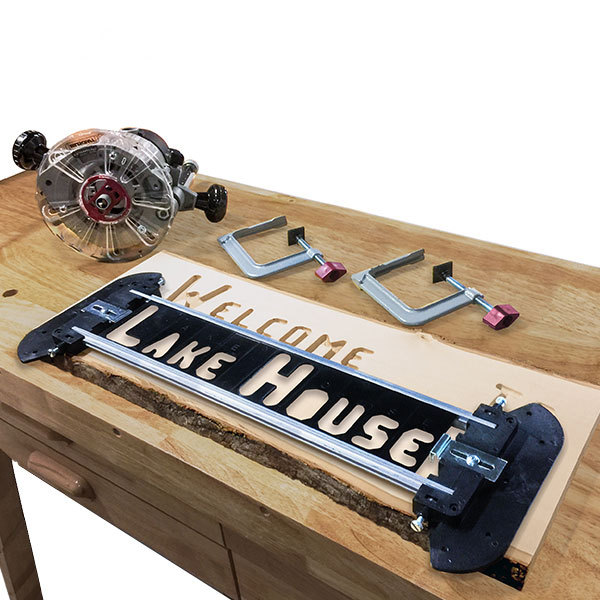
It clogs up the armature, vents and collets. The second modification was to replace the base plate with a larger plate that included handles. This, in my opinion, is a necessity for sign carving. It allows me to rest my wrists on the table and guide the router with fingers. I bought the dust port on Amazon and the base plate from www.
The Dewalt DW is my second router. I keep this one setup for edging my signs. It normally has my 45 degree chamfer bit installed. I like the power of this model and it provides good visibility, right out of the box. I have not modified this router. It also has bundles available with a plunge base. If you already have a larger router, give it a try. You might like the stability provided by the heaver tool. My personal preference is to have something light to allow me to move it around my work piece with as little effort as possible.
That is my preference but you might disagree, and that is okay. I hope this information has helped you.
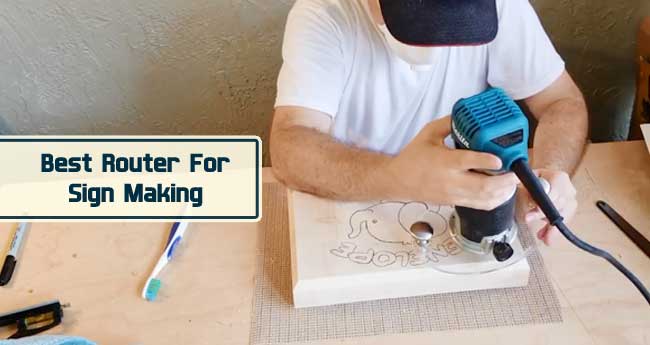
Please feel free to send me any feedback you might have on the subject. With your router at the beginning of your lettering, begin moving forward, never backward. Using your wrists will help you to control the device, thus crafting correctly. Always ensure to wear your safety glasses because the process will flip the wood chips at your face.
Be sure to take the necessary precautions when using a router. After the routing process, you are nearly finishing up your wood sign. Use a brush to get rid of the wood chips. You can then varnish, paint, or keep the craft natural.
When it comes to the finishing stage, this is the best step to crafting countless designs in your wood sign. Ensure that you sample some of the best designs before settling for the final look. You may also find it challenging to paint the background with the lettering. This is because there may be some images that you would like to stand out.
Note that the process requires patience to achieve the look that you desire, meaning that it is time-consuming. Why not just apply a clear finish to get the retro touch? Leave the wood sign to dry up and then sand off the excess paint for a smooth finish.
Basing on your imagination, you can create many creative designs. There are effective tips that help you to achieve efficiency and best results when you are working with a router. It is crucial to understand the type of bits available for various models. They include square route, V groove, or round nose. Remember to hold down the tool while keeping your arms on the table to gain extra control. Without this, the wood piece can get destroyed, or you might hurt yourself.
If you want to maintain your wooden sign looking brand new, remember to vanish it once in a while. When it comes to how to make wood signs with a router, t involves three main processes; cutting, routing, and varnishing. You should consider a few things, such as the message in the sign, the size, and type of lettering and the board. Besides, you must also know the exact locations of words, pictures, and numbers. Having all this in mind before cutting the wood is crucial in avoiding wastage of wood and time.
Your final product will give you immense pleasure. Making a wood sign is a fun way to craft names, images, addresses, or directions as you wish. It is an excellent decoration for your home or business. Furthermore, it makes a unique and thoughtful gift for your friends and family. With just a little effort and accessories, you can craft luxurious wood signs that may bring you some income.


|
Best-bench-players-fifa-21-2020 Flexcut-4-piece-carving-knife-set Bessey-parallel-clamps-sale-australia Gouge-chisel-definition-2019 |

027
29.03.2021 at 20:12:49
AmirTeymur
29.03.2021 at 10:36:34