How To Build A Steam Box For Windows Iso,Makita 2711 Miter Gauge Filter,Best Band Saw Blades For Wood 600 - For Begninners

We decided on Micro-ATX as the form factor for our build. This means the system is small, though not slim enough to fit in most media cabinets. Going smaller would have forced us to increase our budget or settle for lower performance. Both trade-offs seemed a poor choice. Some users might want a smaller or larger case, have a preference for different hardware vendors, or want to go with an AMD processor instead of Intel.
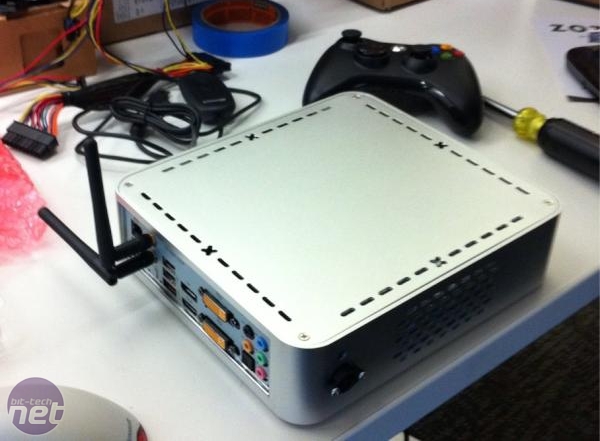
We put this build together to offer maximum performance at minimum price. Different hardware could make your Steam Box slower or more expensive.
Besides these three items, you should also find a large, well-lit surface to work on. Settled and equipped? Check out the bottom of the post for info on how to win this very Steam Box! It will act as a working surface while you install components on the motherboard. Remove the motherboard from its box and various wrappings it will usually be enclosed by at least one anti-static bag.
Place the motherboard flat on the case panel. Take the RAM out of its packaging and install it by lining it up with the RAM slots on the motherboard located to the right of the processor socket. Once the RAM is in place and properly aligned, apply moderate pressure to each end until the tabs on both sides of the socket lock in place over each end. Motherboards ship from the factory with a plastic guard in the processor socket. Remove the guard by pressing outwards on the metal bar that is attached to the socket.
This un-latches it, letting you flip up the metal guard and remove the protector. The pins in the socket will now be visible.
Un-package the processor and take a close look at it. These must be aligned with the notches on the motherboard socket.
The borders of the processor will be flush with the surrounding socket. All you need to do now is secure the socket. This may be the most challenging portion of the installation. Most people will need twenty to thirty minutes to complete this step.
Start by removing all of the cooler components and identifying those needed to install the cooler on an LGA motherboard which is in our Steam Box. You should end up with two silver retention brackets, a large metal backplate, four small screws, and four washers. Now find the thermal solution. This is a grey jelly contained in a small plastic syringe.
Uncap it and then place a small blot about the size of a pencil eraser in the middle of the processor. This thermal solution will help conduct heat between the processor and the cooler. Attach the retention brackets to the cooler itself using the small screws supplied and then place the cooler on top of the processor.
Line up the screws built into the retention brackets with the four holes in the motherboard that surround the processor. Now turn the motherboard, with cooler attached, upside-down so that the motherboard is actually resting on the cooler. Place the backplate around the back of the processor socket and line up its arms with the holes. Gently prod the retention bracket screws until all four are through the mounting holes in the motherboard.
Do this again for the screw diagonally opposite to the first, then attach the final two washers in any order you choose. Use the hex-head tool bundled with the cooler to gradually tighten each washer in a clockwise motion with your Phillips screwdriver. You will find this connector between the processor socket and the PCIe slot.
This is where the power supply goes. Install is simple. Just align the screw holes in the power supply with the ones in the back of the case. Because the pattern of screws is not perfectly rectangular, it is, once again, impossible to install the power supply in the wrong direction. This is done in the same way you removed the previous panel. Remove the two screws holding the panel in place, then slide it gently back to detach it.
Place the hard drive in the hard drive bay, which is located at the front of the case below the larger optical drive bays. Insert the hard drive so that its label is facing upwards and the power and data connectors are facing the rear of the case.
Then, align the screw holes on each side of the hard drive with those in the bay. Use two screws on the left and right sides to secure the hard drive. Tighten these as much as possible. A loose screw can cause annoying vibrations when the hard drive is active. Start with the port panel. It should be aligned so the three audio-out ports are at the bottom of the case. Installation is just a matter of snapping it in.
However, because the case in this build is inexpensive, you may need to firmly hold the metal surrounding the port panel while snapping it into place. You must attach the stand-offs before installing the motherboard. Stand-offs are small screws with a large six-sided head that have another screw hole drilled in the top. These stand-offs keep the motherboard from directly touching the case, which could short out the motherboard.
Use this as your starting point. Place the motherboard in the case so that the hole in the upper left-hand corner of the motherboard aligns with this existing stand-off. Through the other holes in the motherboard, you will be able to see where the additional stand-offs need to be attached.
Remove the motherboard, attach the stand-offs, then place the motherboard back in the case and align the holes along the edges of the motherboard with the stand-offs. Also, align the ports with the cut-outs in the port panel.
Use the screws provided with the case to attach the motherboard to the stand-offs. The case has one fan, mounted at the rear, which must be powered by a three-pin or four-pin connector. These will make the front-facing USB and audio ports functional. Both cables can only be connected in one orientation because of dead pins in their layout. Again, the cable can only connect in one orientation.
Last up are the front panel switches and lights. When you examine the cables in the case you will see that each has an arrow pointing to one particular pin. With that in mind, install the power, reset, and LED light connectors according to the diagram and labeling on the motherboard.
To do this, remove the screws holding the expansion slot bracket in place, then remove the third screw that holds the top expansion slot panel is place. With the back panel free, install the video card by lining it up with the PCIe slot and pressingly gently until it snaps into place.
The rear of the video card, which contains the video-out ports, should align with the expansion slot panels you just removed from the case. Secure the video card by attaching it to the rear of the case with screws and then re-installing the expansion slot bracket you removed at the beginning of this step. You must connect the power supply to the components in the PC.
Start with the motherboard. There are two power connections: a square four-pin connector below the upper-left corner of the motherboard connectors, and a long, rectangular pin connector beside the RAM. Both connectors are cut so they can be installed in only one orientation, and the pin connector is clear and simple.
Just plug it in — done! The four-pin connector is in a tight spot, however, so installing it can be awkward. Always use gloves when you are working with steam. The steam can get hot very fast and cause burns unexpectedly. A lot of people will place the steam box on a wooden workhorse for ease of use. If you prefer, you can build legs for the steam box easily. This is entirely up to you, and will depend greatly on how often you plan on using the box.
We welcome your comments and suggestions. All information is provided "AS IS. All rights reserved. You may freely link to this site, and use it for non-commercial use subject to our terms of use.
View our Privacy Policy here. Toggle navigation subscribe. Building a Steam Box. Written by Doityourself Staff. What You'll Need. Enough wood for a 7 x 1 x 1 box. Steam Supply. Flexible PVC Hose. T Junction. Shadow Box Fence Painting Tips. Guide to Wallpaper Removal. How to Anchor an Iron Railing into Concrete. Solid Bridging. I asked my contractor this question he has the cable running w the steam pi Read More. Smoke from residential chimney at 85 degrees I live in a tall building in New York City over apartments and there' I have several radiators with danfoss RA valves on them that are not he Schluter profile in shower.
Because t Hi everybody, I live in a year old building in NYC. There are a number Power from temp pole to building breaker box. Hi folks! I have a temporary power pole set up with 2 20 amp breakers


|
Diy Wood Candy Dispenser Plans Lumber Products On Airline Highway 12 |

JO_KOKER
07.04.2021 at 23:21:16
LEZGINCHIK
07.04.2021 at 11:30:44
SuNNy_BoY
07.04.2021 at 20:10:20
BoneS
07.04.2021 at 22:57:23