Diy Box Joint Router Jig 70,Watco Danish Oil Application Matrix,Wood Vise Meaning,Diy Woodworking Plans Free Pdf Online - Downloads 2021
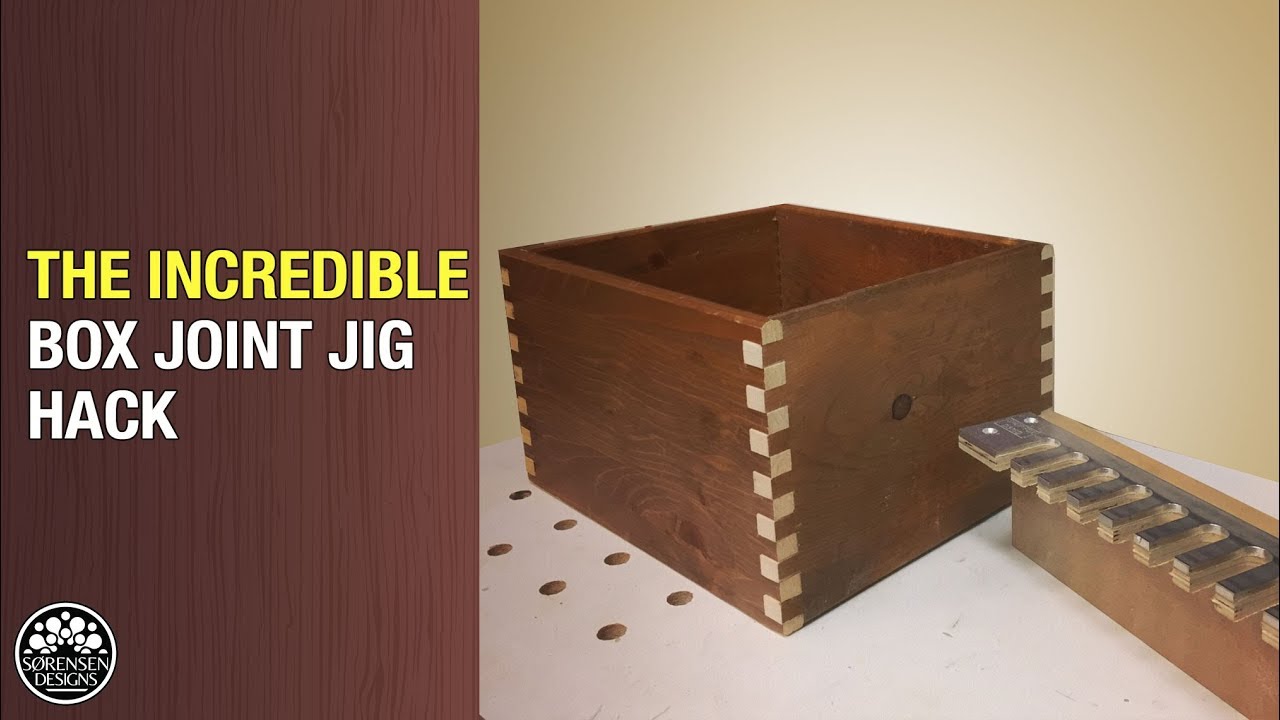
The box joint jig is now complete. To begin cutting a box joint, you'll need the two pieces of stock into which you'll be cutting the joint. Typically, these two pieces of stock will be the same thickness and width, as in two corresponding sides of a drawer box. Before making the first cut, adjust the depth of the stacked dado blade on the table saw to match the thickness of the stock being cut. To make the first cut, position the board on the edge so that the end edge of the board that will be cut is flat on the table.
Slide the board to the right so that it butts up against the spacer block, leaving the edge flat against the table. After verifying that the board is extending upward square to the table saw the face, clamp the board against the jig with a small woodworking clamp.
Notice the picture above as an example. Turn on the table saw and push the jig all the way through the stacked dado blade. This first cut will cut a new notch in the jig in addition to cutting the board. After the jig clears the blade completely, pull the jig back toward your body past the blade again and turn off the saw. This slight extension can be sanded after the final assembly of the box joint. After the first finger has been cut, remove the clamp from the jig and re-position the board so the newly cut notch slides onto the spacer block on the jig.
Check to see that the edge of the board is flush with the table and re-clamp the board to the jig, as shown in the picture above. Cut the second notch in the same manner that you cut the first. Remove the clamp, adjust the board so that the second notch now slides onto the spacer, re-clamp, and cut the third notch. Continue this procedure until all of the needed finger notches on this edge of the board have been cut.
The procedure for making the first notch in the second, corresponding board is different than the procedure used to cut the first. If you cut the second board the same way as you cut the first, the edges of the board won't match up when you assemble the joint.
To align the second board, place the edge of the board against the table and the face against the jig's backer board as before , but this time, slide the board to the right so that the top edge of the board just barely covers the notch in the jig. Clamp the board to the backer board and cut the first notch. This notch should be much like a rabbet joint , where the full width of the notch matches the edge of the board.
After completing this first notch, remove the clamp, slide the board to the right so that the first notch is positioned over the spacer block. Re-clamp the board to the jig and cut the second notch. Continue this procedure as before until all of the finger notches have been cut. With the box joint fingers on both boards cut, check to see how well you did by dry assembling the box joint.
The joint should fit snugly, but the fingers should not be too tight. Then I removed the spacer and staggered and aligned the two notches on and up to the fixed key. It then became a matter of leap-frogging over the key until I reached the end of the board. The same result can be gotten by doing each separately. The first goes against the permanent key, the second goes against the spacer. Basically, you are creating tongues and groves that will go together to form a joint.
I was very pleased with the result. Now I must admit I looked at dozens of How Tos on making this jig and Frankensteined my own version to fit my router. You'll notice I only have one runner where as most I saw have two.
Even one I saw made a second runner off the side of the table. Some were so elaborate it'd take me forever to build it. The simple one I show here took a few hours on and off while doing other things around the house. It meets my needs, and that is the whole purpose. Make a jig to suit your personal requirements. I'm making my jig now. One question. In fig. Anyway to fix that? Reply 1 year ago.
Hi, Allan, yes there is a way to eliminate that offset. When doing your first pass and you are NOT against the key stop, make sure you accurately make that first cut without any tag--or offset as you called it. Some people use accurate keys in the open slot.
What I eventually did was to carefully test scraps until I had an accurate starting point and made a mark on my jig. It works. Let me know if this helps. I will be following you for I also born … This is just the plans I have been looking for More by the author:.
About: In my shop I have a name for hammer, saw, and plier. The saw is Tess, the hammer's Joe, and Glumdalclitch is the plier. Yes, I'm brillig, and my slithy toves still gyre and gimble in the wabe. With that, le… More About Kink Jarfold ». Did you make this project? Share it with us!

|
Woodturning Supplies Scotland 2021 Wood Projects For New Baby Company Soft Close Drawer Slides Ace Hardware Unity Build Your Own Bed Frame King Size System |

FASHION_GIRL
26.04.2021 at 22:33:21
shokaladka
26.04.2021 at 19:39:32
101
26.04.2021 at 23:43:46
3apa
26.04.2021 at 20:57:42