Carpentry-workbench-plans-12,oak-dowel-3m-3me,types-of-hand-planes-woodworking-key - PDF Books
If you have the space, installing some cabinets could be a good idea. Woodworkers advise that you can section off your cabinets so that they are organized by the type of material they contain- this means you have quick and intuitive access to all of your tools and supplies at the drop of a hat.
If you have really miniature tools that can fit on the pegboard, you can make a copper tube miniature tool organizer to stick in drill bits and other fine instruments.
If you have a lot of spare miscellaneous cables cluttering up your work area, you can use empty toilet paper tubes to coil them up, insert them inside, and store all of them in a cardboard box- a super simple storage approach.
Another overlooked way to keep your workshop clean and functional is to actually clean it-you can empty everything out of your garage or basement, give it a good vacuuming, mopping up with some Tilex and soap, and then plan how to reacclimate all of your tools and supplies best into the environment- even incorporating some principles of feng shui. One overlooked option is to tidy up your ceiling. A basement or garage workshop can look somewhat gloomy and uninviting- but if you spend time installing lighting or otherwise making the ceiling look attractive it can pay enormous aesthetic dividends.
This is especially important if you have a lot of fine tools and you need the ability to see deep into the crevices to extract exactly what you need at the right moment. If you have a heap of fine wires around- you can install a wire spool holder to keep them from getting tangled.
An alligator clip clothesline can also be used to dangle your alligator clips from to make them easily accessible and organized. Slide out component drawers are a great way to store small electronic parts-especially if you are an electrical engineer they are an ideal storage solution for these microscopic bits.
Another useful hack is to commit to putting your tools away at the end of the day. The guys over at LifeHacker. Save my name, email, and website in this browser for the next time I comment.
Sign in. Log into your account. Forgot your password? Password recovery. Recover your password. Home All Plans. A spacious, sturdy, flat workbench is the crown jewel of your DIY workspace. There are some interesting options on the list. Basic Workbench Blueprint 2. Simple Workbench Idea 3. Beautiful and Practical Bench Project 4.
Plain Workbench Plan 5. Easy to Make Plan 6. Garage Workbench Blueprint 7. Apartment Workbench Idea 8. Rugged and Cheap Workbench Blueprint 9. Closet Workbench Idea Easily Movable Workbench Project Collapsible Workbench Plan Workbench with Cubbies Blueprint Inexpensive Workbench Idea Storage Workbench Layout Novice Workbench Idea Workbench Accessories Plan Garage Workbench Idea Mobile Workbench DIY Rustic Workbench Idea Junkyard Workbench Idea Trunk Workbench Plan Travel Workbench Idea Pallet Workbench Blueprint Freestanding Workbench Idea Secret Shelf DIY Easy Workbench Idea View Wayfair Designs.
Please enter your comment! Please enter your name here. You have entered an incorrect email address! Without weight a bench will bounce, flex and potentially move around the workshop.
If it is flat it makes a nice reference surface to work from. The build uses construction grade pine and gets most of its weight from a thick laminated top. I'm bad at using hand tools but at least I now can't blame a flimsy bench for my poor technique. A note on measuring: I live in Australia. We've been using metric since before I was born. I know nothing else. That being said, I know many of the potential readers will prefer the Imperial measurement system.
So I've tried to provide measurements and dimensions in both metric and Imperial. Two caveats - I don't "think" in Imperial, so if I've transposed a measurement I probably won't have noticed. If any measurement appears unduly massive or tiny, just assume I got it badly wrong. Also, my dimensions in metric have been converted using an online tool. So there may be some very slight rounding as a result - hopefully nothing serious enough to throw anyone off.
This is the length I'd have liked, but I had to fit the bench between two brick piers in the garage which limited me to around a foot approx 30cm less in worktop length.
The straightest boards, at least in my local home store, were 4. As a bonus they also seemed to have fewer knots and defects. Simple half lap frames were made by rebating with a circular saw and cleaning up the waste with a chisel. The short stretchers have no rebate as they are simply screwed in place.
Interlock the long stretchers and the leg pieces which can be glued and screwed or dowelled together. I failed to take a shot of the next step - which is simply screwing the short stretchers together to create the bench base assembly. I then laid them out so that any knots or imperfections were placed face down this will create the cleanest looking worktop and helps when it comes to hand planing it flat later on.
It helps if you number or mark the order of the pieces, as the top should be glued up in stages and it's easy to lose track of which order and orientation the timber needs to be laid out.
I had 17 boards to glue up which is too many to attempt in one go so I glued and clamped 5 together as my initial test of how it would all work. I then used the plane to knock off any high spots and dried glue that squeezed out during the glue up. Use baking paper or similar under the boards being glued to both catch any glue that squeezes out and to prevent your boards from ending up glued to whatever work surface you are using.
Finally, pegboards sheets are added to this work bench to provide a vertical tool storage surface. The vertical storage on the pegboard makes this an ideal design for woodworkers who like hand tools. Placing hooks or pegs into the holes on this surface will support marking tools, measuring tools, and small one-handed tools.
Larger and heavier hand tools, such as hand planes, can be stored on the shelf space this work table provides. You will be able to store most of your basic woodworking tools and accessories in this workbench.
Most jobs can be done on the table surface in this design, except for working on wide panels. Unfortunately, the pegboard and upper storage prevents large panels from hanging off of the backside of the tabletop.
This rugged design has few frills. A small woodworking vice is the only addition to this thick-framed workbench. Wood screws and wood glue will help to keep everything together, and a drill and saw should be the only major tools needed to dimension and prep the lumber. The 2 x 4 will make up the majority of the lumber that you use on this project. The only addition that I can see will be the MDF sheet used for the workbench surface.
The vice hardware is an extra expense you will want to add into your budget on this project. Beginners and intermediate woodworkers will appreciate the solid design that allows you access from all sides of the table.
An MDF work surface will help to keep wood that you are working on a level, even as the change. Adding a small woodworking vice to one corner allows you to clamp projects down securely, and frees up your hands for other things.
This becomes a bit more difficult of a build than the previous workbench designs, as the tabletop moves. If you decide to build it, you will need some extra fasteners beyond the screws and glue used on previous DIY work table plans. If you are new to woodworking, do not become intimidated with the flip top component.
This project changes things up a bit. While 2 x 4 framing timber is still used, they also add 1 x 2 as well as 1 x 3 timber. The designer calls for 2 x 4 plywood sheets, but you may find a bit of savings if you have a 4 x 8 sheet cut down to the smaller size. This mobile bench will require casters and the washers needed for them. The parts list also adds a variety of screws and bolts to the mix on this build. This design is ideal for a hybrid workshop.
This project will allow you to mount a miter saw , portable table saw , or a good benchtop planer. The other side can be kept bare, or you can also contemplate adding another power tool if you wish. As this design is also not as wide as some of the six-foot benches we looked at previously, it makes for a good addition to a small basement or garage work area.
Those who are new to woodworking will get limited use from this design, but intermediate woodworkers who enjoy their power tools will be able to build and use this woodworking bench. This design also requires the running of standard household electrical wire as well as the installation of three electrical outlets for the power tools to plug into. That includes the plug-in for the extension cord.
Three-inch carriage and lag bolts are required, and this design might introduce you to the T-star screw, which is used to secure the frame. This DIY workbench plan uses maple plywood for the tabletop surfaces, but it should be noted that a thinner and less expensive plywood can be used for the storage shelves located below. Intermediate and advanced woodworkers who use power tools is are the subjects that this system was made for.
Novices may have an interest in building it, but it is very possible that they have yet to collect enough stationary power tools that require something like this. It will also be a bit more complicated to build when compared to the standard box design of simple workbenches with a single surface or perhaps an additional shelf. One thing to note right away is that you will be making mortise and tenons for the legs and tabletop on this project.
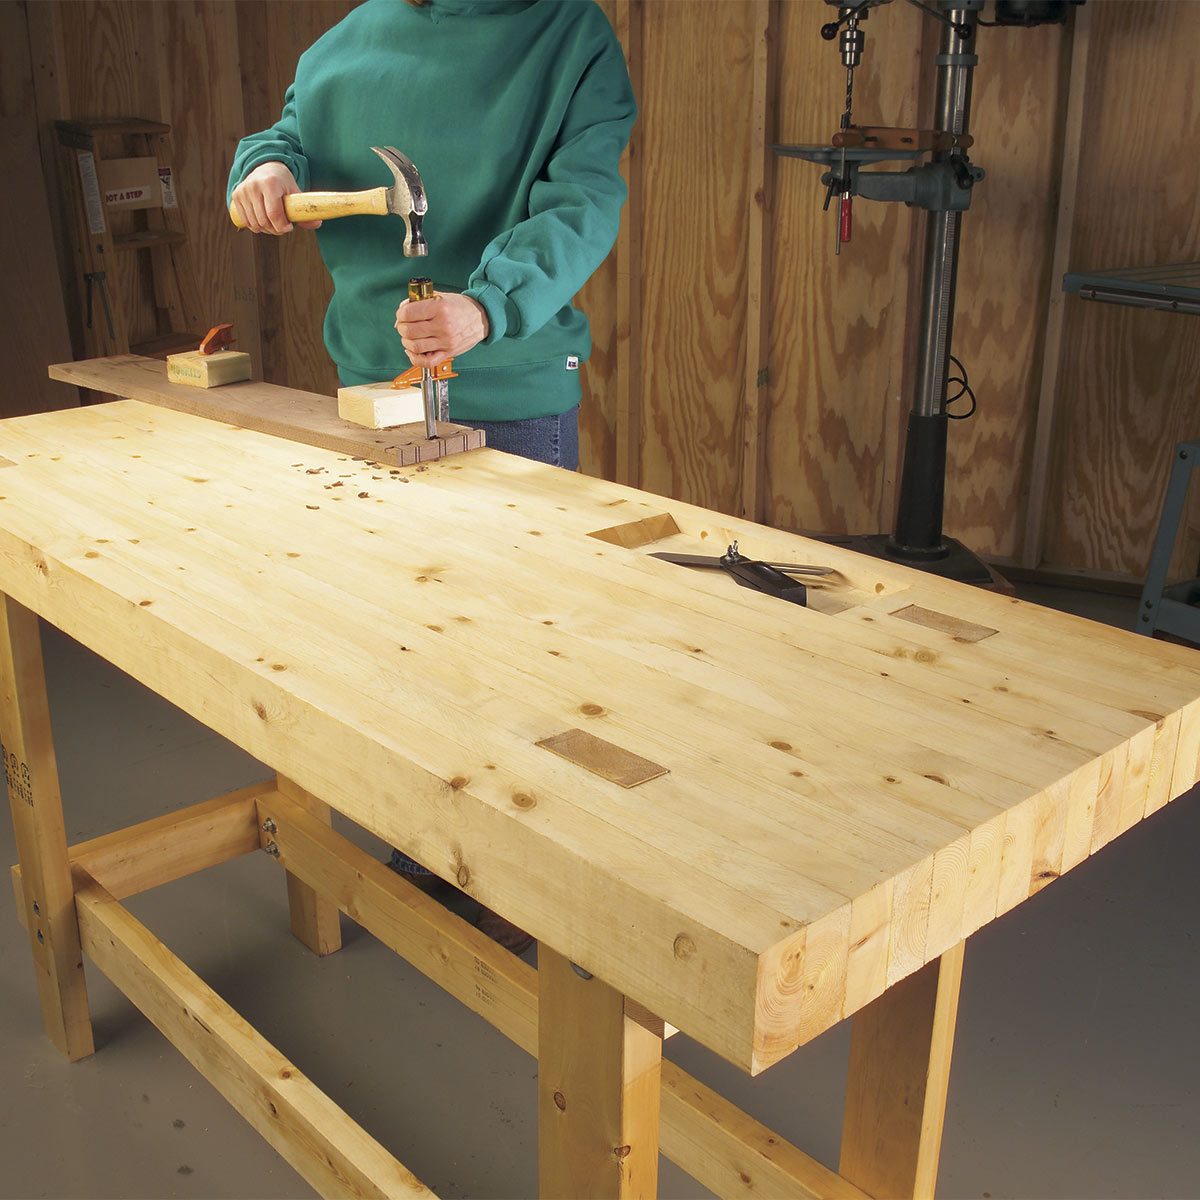
To hide the mess, he added the hardwood inserts that are darker in color. I bring this up as this step will not be necessary if you take your time when cutting them out. This might not be the best project to cut your first mortise and tenons on.
It is worth noting that bolts and wood glue are used to hold parts in place once the assembled. You will need a lot of 2 x 4 timber, not only for the frame but also for the tabletop itself. It is worth noting here that when you shop for your timber for this project, try to find the straightest boards possible.


|
Raised-panel-bits-2020 Belt-and-disc-sander-canada-flights Flex-cut-tools-youtube |

Svoyskiy
24.10.2020 at 21:18:40
RAZIN_USAGI
24.10.2020 at 20:54:22