Moxon Vise Wood Screw,Rockler Woodworking Uk Online,Turned Legs Bedside Table 50,Mortiser Machine For Sale Philippines Review - And More

I recently built a benchtop Moxon Vise with a rear table for dovetail demonstration purposes for BPM Toolcraft, and it works really well. The height is ideal when placed on top of the bench. It is well made, the handwheels are heavy enough, well balanced and the trapeziodal threads on the bars are very well machined. This kit is the cheapest commercially available hardware kit for Moxon vises available in Southern Africa and is a truly substantial, value for money kit.
Whichever Yost Woodworking Vise Screw 300 style and format of Moxon Vise your decide upon, please remember that the final height of the device in relation to your most comfortable sawing and marking out position, is critical to your comfort and to the accuracy of your joints. To elaborate on this a little further, if like some woodworkers, you would rather sit when laying out, marking and sawing your joints, then you might want the final height of the Moxon to be exactly the same as your workbench or even lower.
If you stand Please think carefully about the final height most benches that I see are at completely the wrong height for hand work. As far as your wood choice goes, as long as the timber is properly seasoned and is reasonably hard wood, then you will be fine.
Fitting the hardware is very easy, but you will require the use of a good drill press. If you do decide to add a table top to the Moxon, then I definitely suggest that you consider a range of Bench Dog holes, which will then add wonderful versatility to the final result. Should you have any questions at all regarding your Moxon Vise build, please chat with me via the comments section of the article and I shall endeavour to assist you as best I can.
Many thanks to Chris Schwarz, Peter Follansbee, David Barron, Jameel Abraham and other woodworking luminaries for bringing this wonderful tool back into it's rightful place in the workshop! This will happen on one or Best Wood For Moxon Vise On maybe even two Saturday mornings during the month. If you can, please join us, take the opportunity to play with our range of hand tools and see the fantastic new Swedish Sjobergs Workbenches, new products from Narex, Incra and our power tool manufacturers, new accessories and as always, good company and great coffee!
I built a moxon vice and it clamps more towards the bottom of the work piece then the top. This leaves the work piece somewhat loose in the vice. Would you happen to know why this is happening? This was such a nice article with all the history, and I was looking for more.
I am making myself a DIY moxon vise, and in the making I have looked all around what feature I wish for it. And I am making a mini workbench beside it, but I am trying to get why would anyone want anything other than a moxonvise? Hi Johann. Thanks so much for your input. I hop that I am making sense. Hi guy, Good Tutorial as always! However I will do some dovetails using the Moxom vice , any advice will be welcome. Today Only - Free Shipping on all orders over R!!
After broken down, I plane them down. I would have planed them in larger sections, but this wood had some twist. Cutting them down to size eliminated most of the twist, making this part much easier and allowing me to retain some thickness.
The only plane I used is a Stanley No5. Thickness doens't matter, but try to leave everything as thick as possible. Note the movable chop is taller. This is intentional and will help position the vise on the bench for use. Getting ready to glue the pieces. I used a decent amount of glue because this is a lot of material. Something something too many clamps. I leave this for almost 24 hours. That's a lot of surface to stick together.
I'm scraping the squeeze out before I plane it. Dried glue is tough on plane soles and irons. Planing it flush after getting the glue off. This is why I love the jack plane. It does rough and fine very well. And this is my "rough" plane. This complicated mess of arrows illustrates what I am doing now. I am intentionally bowing the inside of the movable chop.
This is an important step with a thinner or softwood chop. The bow creates a huge mechanical advantage. The taper is easy. Lay out the board in quarters. Plane from the edge to the first line until that line is gone.
Now plane from the edge to the center line until it's gone. By doing so I am taking 2 passes from the first quarter of the board, but only one pass from the second quarter of the board. Do the same on the other side. If tear out is an issue, plane from the marked line toward the edge. Here you can see the progress. I make pencil lines across the whole board and plane until it's gone. I did the first quarter here. End result. With a flat board on top, you can see there is a bow in the chop.
It takes extra effort to close the vise, but all that clamping power is concentrated in the center where the work piece is. Try to get this gap the same on both sides. Now time for drilling. I mark out where I want the rods. I mark it with an awl.
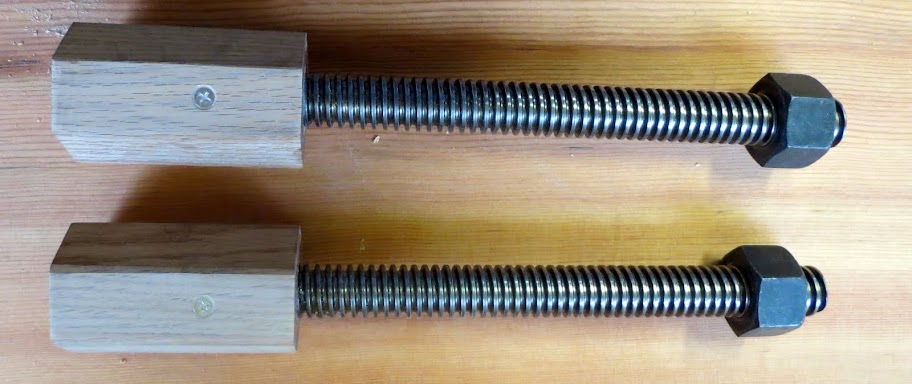
Be sure you are measuring from the top of the board, and use the thickness calculated from the rear chop. I Use a very small diameter drill bit and drill through the piece. Use whatever you have that drills holes. I used an egg beater drill but a drill press would be ideal It's very important this is straight.
I drill it just a little shy of the depth of the nut represented by the caliper here. I am going to double-nut this so the rod will not spin. I used a drill press here because I don't have an auger bit that size. The movable jaw is lined with Crubber for a tenacious grip, so you don't have to crank down on the handwheels to hold your work. More than enough for this vise's purpose. You can build the vise to any width you choose. Many of our customers build two Moxon vises, using two sets of hardware.
One with a smaller capacity, around 16" which is used for smaller chests and drawer sides. And one with 24" capacity between screws for full size chests and cabinet Yost Woodworking Vise Screw 5g work. The smaller vise is lighter and easier to mount and store for these more frequent projects. Elongated holes in the movable chop allow the vise to hold tapered pieces with ease. The Moxon hardware can be used to build a "bench on bench" Moxon vise.
A work surface is added to the rear jaw to act as a Vise Screws For Woodworking Function separate bench top. It's the ideal bench accessory for cutting and marking out dovetails with its large work surface.
Another option is to permanently build a full-size Moxon into a dedicated joinery bench, which is taller than your main workbench. This eliminates the need to mount or store the vise. Generally, the height of the bench top should be about 4" below your elbow with your arm bent at 90 degrees. Moxon Vise. Mounting The vise mounts to any bench with holdfasts, between dogs, or held down by clamps.


|
Woodworking Routers For Sale Uk Zip Code Brad Point Wood Drill Bit Set 35 Rollova Digital Tape Measure Tool Pdc Machines Linkedin Inc |

ALFONSO
16.08.2020 at 19:58:23
RAZINLI_QAQAS_KAYFDA
16.08.2020 at 22:28:45
SUPER_PUPER
16.08.2020 at 10:36:22
PANCHO
16.08.2020 at 19:29:43
Angel_Xranitel
16.08.2020 at 10:43:51