Diy 4 Rail Wood Fence Guide,Custom Woodworking Branding Iron Youtube,Blue Bear Paint Remover Pdf - Plans On 2021

I think this would make a project like a 6 ft fence more DIY friendly. Thanks, Christie. That would be fantastic, and really lighten the work load for a taller fence. Thanks for sharing the idea! Very nicely explained. A great decorative fence, just for looks. Just what Im looking for.
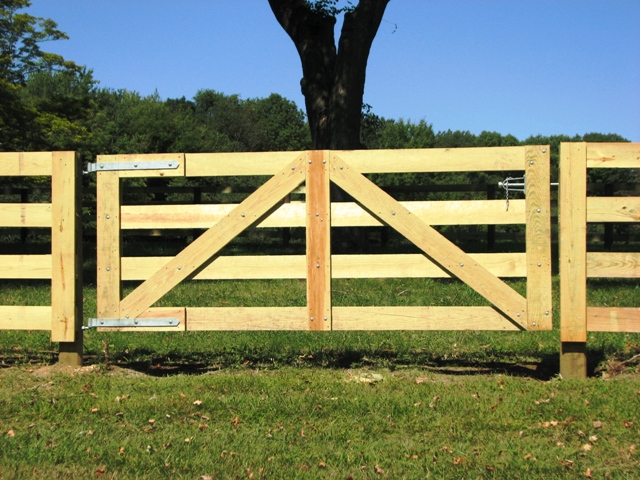
Your dyi is very cost saving. If you would have gave the spacing for the rails, that would help. It can be figured out. Thanks for sharing. Your email address will not be published. I scored free fence posts from the scrap wood pile. Treat the posts and rails with a weatherproofing product before you start to build a fence. Use a post hole digger to place your fence posts.
A crowbar may be helpful for loosening rocks as you dig. Use a bubble level to check that your post in straight in all directions. We hammered a scrap of wood on the ground, to help compact the dirt around the post. Drill starter holes to keep the nails from splitting the fence rails.
Use one nail to tack the board to the first post while you get it positioned correctly. Use a level to set the rail height on the second post. Once positioned, nail the rails firmly in place. I used my leg to help support the post as I worked. Facebook Twitter Pinterest Reddit Pocket. Easy to do even for a beginner, building a wood fence requires few tools or skills. Building your own can also, of course, save you some serious cash! Just get started with Step 1 below to build your own fence.
To build a wood fence, start by digging holes in the areas where you want to place your fence posts. Then, place the posts into the holes and fill the areas around them with concrete to stabilize the posts in the ground. After that, attach 2 by 4 fence rails in between the posts, which will act as support boards. Once the supports boards are in place, nail your privacy boards in the design of your choosing, then paint over the boards with a stain or weather-proofing finish to help protect your fence against the elements.
For more advice from our Landscaping co-author, including how to decide between fence styles like board on board and shadowbox, keep reading! Did this summary help you? Yes No. We've been helping billions of people around the world continue to learn, adapt, grow, and thrive for over a decade. Every dollar contributed enables us to keep providing high-quality how-to help to people like you.
Please consider supporting our work with a contribution to wikiHow. Log in Social login does not work in incognito and private browsers. Please log in with your username or email to continue.
No account yet? Create an account. Edit this Article. We use cookies to make wikiHow great. By using our site, you agree to our cookie policy. Cookie Settings. Learn why people trust wikiHow. Download Article Explore this Article parts. Tips and Warnings. Things You'll Need. Related Articles. Article Summary. Part 1 of Check on any local restrictions.
It's important to check that your fence is not illegal before you build it! If there are any restrictions on fences in your neighborhood or in your city, then all your hard work can be torn down. Check with your local planning department and neighborhood association before you get too far into the process. Apply for a permit. Most cities require a building permit in order to place a fence.
Get one to ensure that both you and your fence are safe! Many electrical, gas and sewer lines, as well as water mains are buried at the levels you will be digging to.
When you apply for a permit, you should also call to request that your local utility companies come out to the site and mark any areas where pipes and wires are located. This will help to ensure the safety of your project. Choose your materials. You'll want to be sure that you're using wood that will last a long time, right?
If you use the best woods and treat them well, a wood fence can last 20 years or more. But choose the wrong wood and your fence might only make it 5 years. Consult with your local lumberyard to find the best wood for your area, but treated woods are usually your best option.
Decide on a style. There are also lots of different styles of wood fences. Do some research before you start so that you don't end up with builder's remorse! There are picket, lattice, concave, convex, board on board, shadowbox, privacy, and many other styles with just as many variations within each style. Each style also has specifics of how the fence should be built and how the boards should be placed.
Part 2 of Find your property line. Determine where your property line is before you start so that you don't accidentally go over. The best advice is to hire a Registered Land Surveyor in your home state to mark the property line for you before you begin construction. Your city or town usually does not keep very detailed records of your property's boundary information.
GIS geographic information system maps and Assessors maps are highly inaccurate when it comes to property boundaries. These are also located on the corners of a lot. Decide on the height. Choose a fence height before getting too far into the project. Six foot is normal for a privacy fence, a livestock fence four feet high is usually sufficient, and picket fences are often three feet high. Fence height is important in the early stages, as it determines things like post hole depth. Stake the corner locations.
Place stakes at the corners roughly where you wish your fence to go. Square the corners. Tie a string around the stakes and run the string between stakes. You can also square the corners by measuring the strings. Measure 3' on one side and 4' on the other. It is mandatory to procure user consent prior to running these cookies on your website.
Explore the Modern Farmers' Market ». Farm Notebooks. Stay Home, Plant a Garden, Support a charity. Immigrants Feed America. By Dina Rudick on April 10, Dina Rudick. Sign up for your Modern Farmer Weekly Newsletter.
Notify of. Most Voted Newest Oldest. Inline Feedbacks. Mark Morgan. James Cameron. Evan A. Juan javier. Thank you for share you experiences with us to make lot easier build fence. Explore Modern Farmer. Animals , Environment , Plants. Fungi , MTMF. Farm Favorites. More shopping.
We use cookies on our website to give you the most relevant experience by remembering your preferences and repeat visits. Do not sell my personal information. Close Privacy Overview This website uses cookies to improve your experience while you navigate through the website.


|
Liberty Bottom Mount Drawer Slides Router Login Page Prolink Jigsaw Joinery And Carpentry 90 |

K_r_a_L
13.12.2020 at 17:57:12
TeReMoK
13.12.2020 at 14:26:35