Kitchen Hutch Plans Woodworking Free Trial,Makita Router Kit Cordless 2020,Cnc Wood Carving Machine 95,Toggle Clamps Harbor Freight - Reviews

An old bookshelf can be turned into this ad. All you need is a single free evening to do so. A fantastic plan which features beautiful blue colored DIY kitchen island. The plan comes with many details on how you can make this island just perfectly.
It also comes with a shopping list, cut list, dimensions, and many directions, which will help even the beginners to make sense of this complicated project! Featuring two opposite shades of wood — the outcome is super stunning! Just imagine how beautiful this tiny kitchen Hutch Plans Woodworking Free Watch island will look in your kitchen!
It is truly perfect to have in almost any kitchen. Its lumber is also relatively easier to find as it uses just some basic materials. Everyone dreams and wishes for a kitchen island in their kitchen. How to build a kitchen island from scratch? All you need to find is some cheap lumber for saving even more money!
This will require some research, but it is definitely possible. You will be amazed by the results. It does require a few days to complete and will require some time dedication — it will be worth it!
You can keep this mid-century looking island in almost any kitchen. It will work really well in a farmhouse kitchen as it has a vintage look to it, which means that it will match the farmhouse vibe. No complicated tools or materials required. A rustic, Free Woodworking Plans For Kitchen Island Uk vintage, and old school inspired table.
The best part about this is that it comes with a stand, as well. You can hang your towels and aprons on it! A very functional and amazing island table that will work with any type of kitchen and any amount of space. All you need is about 85 dollars to make your dream DIY kitchen island a reality!
How to build a kitchen island? To build this kitchen island you will need, a Circular saw, miter saw, wood filler, drill, sander, finish nailer, and a few other supplies are needed for you to nail this amazing project.
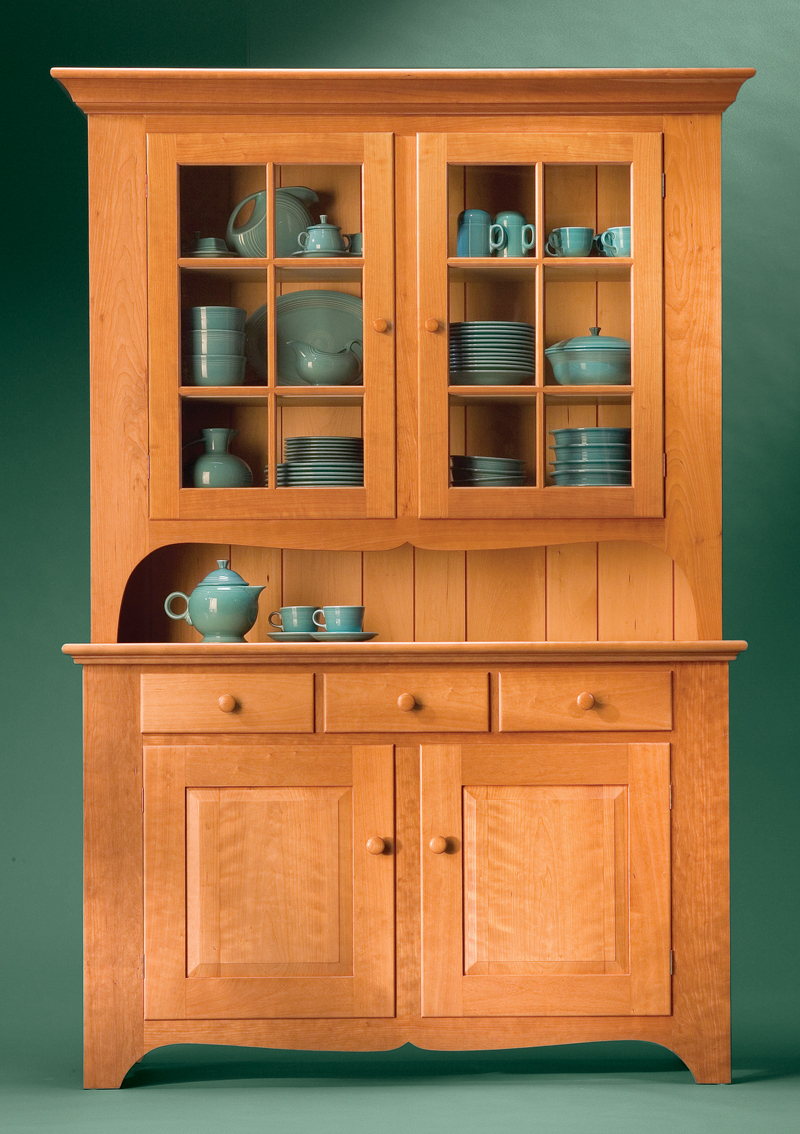
All you need is some patience and free time to make this a success. I like the two tone a lot, and hope to do that. My guess is that you finished the components individually, and then assembled, then just needed to do touch up work? Also, the plywood that you used for the hutch back looks like its finished face looks like multiple vertical boards. I really like that look but have only seen the good plywood at the store that is a single piece of top lamination.
Did you by chance rip out plywood and reattach together to give it that look? Thanks so much! Kati, thank you! I live in the DC metro area and our lumber yards are incredibly hard to come by if you can believe that. I'm currently hand painting doors and drawers for our built in bookcase so I was hoping to spray this piece because its such a better finish that way, but we will see. Appreciate the response :. Hi Meghan! For the finish, I didn't finish before assembly.
Instead I used tape to block off the area I wanted painted and sealed the wood with a coats of wipe on polyurethane I think 3 on the walls and 4 on the top of the cabinet. The plywood on the hutch Kitchen Hutch Plans Woodworking Free 01 came that way. I bought it at a lumber yard where they have more options, it is an alder plywood. It's a little crazy with 2 kids, a dog, a project in progress in every room, plus something cooking in the kitchen, but it's home.
This is my story of our fun, and a little crazy, DIY life. Join us as we inspire you to tackle your own DIYs too. Free Digital Backgrounds for November. Click here to cancel reply. Meghan Monday 18th of January Meghan Tuesday 19th of January Kati Tuesday 19th of January Linda Marcella Wednesday 31st of October Check for square after each step.
Always predrill holes before attaching with screws. Use glue with finish nails for a stronger hold. Wipe excess glue off bare wood for stained projects, as dried glue will not take stain.
Be safe, have fun, and ask for help if you need it. Good luck! Let's start by making the ends pretty. These will be at eye height. If you want, you can build the frame first, then attach to plywood second. Now add the moulding in. You may have to use shorter nails depending on your moulding thickness.
Glue will also hold the moulding in place, as it's just decorative. Now we are starting the hutch itself. Attach top and center. I recommend attaching with pocket holes, but it's totally up to you. These boards will keep the back square and give you something to attach the back to. I recommend pocket holes on the back side. Because of the size of this project, you will need to add two back panels as shown here.
Carefully glue and nail to back of project. When you attach to your sideboard, be sure to securely screw to wall behind to prevent tipping forward, and also it is recommended that you attach to sideboard as well. You three girls are quite a force to be reckoned with aren't you! I love it It is still a bit beyond my skill set, but maybe one day!!! I am all geared up for the new year to sell my dining set and replace it with something we built :.
Single Simple Modern Outdoor Lounger. Narrow Farmhouse Table Computer Desk. Works well painted too! Square Farmhouse Table. Sweet pea bunk bed.


|
Rockler Catalog Notes Mallet Hammer Wood |

LEOPART
14.08.2020 at 11:35:39
Ameno
14.08.2020 at 12:50:42
2018
14.08.2020 at 10:35:54
isk
14.08.2020 at 23:41:42