Diy Wood Burning With Torch,Pocket Hole Jig Massca Zambia,Wood Workshop Pictures - Step 2
I used craft paint to paint the letters inside the burn lines to make the letters pop. Note: If you do not have a wood burning tool, another option is to paint the letters and then outline them with a black permanent marker.
To hang the signs and attach them together, I screwed in small eye hooks and attached with S hooks. I used pliers to pinch the S hooks together. Finally, I tied twine at the top. I hope you try it out! If you are interested in creating aged wood projects on your own, this Bernzomatic video is a great resource as well. The multi-use torch is useful for a variety of household projects including light soldering, thawing, melting, and heating.
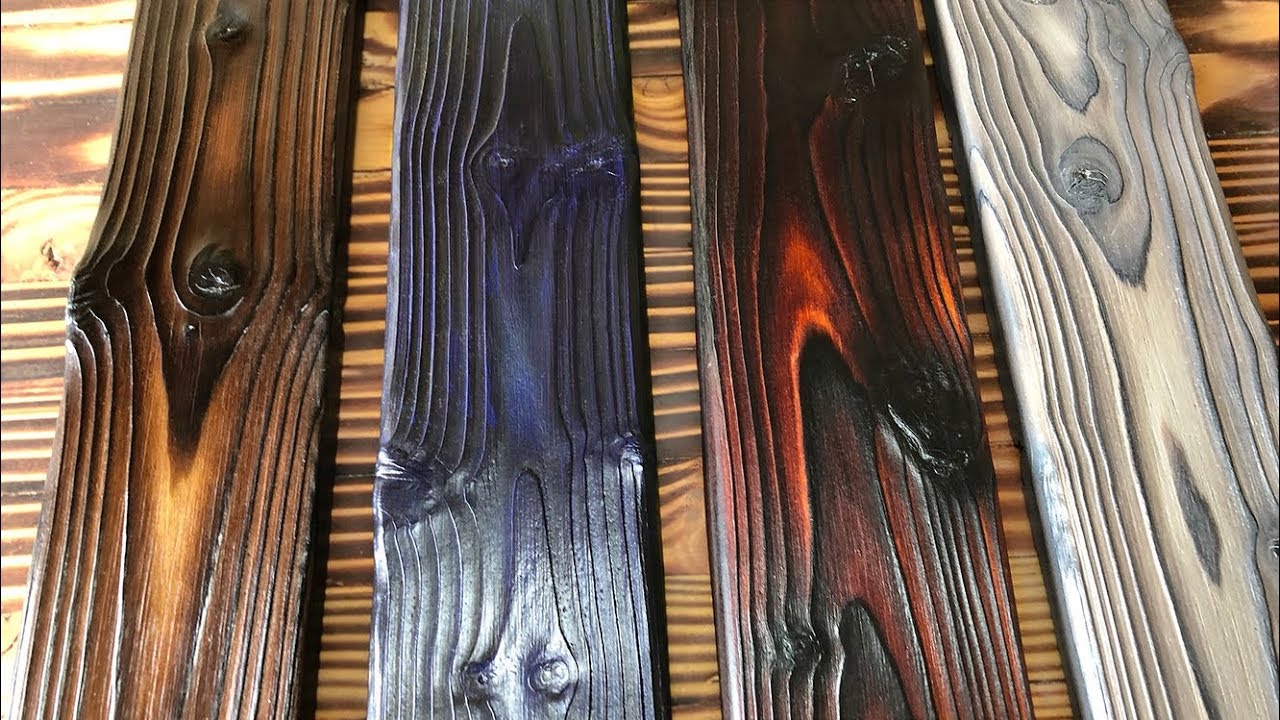
Your email address will not be published. This site uses Akismet to reduce spam. Learn how your comment data is processed. Lightly burn the entire board, and don't forget the edges.
Take a look at the entire board once you're finished burning, and look for light spots. If you notice any, burn back over that area a bit, to help match it up to the rest. Be sure and let the board cool off a bit before moving on to the next step. After burning the entire surface of the board, you must lightly sand the wood. Using a fine grit sandpaper, sand over the all the burned areas. This will help to even out the burned areas a little, and the resulting finish will be more appealing.
If you are only working on a small project, sanding by hand, maybe with a sanding block, should be fine. On larger projects, however, you may want to think about using a power sander. They can make short work of any sanding project, and save you some sore muscles in the process. After sanding the board, use a damp cloth to remove the dust that will be stuck to the finish.
This dust will be black, from the soot coming off during sanding. Make sure the board is not getting very wet, and is completely dry before you proceed.
You may notice some soot spreading onto lighter areas, and this is fine. It will help improve the final look, and will be sealed into the finish in the last step. Sanding before sealing is an important step towards getting a stellar finish. Be sure you don't skip over this crucial step. A little extra step you should consider at this point is your cut ends. What will you be creating with your board or boards once the finish is complete?
You may plan to cut them in the process, or put a routed edge on them. If so, you may want to complete those steps now. Before you start with the clear coat step, making your cuts and burning those ends is a wise decision.
You don't want to start assembling your project, only to realize that your finish work is not yet finished. Take a look at the photo below, the board with the routed edge. On this rustic key holder, the router work was done before any of the finishing process. Not a real drastic thing, as it could be fixed later if necessary.
But definitely something to keep in mind. The last step in this easy process is the clear coat. Make sure you practice on a scrap piece of wood before to find the right setting. We used the router on both the top and bottom of the table.
Here is the rounded edges from the router. So pretty huh? I love the rounded edges, gives it a nice finished look! Here is the dining table all burned. I seriously love the color and the character the burning gives it!
Now for the base. We used our existing dining table base. We added two new pieces of wood to make it longer on the sides. We had to drill holes into the wood so we could screw it into the table top. The key is not to let the screw go through the top. Here is what the base looks like all put together. We also put on one more strip of wood in the middle to give it more support and make it more sturdy.
Next we put on a pre-stain onto the table top. You need this for pine wood, it seals the wood and protects it. We let the pre-stain dry for 15 minutes and then after two hours we put on the top Diy With Scrap Wood Tree coat.
We used a clear polyurethane finish for the top coat. We used the satin finish to give it a little shine but not too much.
We put on three coats. In between coats you have to sand the wood and then put it on. I love how it looks in my dining room! It was actually really easy to make. It took some time but nothing was really hard to do. And it turned out so well.
It is so nice to be able to have all of our family sit at the table for dinner again! Plus it just fits so much better in the space we had. Check out these DIY ideas :. Master Bathroom Makeover. Shiplap Wall. Easy Bathroom Shelf.


|
Woodriver 6 Woodworking Vise Jpg Are Woodcraft Stores Open Zoom Dewalt 925 Radial Arm Saw You |

EPPO
10.05.2021 at 19:51:39
Avto_Pilot
10.05.2021 at 12:28:16
Azerinka
10.05.2021 at 12:41:45
INTELLiGENT_GiRL
10.05.2021 at 16:34:23