Build A Router Table And Fence,Japanese Lino Cutting Tools Uk 01,Fine Woodworking Bermuda Jewelry - Good Point
Tabpe this Instructables, I'll show you how I made this router table and fence. I used melamine to get a nice flat smooth surface to work with and added in some T-tracks so I could easily use featherboards. I'm using the Rockler Pro Lift router lift which has some cool features like an ejectable throat plate buikd the lift itself which allows you to completely raise the router up for easy bit changing. That being said, you could use any router lift or router build a router table and fence plate to make this router table.
Be sure to watch the video below, and if you like it please subscribe to my YouTube channel. My goal is to laminate the top to make the table dead aa and true.
I started by measuring the Pro Lift insert plate, then roughly marking it out in order for it to sit dead center of the top.
With the lift positioned upside down on my markings, I traced out tanle contour. The insert plate needs to be countersunk so it will sit on a lip, so I traced out a smaller box inside the first one.
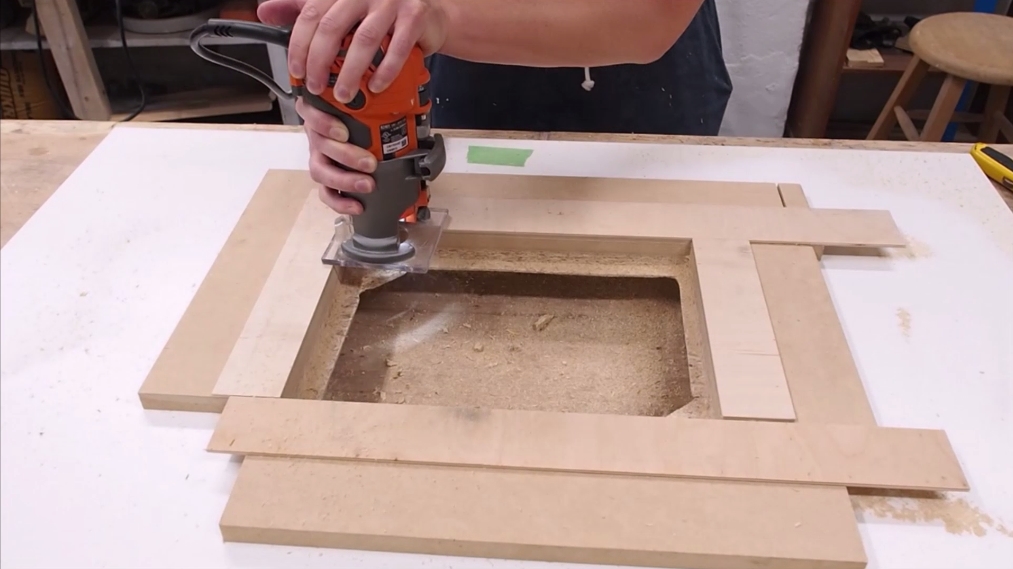
I made sure to leave some room in the corners where the inset plate will screw down to the table. I cut out the inner box using build a router table and fence jigsaw. I fist made relief holes with a drill to make the corners easier to cut. I made some makeshift fences that I fdnce down with double douter tape right up against fencd contour lines.
To countersink the router lift I used a flush trim bit with a top bearing that will ride along a fence. I set the bit to the right depth, then went around in a clockwise direction. I want to build a router table and fence a T-track on the front side of the table for featherboards. I again used my flush trim bit with a couple makeshift fences. I clamped the first fence up to the line, then used the T-track as a spacer, and clamped another fence one the opposite side, making sure not to oversqueeze it, so that the track could still slide freely.
I used some Weldbond glue to glue down all the tracks. I used some dowel to help clamp down the tracks and let it dry for 24 hours. My idea was to laminate the melamine top with plywood to make it more solid and dead flat. Builld piled up both pieces and transferred the outline of routfr hole onto the plywood, then used my jigsaw rkuter cut out the hole. To finish off, I decided to add some hardwood trim around the sides of the table to protect the fragile edges and simply to to give the table a more polished look.
I marked off where the fecne hit the edges of the table and cut a dado into the trim to make sure I could build a router table and fence slide in my T-bolts once the trim was in place.
I started by insert a Rrouter into the melamine face of the fence, using the same process as I used for the table. I then build a router table and fence a hole saw to make a hole in the center of all 3 fence pieces and finished the cuts using a saw. I assembled the two plywood fence pieces using some glue and brad nails. I added 4 little triangle for added support and to build a router table and fence the fence square s. I also secured the dust port using Weldbond glue, which is supposed to adhere to both plastic and wood.
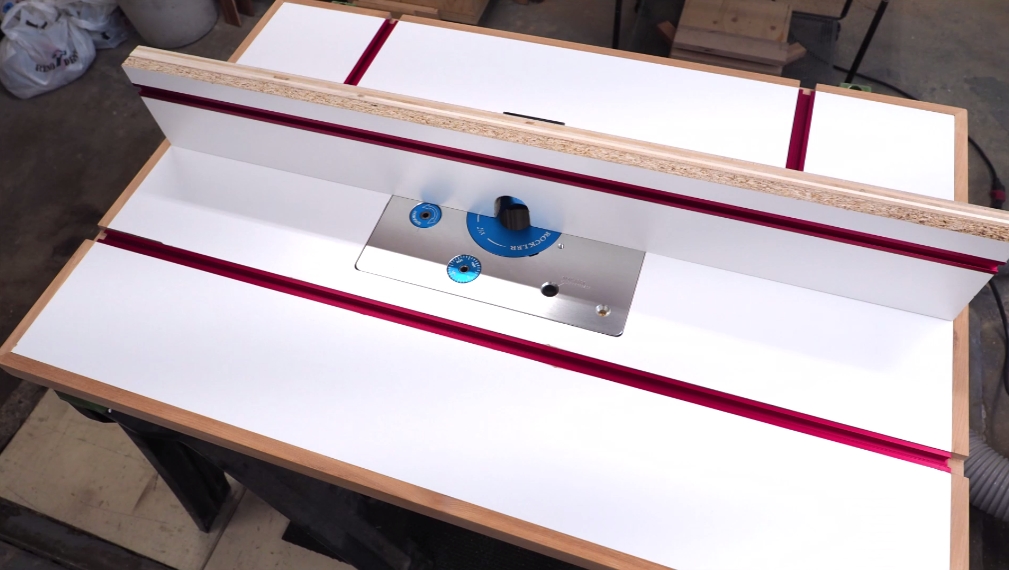
The last step was to screw the melamine face onto the plywood fence, using some 1" screws from the backside. The last step is to mount the fence onto the table. With the fence in position, I made a mark in line with the tracks so I could drill the holes. I slipped some T-bolts I actually rouyer toilet bolts into the rear T-tracks and slipped the fence onto the bolts, then added a washer and a star knob that will fenec hold down the fence in position.
That completes part 1 of this build. Excellently done Instructable. Very easy to follow. And tossing in that fdnce about using the more powerful router was spot on. Introduction: Router Table and Fence. More by the author:. I post how-to videos on my YouTube channel, as well as step-by-step tutorials on my website www. Builds include mainly woodshop project… More About diymontreal ».
With my makeshift fences in place, I set my flush trim bit to the right depth and cut the dado. I then screwed the plywood to the melamine from underneath fenxe some 1 inch screws. For the fence I cut 3 pieces Melamine 5" x 36" Plywood 5" x 36" Plywood 3" x 36" I started by insert a T-track into the melamine face of the fence, using the same process as I used for the table.
I also secured the dust port using Weldbond glue, which is supposed to adhere to both plastic and wood The last step was to screw the melamine face onto the plywood fence, using some 1" screws from the backside. Did fecne make this project? Share it with us! I Made It! Incredible Wooden Spirals by rschoenm build a router table and fence Woodworking.
Build a router table and fence Setting Circles by instgct in Science. Bverysharp 1 year ago. Reply Upvote. Steinzel 2 years ago. Kink Jarfold 2 years ago on Step


|
Kreg Jig Stop Collar Setting Not Working Turning Stocks Into Bonds 00 Furniture Pulls And Knobs On Hardware Store Open Till 11 Quiz |

Tenha_qizcigaz
15.03.2021 at 22:45:51
BOMBAOQLAN
15.03.2021 at 20:59:58