Best Router Table Build Jar,Carving Gouge Sweep Chart Yield,Kms Tools Lathe Chuck Install - Good Point
A professional woodworker always needs more equipment to take the woodworking to a new level. There is no doubt that a router is just coveted by most of the professional and aspiring woodworkers. Only basic woodworking skills are more than enough to build a quality router table for your working area.
What the other benefits are to build your own router table? Not only money, but you are also able to improve quality and save a lot of time as well. As you are the manufacturer of this tool, then, there is no compromise with the quality as well. Make your tool in quick time and also transform your hobby overnight. You must have a few things in your mind before building a router table.
Why are you making a router table? What is the real purpose of a router table? You must answer this question to determine what kind of router table you must build for your workshop. If you have a general workshop or working in the general workshop then, you just build a large router table. For this purpose, you just unscrew your router to have a very elegant and smooth work surface that you can use in the future days.
Size of the applications and projects you create always determines the size of your router table. And the last thing, what are your real priorities and needs? Ask yourself about the needs and priorities while building a router table.
In this context, you have to customize your plan below to well suit them. In the way, the router table will be as much practical as you want. Here are a few useful Best Coping Sled For Router Table Lock steps to answer your question, how to build a router table?
How to build a professional router table? How to build a router table for beginners? If you are beginners, then, you must know that you have to get all the required tools before construction.
You will see and use your skills in this project that require different tool including a wood router itself. If you forget to buy this tool, then there is nothing wrong or right because it is your first time. Why you need a wood router? The reason is that before building a routing table, you just need to match this with the router table you are using for your applications.
On the other hand, you must also keep the space of the workstation in your mind. You may need a few things like wood for the top of the router table, as pine or Plywood is ideal in this case.
Perspex or plastic for your faceplate as well. Despite, you also need a long piece of solid wood for the fence of the router table as well. There are some other tools you may need for this purpose, there are following:. The base is the most important part of router table because it also decides the size of the table as well.
Your device also needs a sturdy and solid framework to support and also the weight of your future application or projects. Despite, you also require to lift the top off the floor to make elegant space for the router.
You know that router will be fixed to the bottom of the router table. Which type of wood is best to suit the strong router table? You must use planks and maple wood to build an elegant framework for your router table. For this purpose:. You must keep in your mind that all the legs must have the same length.
As unequal length will absolutely make your router table unstable. As these units will provide your enough or valuable storage space. If you really want to form a cabinet, then, simply add a bottom, side panels, and door as well. This is another important step and answer to the question, how to build a router table?
We are now at the next stage because our foundation is ready. Now, the time has come for your top as well. Construction of wooden top means the top of the table will be of a larger piece of wood. What to do for this section?
Just measure the square slightly bigger than that of the head of the router in the center of the piece of wood. After drawing this, cut the inner square entirely with care. Now, its time to cut a rabbet with the help of chisel using bigger square.
What is the purpose of these features? It is able to allow you to view your router by providing you with even more control. So, if you come across any kind of malfunction, then, you will notice this and make easier adjustments when you have eyes on the level.
This is even better than getting all to make the good adjustment from underneath of the router table. Time will become an important factor as your progress in your professional woodworking.
Now, its time to create a faceplate. For this purpose, just measure the size of the large square of the top on Perspex and cut the size.
Now, you have done with all the steps to construct the top of the table. Is the router table is ready? No, you have to do a few more steps to build an elegant router table. You have already done all the difficult steps before this step. Now, you just came across a few easy steps to do. Construction is a little bit easier step in your question, how to build a router table. What is the reason behind this? Did this summary help you?
Yes No. We've been helping billions of people around the world continue to learn, adapt, grow, and thrive for over a decade. Every dollar contributed enables us to keep providing high-quality how-to help to people like you. Please consider supporting our work with a contribution to wikiHow.
Log in Social login does not work in incognito and private browsers. Please log in with your username or email to continue. No account yet? Create an account. Edit this Article. We use cookies to make wikiHow great. By using our site, you agree to our cookie policy. Cookie Settings. Learn why people trust wikiHow.
Download Article Explore this Article parts. Tips and Warnings. Things You'll Need. Related Articles. Article Summary. Part 1 of Use a straightedge and a pencil to Best Router Table Build 311 make the lines you'll along. Push the board slowly through the table saw to make a straight, even cut.
If you want to ensure you're cutting a straight line, use a guide along one side of the plywood. The size of the plywood can be increased or decreased depending on how much tabletop space you want. Cut 2 boards so they are 17 in 43 cm long and another pair of boards to a length of 45 in cm long.
Arrange the boards into a rectangle so the shorter boards fit between the longer ones. Connect the ends of the frame boards using wood screws with a drill. Pre-drill 2 holes into the ends of the boards so the wood doesn't split. Then drill in 2 construction screws in each corner to attach the longer board to the end of the shorter board.
Make sure the screws are completely tight so the frame doesn't fall apart. Use angle brackets and wood screws to secure the frame to the tabletop. Use 2 angle brackets for each board and place them at least 4 in 10 cm from the inside corners of the frame. Screw them into the frame, then screw the other side of the bracket to the bottom of the table. If your frame still fits loosely to the tabletop, use another metal bracket in the middle of each board. Measure the distance from the floor to your waist using a tape measure.
Once you find the height, make marks on your boards so you know where to saw them. Cut the boards using a table or circular saw and sand the bottoms so they sit Best Router For Sawstop Router Table Zoom flat on the ground. You can also make the table the same height as your current workbenches if you'd prefer.
Screw the legs into the support frame at each corner. Place the legs in the inner corners of the support frame you've built. Drill 2 construction screws into each leg to attach the legs to the frame's shortest sides. Once the legs are attached, flip the table over so it's upright.
Add cross supports between the legs 8 in 20 cm from the floor. Pre-drill the holes through the boards and legs so the wood doesn't split. Attach the supports between each leg with construction screws and a drill so your table is sturdy when you use it.
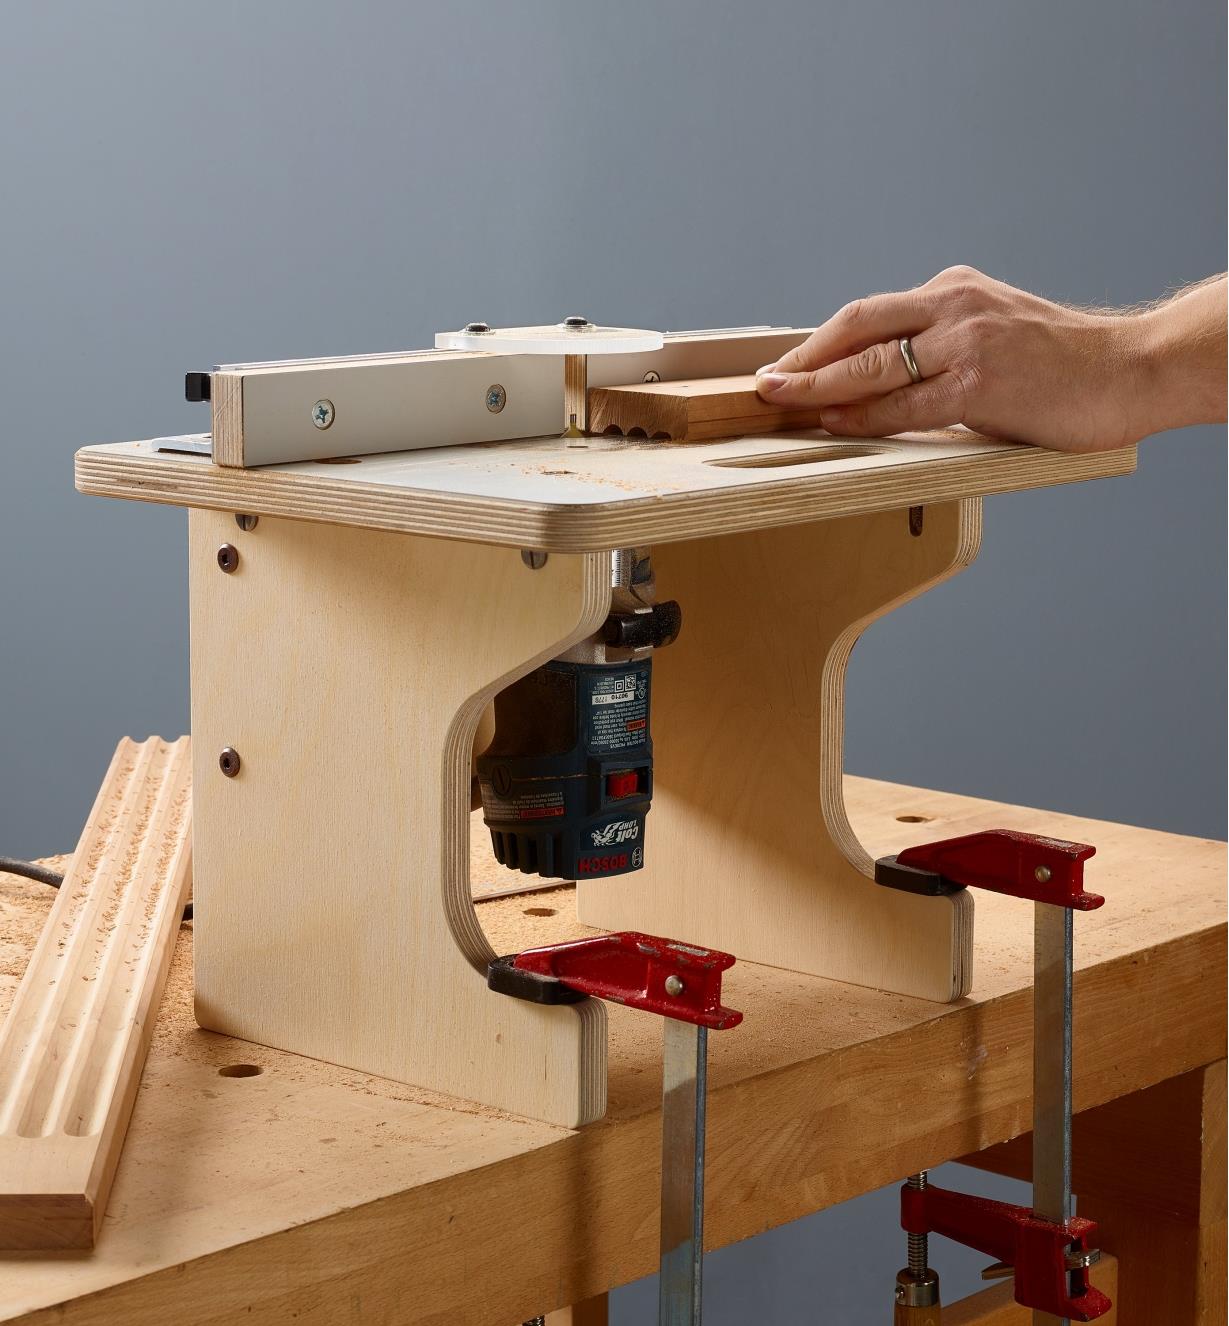
If your wood cracks, squeeze wood glue into the gap and clamp it tight so it is secure. Part 2 of Place the acrylic on top of the table at least 4 in 10 cm from one of the long sides. Use a pencil to draw a line on the tabletop in the shape of the acrylic. Otherwise, you can place the hole in the center of the table.
Use a straightedge and a pencil to draw a second square inside the one you already traced. This square is what you'll cut out so your router can fit under the table. Measure the width of your router to see if you need to make any adjustments. Cut holes in each corner of the smaller square with a 1 in 2. Place your drill bit as close to the corner as you can. Turn your drill on and push down with an even pressure so the bit cuts through the tabletop completely. Repeat this for each corner of the smaller square.
Cut the inner square out with a jigsaw. Place the jigsaw in one of the holes you cut in the corner. Follow the line you drew to one of the other corners. Keep cutting until the square falls out or can easily be removed by hand. Use a straight bit in your router and set the thickness on the router to the same thickness as the acrylic sheet. Turn the router on and press it firmly into the tabletop. Slowly work left and right to file away the wood up to the line you've drawn.
Make sure not to work past the lines or else the sheet of acrylic will fit loosely. Sand the edges and corners of the square so the acrylic sheet fits. Use a or grit sandpaper to smooth the edges of the routed-out section of tabletop and round the corners of the acrylic sheet.
|
Table Top Wood Cnc Machine Nmr Drawer Track Kit 8bit |

NASTYA
04.06.2021 at 22:33:30
Ragim4ik
04.06.2021 at 19:23:54
Alla
04.06.2021 at 13:46:43
3033
04.06.2021 at 16:16:59
hmmmmmm
04.06.2021 at 20:17:58