Burl Wood Knife Scales Recipe,Most Popular Woodworking Plans 2021,Makita Compact Router Kit Rt0701cx3 Ca - PDF Review
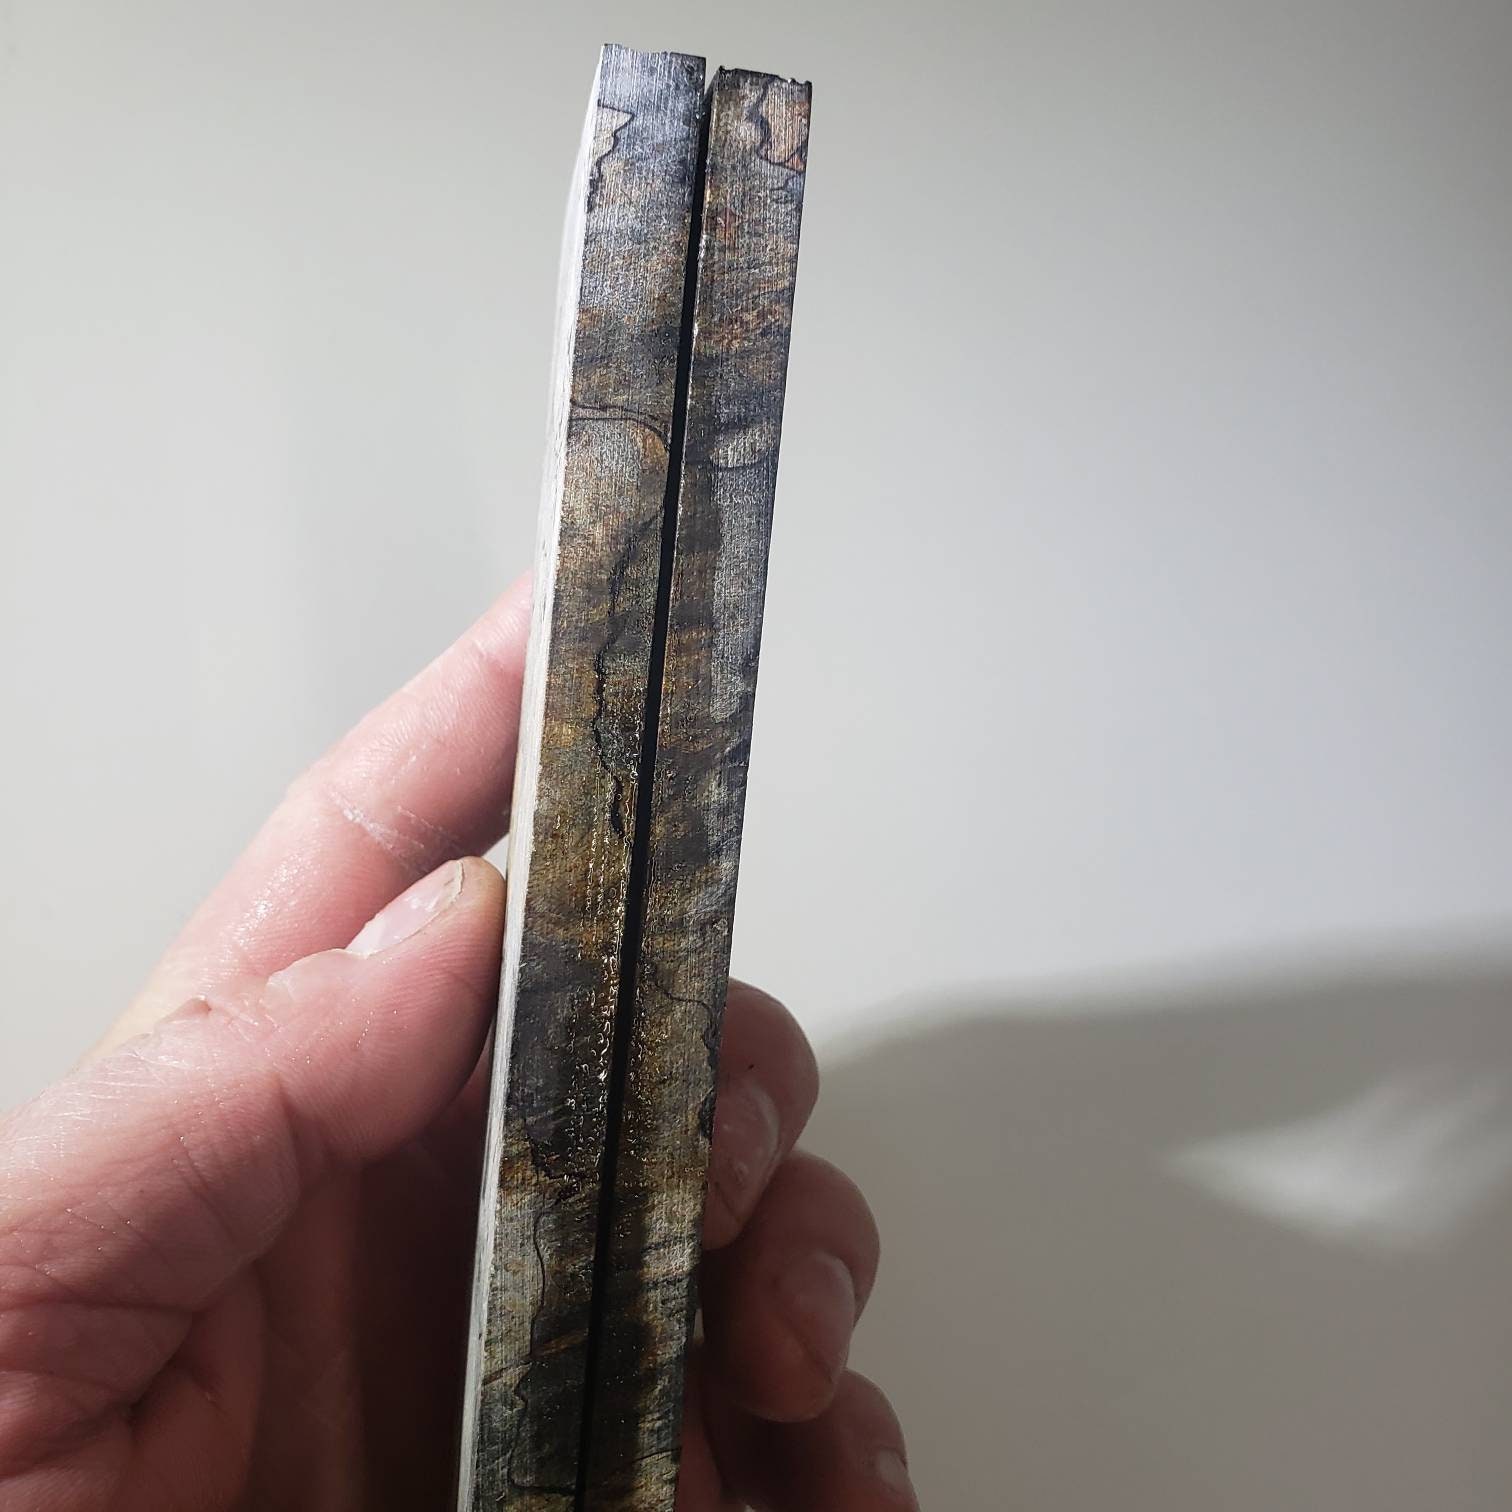
Hi Dan Looks like you were right. I have just stabilized a piece. Just took it out and I can't see any cracks. Thanks a lot. Looks like this is the way to do it. Excellent news. There must have been some moisture trapped in the wood and when heat curing it expanded and cracked the wood. I am glad you have had better success with the drying. How long did it take for the wood to stop releasing bubbles?
I used plumbers putty to help hold the pressure at Pin head bubbles have been rising off of the wood now for like 2 hours. Ultimately, many factors would be involved in determining the time it takes, such as the porousness of the wood, thickness of pieces, vacuum, wood moisture content and resin viscosity and temperature. For the thin scale pieces I stabilize it takes about 30 to 45 minutes.
Hi, Dan! I was wondering is it possible to dye the stabilisation agent? I am going to try my first stabilisation experiment with pentacryl because there is nothing else available here. Can i dye it to make the wood more colourful? What kind of dyes are ok to use? Thanks for your super valuable and informative blog! This site is a treasure chest! Hi dan I live in Ns and am looking for someone local to buy scales.
Do you have the gentleman you buy from in New Brunswick email address? I get them from Michel at Aplus Hardwood.
I've heard it takes repeat sessions to get that deep color into the wood. Also, once the resin is dyed, it will always be dyed. Hi, Thanks for doing all of the experimenting. I am wondering how much difference being in a vacuum makes in absorption, vs just warming the wood and then soaking it in a stabilizer? Have you tried that? I have tried soaking soft scale sized pieces overnight.
The next day I applied some vacuum and there was still a lot of air trapped in the pieces. This may also show different results depending on the size and density of the wood. I don't think a simple soak would work well for denser woods or larger blocks as the resin needs help penetrating. It never hurts to experiment. Hi, I don't know of anyone carrying Cactus Juice in Canada. You will have to import in from the USA.
I bought a gallon of Stick Fast from Woodchuckers in Toronto. Shipped via Canada Post. You are correct about being able to boil off different liquids like you did with alcohol. I use to do HVAC work and still have my pump. When you use your pump you are pulling all of the air out of the chamber including anything in it that is porous and the liquid is filling the negative space left by the air. If you continued to pull a vacuum you would start boiling off the components of the hardener.
Also there is a difference between this and a fence post because where as this is vacuumed, a fence post is pressure treated. I've never done green wood before but I think I would place it in the vacuum by itself and boil off all o the moisture in it before I ever put my stabilizing liquid in it. May have to try it some time. Love the site.
Nice article, quick question Hi, The Nakiri is made from carbon steel with oxidizes when in contact with acids. I used a small artist's paint brush and applied mustard and hot sauce for short periods of time until it had the effect I wanted.
This is called a forced patina. Hello, I ran across your blog searching for info on stabilizing. I do scroll saw work and turnings. My daughter recently bought me a box of assorted pieces of wood.
One of the woods is very porous and it was brought up to stabilize it. The friend that brought this up to me suggested I use a bag system to do it, kinda like with a seal of matic. Have you tried this type of stabilizing? Or know anyone that might have tried it? If not would you recommend this type of stabilizing and if not may I ask why?
I have not used a bag or food saver vacuum system, although the Stick Fast company suggests this method for irregular shapes like turned bowls or large sized pieces that do not fit handily into a vacuum pot or jar. How about the WEST resin? It was created to penetrate wood used in boat construction. Also, would a seal a meal produce enough vacuum? I am not sure how well it would work as epoxy is usually quite viscous.
The stabilizing resins I have played with are very close to the consistency of water. Maybe there is a way to thin epoxy with acetone or similar solvent to improve the penetration. I have not experimented with this. I've seen a special segment from StickFast regarding vacuum bags, however they are pulling a good vacuum with the same equipment they use in their can method.
If you could connect a vacuum gauge and measure the food sealer. Anything in the 20 inches of mercury or better should do the trick on smaller pieces. The link is to YouTube just a couple of posts up. Hi Dan great blog! Have you or heard of anyone using polyurethane floor varnish? A few questions sir: 1: mix part A and part B before using it? Thank you. Also, I was thinking as the wood does not contract as much as the resin when switching to low temperature, would be an idea to warm up the resin and the jar then place them in the freezer with the wood inside?
I am not sure I completely understand the process you are envisioning. The cooling of a sealed space will create a vacuum within the jar, but the viscosity of the resin would be increasing at the same time.
Not sure if that would achieve the desired results. I was thinking about trying a FoodSaver with the jar vacuum attachment to try and experiment with stabilizing wood. Do you think that might work? I don't know how strong the vacuum pump is in the FoodSaver unit, but it should work. Stick Fast uses vacuum bags in their instructional video for irregular shaped pieces. You could probably use the FoodSaver bags; put your stabilizing resin and wood in and put it under vacuum.
Hi Dan. Thank you for your post, it's very interesting and for me, the newbie more newbie that you have never seen, a window to try different ways to do things. I need to clarify acouple of things. One is related with the vacuum you used. I would like to know if the pump brake bleeder is an special one or it's usual and normal.
I've seen many videos about stabilizing that shows compressors, rigid tubes The second is related with the product used. I'm in Spain and google doesn't show me any place to buy stick fast. As you have test pentacryl and results are not so good Thank you for your attention Regards Q.
You can use any device that creates a substantial vacuum. This is sufficient to cause copious amounts of air to evacuate from the wood. A vacuum pump or compressor attachment can also be used to create the vacuum. Perhaps another reader from Europe can offer advice.
Both of these products are superior to Pentacryl. Dave, I spoke to my supplier yesterday. He says there is no UV marker in Cactus Juice. They are very similar in performance. However, I find that Stick Fast has a slightly "soapy" appearance when buffed. I don't see when buffing wood treated with Cactus Juice.
Super interesting project The end result will look "dead". This especially pronounced in formulations using acrylics. Post a Comment. Wood Stabilization. Also note, when i say moisture, its not anything that will even feel wet, what I'm talking about here is water that's actually trapped in the cells of the wood that we need to get rid of.
Now, the drying process it pretty simple, stick the wood in your toaster oven at f and leave it there for as long as possible. In my case, i left my scales cooking for about 8 hours. Yeah, maybe, but better than underkill.
Thicker pieces will require longer drying times, so the thicker the piece, the longer you want to leave it in there. I recommend a minimum of 2 hours, but again, as long as possible.
Once you thing the pieces are dry enough, toss em in a zip-top freezer bag and let them cool to room temperature. Quick tip, if you see and condensation on the inside of the bag, the blanks aren't dry enough, pop em back in the heat until the bag stays clear.
Make sure your blanks are in a sealed container to cool, if you just leave them on the counter the blanks will actually absorb moisture from the air, defeating the purpose of drying them.
Now, the wood im using is already pretty dry to start with, so i cut my pieces pretty close to what i wanted the final dimension to be. If your pieces aren't quite so dry, they could warp as they dry in the oven, so for the first few batches you do i recommend leaving them fairly oversized.
Wood nice and cool? Are you sure? Remember, the resin were using is heat-activated, so if the wood is still hot when you put it in, the resin will activate on the surface and prevent any more absorption, so make sure its cool. You're sure? Wait a little long to be sure, then come back.
Okay, now that the wood is sufficiently cool and dry, time to actually make with the stabilization! Here again the pictures explain a lot, so check those for more details. First things first, take the lids off both the jars, make sure they're clean and empty. Now, place the wood blanks in one of the jars.
This will be the stabilization chamber, it gets the lid with 1 hose. Once the wood blanks are in the jar, find some way to prevent them from floating. Ive found that a round cut of chicken wire does a pretty good job, just bend it so that it forces the wood down against the bottom of the jar.
Place the lid on it and set aside. This will be the reservoir, and it serves 2 purposes. For one, the air space at the top of the jar will keep the pump from sucking up liquid. The second purpose it serves is to keep the stabilizing chamber filled with resin, more on that in a minute. Make sure the lies are hooked up correctly, and the pickup hose in the reservoir reaches to the bottom of the Burl Wood Knife Scales 60 jar.
Once you have that done, time to put the spurs to it. Adjust the valves to that the valve going to open air is completely closed, and the valve going to the chambers is all the way open, then turn on your vacuum pump. Now, just let it run until you stop seeing air bubbles come up through the resin. Keep an eye on the hose between the valves and the chambers, make sure no resin is getting sucked up.
If it is, quickly open the valve going to open air to release the vacuum, don't let the pump suck up the resin. The massive foaming subsides pretty quick, after that its pretty much set and forget. Again, just let the pump run until there aren't any bubbles, this could take anywhere from 30 minutes to several hours, depending on the thickness of the blank. Don't rush this, it takes time. Once the bubbles stop, its time to shut off the pump. Don't just flip the switch though, you'll kill your pump.
Instead, close the valve leading to the chambers, then open the valve leading to open air. Once the pump is pulling air, shut it off. Now, slowly open the valve leading to the chamber. You'll hear a big "whooosssshhhh" as air rushes back into the system, and the increase in pressure will force the resin in the reservoir into the stabilizing chamber, fully filling it up. Neat, huh? That pressure is actually the magic to this process, now atmospheric pressure will force the resin into all the tiny little nooks Burl Wood Knife Scales 50 and cranny in the wood that water and air used to occupy, all you have to do is wait.
How long should you wait? Here again it depends, the rule of thumb is let the blanks soak for twice as long as the vacuum was running, i. Personally, i like tripling that amount of time, 2 hours vacuuming, 6 hours soak , and i always soak for at least 12 hours. Too much time cant hurt, but too little can. You also want to make sure that no part of the blanks are exposed to air, everything should be covered in the resin.
The 2 chamber design should ensure that, but it never hurts to keep an eye out. If any part of the blanks is exposed to air, start the vacuum process over. Assuming youve let your blanks soak long enough, theyre now completely saturated with an acrylic resin, but that resin still needs to cure. To do this, you need to expose it to heat, f in this case. Here again we use the toaster oven.
You can either wrap your blanks in foil and bake them, or do as i am and place them all on a wire rack. Wrapping the blanks cuts down on the smoke generated but tends to leave excess resin dried on the surface, the wire rack will let the excess run off but can put off a bit of smoke. Both work equally well.
The key things here are time and temperature, the core of your blank HAS to reach f. Set your oven for f, pop everything in and wait a few hours. Too much time wont hurt anything, but take the blanks out too soon and theyre ruined.
Thicker pieces will take longer, and again, you cant rush this. Leave them cooking overnight if you can manage, you wont hurt them as long as the temperature stays at about f. At this point, congrats, your wood is officially stabilized and subject to all the benefits that process entails!
Clean off the excess resin and see what youve got! Please, did you really think id leave it like that? One of the biggest benefits to stabilized wood is that it looks like wood, it feels like wood, but the finished product is a wonderful hybrid. I knocked together a knife using some of the Sassafras i stabilized. Before stabilization, this was a wood i would've never used on a knife handle, it was far too soft, subject to far too much movement, hard to work with on account of the splintery grain, really just completely unsuitable for this application.
After the stabilization process, however, the wood is much harder i can no longer dent it with a fingernail , much more resistant to rot, more durable, easier to work with and a perfect fit against the tang of the knife, a fit it'll keep. The best part is there's no finish on this knife, no oils or varnishes needed.
The acrylic that's now embedded in the very fibers of the wood allow the wood itself to take a very high polish, so it even looks better. The best part? It still doesn't feel like plastic, it still feels like wood. Smells like it too, Sassafras smells just like root beer.
The second knife pictures has much the same success story, the wood itself was too soft, too unstable, not durable enough, etc. The only redeeming factor it had was it was pretty. After stabilization though, it's perfect for a knife handle.
So, now you know how the process is done, go out and salvage that piece of good looking scrap you wanted to make into a pen, but set aside because it wouldn't stand up to the lathe. The sky's the limit, and stabilized wood is really a fantastic material to have, plus doing it yourself beats the commercial prices. After talking with a friend, who makes solid body guitars, about my interest in wood stabilization, he asked me about stabilizing guitar body blanks.
Since they are larger than the usual chambers used, is there a way to make a vacuum chamber that would accommodate a guitar body. It would not need to be very tall but with a large enough foot print for the body or could you direct me to a site that could help me? Question 3 years ago on Step 1. Answer 6 months ago. Well done Sir!!! This is one fantastic write-up and I would love to have a go, but the cost of the stabilizing solution is very very expensive here in the UK.
But I will keep searching to find a way to do it that is my mission now, more so after seeing this and how easy it is once again thank you so much for the time its taken for this great info Regards Ian Bedford. Question 1 year ago. Can one of the 1 gallon pickle jars be used for stabilizing larger pieces of wood? They are vacuum sealed so I would think they would be fine. Answer 10 months ago. If you can seal it, you can use it, but it needs to be glass - plastic will collapse under vacuum.
Cactus Juice is available in different quantities, so the larger your container, the more you may need. I'd like to try this process but can't find any resin like cactus juice here in France, do you know any good alternative? Reply 10 months ago. Please contact Turntex Woodworks. Curtis will ship to the EU. The resin can be reused again and again.
Limiting factor is time - once the catalyst is mixed in, the resin has a finite lifespan, about 6 months to a year. Reply 3 years ago. Question Burl Wood Knife Scales India 2 years ago. I have a piece of quilted maple That I want to dye. So do I dye it first and can you put finishes over this to get depth? Answer 2 years ago. Excellent question! To dye stabilized wood, you actually mix the coloring into the stabilizing resin before moving on to stabilizing the wood.
The resin carries in the dye as it does its job, so you wouldnt need to add extra steps. You can put another finish on stabilized wood, though personally i dont see the need for my uses. The stabilization process is enough of a finish for the knife handles the wood is destined for, a coat of paste wax to shine everything up is all i ever do.
Id avoid finishes that are more prone to adhesion problems, like polyurethane, but thats just personal preference. Tip 2 years ago on Step 7. When baking the wood, add a "pilot" blank of similar size as the other ones, drill a small hole into it, the size of the pin of a oven thermometer used normally to check the inner temp of your Thanksgiving turkey. Do not soak this pilot wood, but add it with the real stuff and the pin inside in the oven.
Put your temp gauge on F, and you will know when the inside of the wood is warm enough for the chemical reaction to work. That will take the guesswork out of the time needed to cook your batch. By using an untreated sample, you can safely hand back the thermometer in pristine condition to its rightful owner, ready for the next turkey.
Last Professional Knifemakers Association show I went to were some folks selling stabilized and dyed corncob. Got my poor peabrain working. I guess you could stabilize almost anything. Tried the Minwax and brake bleeder pump on some punky maple I had with some degree of success. Great Instructable! Reply 4 years ago. There are some limits to what you can stabilize, but the list of what you can is pretty extensive. I personally have tried nearly any species of wood that I can get my hands on that isn't already high in natural oils, and I've heard of people using the process on stranger things like corcpn cobs, paper, leather, think I saw one guy do a pinecone once, don't ask me why.
Introduction: Resin Stabilizing Wood. By epicfail48 Follow.


|
Everbilt Full Extension Drawer Slides Uk Things To Build With Pallet Wood Water Best Carpenter Tools Online |

Bezpritel
20.01.2021 at 19:35:52
10_Uj_040
20.01.2021 at 23:36:49
Anarxiya
20.01.2021 at 11:39:32
Ragim4ik
20.01.2021 at 17:25:50