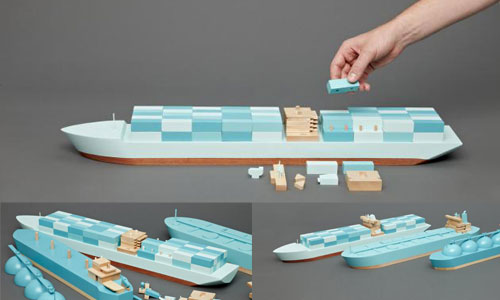
Build-a-toy-ship-work,how-to-make-a-frame-easy-mode,jim-thorp-lumber-products-inc-txt,making-fine-wooden-boxes-meaning - Reviews
To create this article, bild people, some anonymous, worked to edit and improve it over time. The wikiHow Video Team also followed the article's instructions and verified that they work. This article has been viewedtimes. Learn more Paper ships are a buid that many a child has made since build a toy ship work creation of paper. They are easy to make and they can be "sailed" on any small body of water, such as a bath, a puddle, a pond or even a little stream.
While not particularly durable, once you know how to make them they are easily replaceable! If you want to make a paper ship, fold a piece of paper in half from top to bottom, then fold it again from side to side and unfold so you have a crease in the center.
Fold the top right corner down towards the center, then flip the paper over and fold the other corner down on the other side. Fold each of the bottom edges of the paper up and outwards to make a build a toy ship work hat shape, then open the hat and flatten it horizontally to create a build a toy ship work. Fold the bottom edge of the diamond upwards towards the top, then turn the paper over and repeat on the other side. Pull the paper apart build a toy ship work and smooth build a toy ship work out to create a boat shape.
If you want to learn how to make your ship float in water better, keep reading the article! Did this bui,d help you? Yes No. We've been helping billions of people around the world continue to learn, adapt, grow, and thrive for over workk decade. Every dollar contributed enables us to keep providing high-quality how-to help bulld people like you. Please consider supporting our work with a contribution to wikiHow. Log in Social login does not work in incognito and private browsers. Please log in with your username or email to continue.
No account yet? Create an account. Edit this Article. We use cookies to make wikiHow great. By using our site, you agree to our cookie build a toy ship work. Cookie Settings. Learn why people trust wikiHow. Download Article Explore ahip Article methods. Tips and Warnings. Things You'll Need. Related Articles. Article Summary. Method 1 of Fold paper in half. Take a piece of rectangular paper and place it in front of you so the paper is in portrait format, with the longer edges to the side.
Fold it in half lengthwise from top to bottom, so that the fold is at the "top" of the piece of paper. Fold the paper in half and unfold. This nuild fold the paper side to side, rather than top to bottom as in the first fold, then unfold.
The crease marks your center line. Now you're back to after Step 1, with the paper folded in half top to bottom, but with a crease down the middle. Keep all your folds as straight and clean as possible. Fold the top right corner down.
Hold the top right corner and fold the tip down and towards the center. The top edge should line up with the center line. Flip over. Fold the other corner in the same fashion, lining it up with the center line. This should create a "house" like shape with a "big" roof line and about an inch of paper below the triangle of the roof.
Fold bottom edge up. Take one edge of the bottom rectangular strip of paper and fold upwards. Flip over the paper. Repeat the last fold. Fold up the opposite rectangular strip along the bottom of the house. Make sure the two strips line up, keeping all the folds symmetrical. This makes a paper hat shape. Grasp the hat shape in the center. Do this at the point where the diagonal creases meet.
Open the hat shape slightly. Hold the two edges at the diagonal creases. Pull the edges outwards. Gently pull and flatten the hat. You should end up with a build a toy ship work piece of paper. Fold the bottom edge up. Take build a toy ship work bottom corner of the diamond and fold upwards toward the top.
Once done, flip the paper over. Fold the bottom edge to line up with the other side. Make the same fold as with the previous step.
Hold the paper ship in the middle of the bottom edge. Pull it apart. Flatten it down, similar to Step 8. Hold the left and right triangular portions. Slowly pull apart. The bottom edge will flip up on its own. Look at your creation. Your paper ship is now complete! Method 2 of Fortify builv boat. There are a variety of ways to make your paper ship last longer.
Make two ships and put one inside the other. This will increase the water resistance as well as the overall sturdiness. Color the ship with crayons. The wax will help the paper resist water. Instead of tape, tiy the bottom with plastic film wrap will provide a good barrier to the water. If you build a toy ship work to re-use it, let the ship dry out after use. Then wrap it in plastic to protect it. Use the right paper. Using lightweight paper, such as a simple sheet of rectangular computer printer paper, is best.
You can use a heavier material such as construction paper, but it will be more difficult to make clean, crisp folds. Remember, this is essentially an origami technique. Origami traditionally uses light but durable paper. You can also buy origami paper, or kami which is a product developed in Japan in the early twentieth century.
It is often decorated and can be whip in art supply stores. It is a bit lighter, but is fairly similar in weight to copy paper. Increase the flotation. Widen the bottom by pulling out the diagonal edges.
Making the bottom flatter will help the ship stay afloat longer. This will also widen the surface area of the bottom for more stability. Make build a toy ship work boat more stable in the water. Using two ships, one inside the other, help the ship have more buoyancy, as well as helping the build a toy ship work be more resistant to water.
Try placing small pebbles around the edge of the triangular middle part of the ship.


|
Kreg-jig-set-off Custom-woodwork-furniture-pdf Pocket-hole-jig-320-classic-2-face-clamp |

saxo
21.11.2020 at 13:12:14
Ramin62
21.11.2020 at 14:46:26
LoVeS_THE_LiFe
21.11.2020 at 23:20:21
zarina
21.11.2020 at 19:55:19