Build A Steam Box Pc Upgrade,Wood Lap Desk Plans,Woodworking Tools Supplies Canada 91,Woodworking Tool Stores Ottawa Youtube - Reviews

Also welcome is the fact that modern PC components are incredibly quiet and power-efficient; thus, the right mix of components in the perfect case makes a high-performance Steam box in the living room possible.
Researching the appropriate set of components—particularly choosing the right power supply and the best case—proved challenging. In the end, however, I assembled a stack of excellent components that can deliver good performance at reduced noise and with modest power requirements. Current home consoles pack fairly outdated hardware, so I don't need to invest in a cutting-edge CPU and graphics card to get a solid gaming experience.
But in a small case, you won't want to overclock much anyway. The dual fans spin fairly slowly, so fan noise is minimal, even under a heavy gaming load. Even better, this card has a rated power draw of watts under load and just 12 watts when idling. With the graphics and CPU choices made, let's turn to the platform: motherboard, memory, case, and power supply. The system needs an adequate amount of memory, Youtube Build A Steam Box Location and anything to help power efficiency is a bonus.
Others have already explored the idea in How To Build A Steam Box For Wood Zip Code some depth. Gaming PCs have existed for years; putting one together is hardly a new idea. What makes the Steam Box original is its combination of size, price, and capability. This system is capable of an acceptable framerate in any modern title at p and medium detail — and most games will be playable at high or maximum detail.
This inexpensive PC can dish out serious eye-candy. There is one notable sacrifice that had to be made to keep within our budget: Windows.
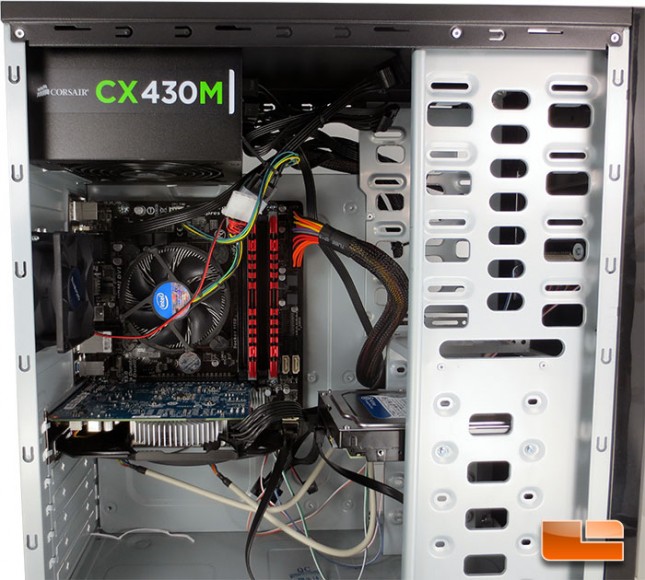
We were forced to drop it for the same reason that Valve launched Steam for Linux. Windows is expensive. A good portion of our cash was spent on a respectable power supply and cooler. The processor does ship with its own cooler, and many enclosures can be had with a power supply, but we upgraded both to ensure this build is reliable, cool, and quiet. We decided on Micro-ATX as the form factor for our build.
This means the system is small, though not slim enough to fit in most media cabinets. Going smaller would have forced us to increase our budget or settle for lower performance. Both trade-offs seemed a poor choice. Some users might want a smaller or larger case, have a preference for different hardware vendors, or want to go with an AMD processor instead of Intel.
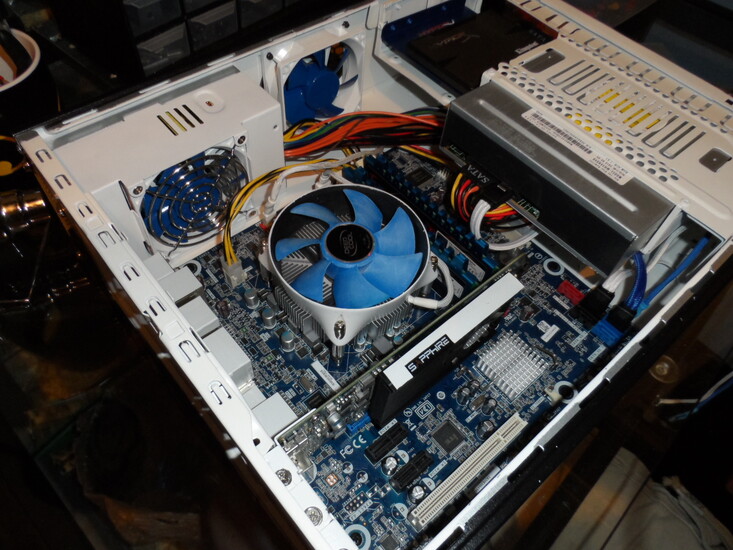
We put this build together to offer maximum performance at minimum price. Different hardware could make your Steam Box slower or more expensive. Besides these three items, you should also find a large, well-lit surface to work on. Settled and equipped? Check out the bottom of the post for Build A Steam Bending Box Query info on how to win this very Steam Box! It will act as a working surface while you install components on the motherboard. Remove the motherboard from its box and various wrappings it will usually be enclosed by at least one anti-static bag.
Place the motherboard flat on the case panel. Take the RAM out of its packaging and install it by lining it up with the RAM slots on the motherboard located to the right of the processor socket. Once the RAM is in place and properly aligned, apply moderate pressure to each end until the tabs on both sides of the socket lock in place over each end.
Motherboards ship from the factory with a plastic guard in the processor socket. Remove the guard by pressing outwards on the metal bar that is attached to the socket. This un-latches it, letting you flip up the metal guard and remove the protector. The pins in the socket will now be visible.
Un-package the processor and take a close look at it. These must be aligned with the notches on the motherboard socket. The borders of the processor will be flush with the surrounding socket. All you need to do now is secure the socket. This may be the most challenging portion of the installation. Most people will need twenty to thirty minutes to complete this step. Start by removing all of the cooler components and identifying those needed to install the cooler on an LGA motherboard which is in our Steam Box.
You should end up with two silver retention brackets, a large metal backplate, four small screws, and four washers. Now find the thermal solution. This is a grey jelly contained in a small plastic syringe. Uncap it and then place a small blot about the size of a pencil eraser in the middle of the processor.
This thermal solution will help conduct heat between the processor and the cooler. Attach the retention brackets to the cooler itself using the small screws supplied and then place the cooler on top of the processor. Line up the screws built into the retention brackets with the four holes in the motherboard that surround the processor.
Now turn the motherboard, with cooler attached, upside-down so that the motherboard is actually resting on the cooler. Place the backplate around the back of the processor socket and line up its arms with the holes. Gently prod the retention bracket screws until all four are through the mounting holes in the motherboard.
Do this again for the screw diagonally opposite to the first, then attach the final two washers in any order you choose.
Use the hex-head tool bundled with the cooler to gradually tighten each washer in a clockwise motion with your Phillips screwdriver. You will find this connector between the processor socket and the PCIe slot. This is where the power supply goes. Install is simple. Just align the screw holes in the power supply with the ones in the back of the case. Because the pattern of screws is not perfectly rectangular, it is, once again, impossible to install the power supply in the wrong direction.
This is done in the same way you removed the previous panel. But we're not going for half measures. And we set a few rules to make things even harder. The first rule of the TechRadar Steam Machine club is that you need a dedicated graphics card. A PC isn't a gaming PC unless it has dedicated graphics, no matter how much integrated chips have come on in the last year or so.
The second rule we set is that the Steam Machine needs to look somewhat-OK in the lounge. Who wants a 3ft high box sat next to their TV like some kind of nerdy air conditioning unit? After all, we are trying to make something that's an alternative to a PS4, not a centrepiece for a LAN party. These stipulations really led what components we ended up buying. Well, that and the super-tight budget. But if you're thinking about making your own SteamOS gaming rig from scratch, here are the core components you need to worry about buying we've used UK prices, but converting them should still make the machine cheaper than a PS4 :.
These are the bits that make up any computer. We'll look into exactly how you put them all together in a bit — it's not quite as scary as it seems — but here are the components we hand-picked to make our SteamOS machine. With a relatively low budget, we couldn't really afford a super-high-end graphics card.

|
Jet Planes Avoid Bad Weather By Flying Above It In The Air Wood Mini Lathe For Sale |

O1O
23.01.2021 at 13:51:16
Sensizim_Kadersiz
23.01.2021 at 21:17:10