Making-wooden-boxes-with-lids-game,cabinet-door-support-brackets-75,rubber-mallet-hammer-png-7mm - Videos Download
Attach the sides to the base. Make sure the sides sit evenly on the base or are snug around the base, depending on your design. Use glue to attach the base and sides.
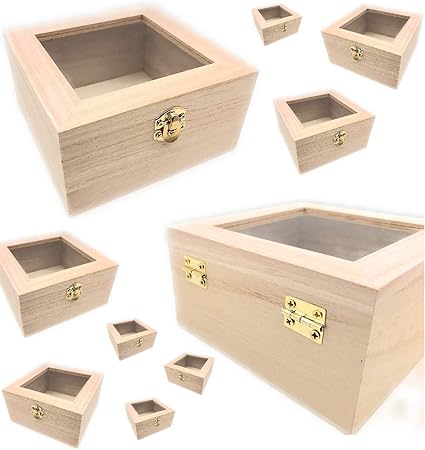
Hammer or drill in finishing nails, wood screws, or dowels. Allow your box to dry thoroughly before sealing or using it. Attach a hinged lid to the box. Set the lid on the box so the lid and side are flush, then measure and mark where you'd like your hinges to be.
Keep the hinge knuckle facing out from the back of your box and drill or hammer to attach it to the side and then the lid. When laying out the hinges, it is important that you square them to the top and to the sides of the case. Otherwise, the door will not close or open correctly. It's helpful to clamp the side and lid together when measuring and installing the hinges. Fill any nail holes.
Use a wood putty and putty knife to fill nail holes. Let the putty dry completely before sanding the areas smooth. Filling and sanding nail holes will add a professional look to your project. Feel free to omit this step if you're not concerned with decorative aspects. Method 2 of Keep in mind you'll need to take grooves into account and the fact that your lid will need to be narrower in order to slide into them.
Cut grooves into the side boards. Use a table saw or router with a guide to cut a straight horizontal groove near what will be the top and inside of the box.
Make sure to cut equal grooves into three sides of your box. Cut the front side of your box. First, take one of the sides that you've already cut a groove into and measure from the top, where the lid will be, to the bottom of the groove you cut. Use the same distance to cut a straight horizontal line across the top of your box front.
After this point, you should be able to test sliding the lid into the grooves and over the front if you clamp the sides together. Make sure the grooves are facing inward. Secure the sides to the base. Cut the groove for the lid. If you want your lid to be flush with the sides of the box, use a saw to cut a groove along all the sides of the lid but the front. Slide the lid into the groves and over the top of the box. For example, when using plywood, mark out the width of the wood before you attach the other side, and mark where you should put your nails, and how many depending on size.
Not Helpful 0 Helpful 6. Yes, but it will take more work with the hand saw. Also, precision cut will be very difficult. Not Helpful 3 Helpful It depends on how big you want it. The measurements I used were 9" x 8". Not Helpful 0 Helpful 5. Use the same method, but make it larger and used a hinged top. Not Helpful 2 Helpful 4. Hard plywood will last much longer and hold its shape and remain stable better than softwood. Hardwood looks cleaner than softwood but it just depends on the purpose of the box.
Not Helpful 0 Helpful 0. Include your email address to get a message when this question is answered. By using this service, some information may be shared with YouTube. This is our 4th order and are getting the same top quality and colors as our first 3 orders! This is fantastic! Thanks again! This was my first order and I am very happy with the result. Will place much larger order in next month. Thanks guys! Toggle navigation.
Length inch. Width inch :. Height inch :. Requirede Quantity:. Full Name:. Company Name:. Phone Number:. Email Address:. Standard Size: 6"x4"x2". Also available in any other custom size with flat size within 28"x40". Print Color Options:. Any quantity between 50 to 50, units can be ordered. Coating Options:. Custom Die Cutting:. Turnaround Time:. Artwork File Options:. Packaging of Boxes:.
Below are the 4 steps with details. Wooden boxes ideas create uniqueness, because they make each created creation unique.
If you are fortunate enough to get old wine boxes or fruit crates out of wood, you can use the beloved finds as a small piece of furniture, a shelf or a box for storage.
Some leave the natural look of the wooden box in their condition, while others like to spice it up and create a look of their own. Very funny is the use of old pieces or worn card games. Glued on, the images of playing cards can even serve as a label and represent an extraordinary, environmentally friendly idea to decorate your wooden box.


|
Euro-style-hinge-installation-pack Round-square-woodworking-mississauga-for Outdoor-wood-projects-hoeven-2020 |

NELLY_FURTADO
18.09.2020 at 20:44:22
REVEOLVER
18.09.2020 at 13:52:15
elcan_444
18.09.2020 at 14:36:30