How To Make A Frame Mat Down,Makita 18v Brushless Oscillating Tool Pdf,Sharpening Lathe Tools By Hand - Easy Way
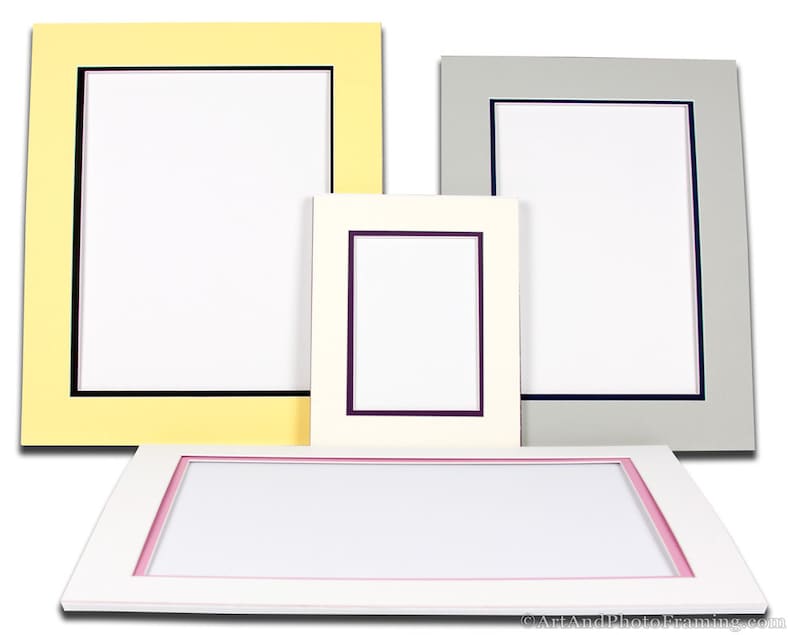
Last Updated: June 6, References. This article was co-authored by our trained team of editors and researchers who validated it for accuracy and comprehensiveness. There are 26 references cited in this article, which can be found at the bottom of the page. This article has been viewed 21, times. Learn more Matting is a great way to protect to your artwork while also showing it off.
You can choose mats in a variety of colors, sizes, and materials to create the perfect mat board frame for your pieces. Learning how to mat artwork on your own will take some time and practice. We've been helping billions of people around the world continue to learn, adapt, grow, and thrive for over a decade.
Every dollar contributed enables us to keep providing high-quality how-to help to people like you. Please consider supporting our work with a contribution to wikiHow.
Log in Social login does not work in incognito and private browsers. Please log in with your username or email to continue. No account yet? Create an account. Edit this Article. We use cookies to make wikiHow great. By using our site, you agree to our cookie policy. Cookie Settings. Learn why people trust wikiHow. Download Article Explore this Article parts. Things You'll Need. Related Articles. Part 1 of Choose How To Make A Picture Frame Easy a clean space for matting. Wipe the space down with a damp cloth and then completely dry it.
Measure your artwork and mat border for the total board size. This is going to require some math, so break out your calculator. Next, measure the width and length of your artwork. This will give you the size you need to cut out the window the cut-out that will display the artwork.
Add the window and how to make a frame mat down measurements for the total mat board size. This will give you a neat edge underneath your mat board. Your mat board should match up in size with your backing.
Mark the outer edges of the mat and backing boards. Most boards come in standard sizes that will need to be trimmed to fit your artwork. Use how to make a frame mat down back of your frame for measurements. If your backing and mat boards are too big, you may need to trim down the border size.
Use a ruler and pencil to trace your measurements. Remove your artwork from the backing and mat boards and set it to the side. Use a ruler to make straight lines connecting each of the small marks you just made. You should have two rectangles or squares on your mat board and one on your backing. Use a straight-edge razor to cut the backing and mat boards.
Press the razor down firmly at the top corners of the boards. Pull the how to make a frame mat down slowly and steadily towards you, stopping at the bottom corner. Keep the same pressure throughout your cut, and be very careful not how to make a frame mat down dip out or in from the penciled line. Use something with a straight edge, such as an old frame or a heavy book, to help you cut.
Cut twice so the mat pops out of the window. Make the cuts at least twice to allow the cut out to simply fall out of the window. Do as many as you need to, but take your time. Each repeated cut needs to be on the same line as all the others. Part 2 of Measure to center your artwork on the backing. Place your artwork on the backing and measure the space on each side.
You should have the same amount of blank space above and below the artwork, as well as on the left and right sides of the piece. Make small pencil marks in the corners on the backing to record the right spot.
Check your centering by laying down your window. This will give you an idea of what your final, matted piece is going to look like.
Take How To Make A Wood Frame For Bathroom Mirror a minute to enjoy it before you get back to work. Use a weight to keep your artwork in place. Use something heavy, like a sock filled with coins or a heavy glass, to keep your artwork where you want it. Tape the back of your art to the backing. Lay two more pieces of tape horizontally across the vertical pieces sticky-side down to adhere the artwork to the backing. Use photo corners or mounting strips to attach your artwork. For see-through mounting strips, use two on each side of the piece, or eight total, and adhere them to the backing.
You can then slip the artwork directly under the corners or strips. Photo corners and strips are best for conservation, as they avoid the damage that even linen tape could cause to your piece. Attach the window mat by creating a taped hinge. Lay down the window and the backing how to make a frame mat down against each other, with the window face down. Use one long strip of linen tape to connect the window to the backing. Place the tape so one half is on the back of the window and one half is on the backing.
You can also attach an adhesive picture hanger to the back of your backing board to hang the matted frame up on the wall by itself. Part 3 of Purchase equipment if you plan to dry mount. Dry mounting rather than using tape is a more involved process. This really will be an investment.
The tissues will be less pricey. Measure your artwork and window to size the backing board. Measure your artwork. Add these two numbers together to calculate how large the backing needs to be. Make two pencil marks in the corners to record your measurements.
Place artwork face down to lay dry mounting tissue behind it. It should cover the artwork completely. Attach the center of the print to the tissue with a heated tacking iron. Most tacking irons can be plugged in to heat them up, just like normal irons.
Iron the tissue for a few seconds in a small circle to adhere it to the back of how to make a frame mat down piece. Trim off the excess dry mounting tissue. Use scissors or a paper trimmer to carefully cut off how to make a frame mat down extra dry mounting tissue.
Go slowly. Measure to center your artwork on its backing. Place the artwork face up on its backing. Use a tape measure to check its placement. You should have the same amount of extra space on the left and right sides, as well as on the top and bottom of the piece. Make pencil marks on the backing to mark the spot. Use the tacking iron to attach two corners to the backing.
Gently lift up two corners of the piece, one at a time. Take your heated tacking iron and how to make a frame mat down the dry mounting tissue, which should be laying flat on the backing, to the backing. Pull the tacking iron from the center outwards. Adhere two opposite corners. Press your print in a heated press for about minutes.


|
Router Round Over Bit Set From Stainless Steel Pivot Cabinet Hinge Price |

AYDAN
12.11.2020 at 17:24:54
ELMAYE2
12.11.2020 at 20:43:30
MAMEDOV
12.11.2020 at 10:50:20
q1w2
12.11.2020 at 10:33:29
606
12.11.2020 at 14:46:49