Gel Stain Application Tips 500,Pen Kits For Turning Knowledge,Best English Wood For Turning Effect - Good Point

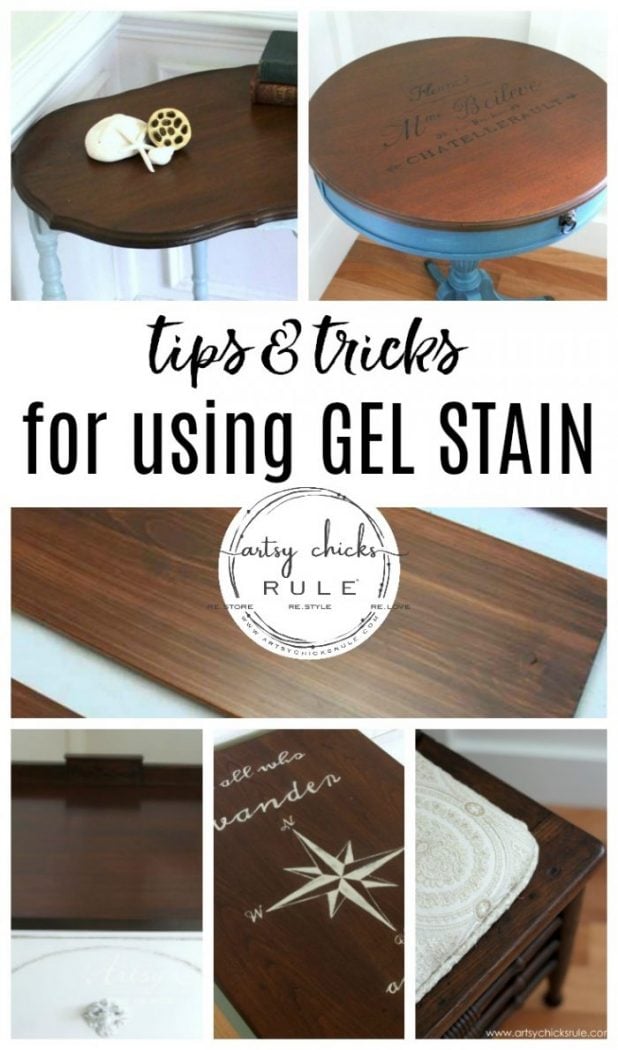
You can read more of our disclosure policy for additional information. Note: This took about one and a half quarts of the java stain and not a full quart of the topcoat. If you prefer to paint your cabinets, you will want to check this out. Here are a few more budget-friendly projects we think you will enjoy:. Thanks for stopping by today. If you enjoyed these 20 java gel stain tips, we would appreciate a share on any social media: Instagram , Facebook , and Pinterest.
Your email address will not be published. Notify me via e-mail if anyone answers my comment. This site uses Akismet to reduce spam. Learn how your comment data is processed. Learn why people trust wikiHow. Download Article Explore this Article parts. Things You'll Need. Related Articles. Part 1 of You can buy stripper at any home improvement store. Brush a thick coat of stripper onto the surface, then let it sit for 30 minutes to dissolve the finish. Use a plastic scraper or stiff-bristled brush to scrape off the dissolved finish.
Wear goggles and protective gloves when using stripper. Scrub the surface thoroughly with a mild detergent solution and steel wool before proceeding.
Clean the surface thoroughly. Use a mild soap solution and microfiber cloth to wipe down a raw wood surface. Dip a microfiber cloth into it and wipe the surface down. Wipe off excess liquid with a paper towel. Sand the surface using grit sandpaper. Start off using a medium grit sandpaper, such as grit. Sand the surface thoroughly, taking care to get into the nooks and crannies of the piece.
Start on 1 side and work your way systematically to the other side to ensure an even and thorough job. Follow up by using a grit sandpaper. After using medium grit sandpaper, sand the surface again using a fine grit, like grit or grit.
The fine grit sandpaper gets rid of any remaining imperfections in the wood and gives you a perfectly smooth surface for applying the gel stain. Using anything finer than that may prevent the surface from holding the stain well.
Wipe down the surface to remove lingering dust and debris. Any dirt or sanding dust left on the surface of the wood will prevent you from getting an even stain and be visible once the stain dries. Use a dampened tack cloth or microfiber cloth to wipe down the entire surface. Be sure to get into the nooks and crannies. Gel stain can permanently stain both glass and metal, so mask off these areas before you apply it.
Part 2 of Protect the floor with a tarp and put on gloves. Gel stain can ruin concrete, carpet, and pretty much any other surface it touches. Before you get started, lay down a tarp or a large piece of cardboard. Situate your item right in the middle.
Your hands can also get stained, so pull on some protective gloves before you open the gel stain. Stir the gel stain thoroughly before using it.
Gel stain is very thick and the pigments tend to settle at the bottom of the can over time. If you want to be extra thorough, turn the can upside down for 15 to 20 minutes, then pop open the can and stir well. Divide your piece into small sections. Gel stain dries very quickly. Use a foam brush or pad to apply the stain liberally to the first section. Dunk the foam brush or pad into the gel stain, then apply a thick, even coat on your first section.
Saturate the surface with the stain. Let the stain sit for 30 seconds. Do not wait longer than 30 seconds. Gel stain dries very quickly and will become tacky if left on the surface any longer than that. Wipe off the Gel Stain Application Tips 81 excess stain with a staining pad or old t-shirt. Wipe the surface in the same direction as the grain, then inspect the surface for any streaks or marks.
It may take up to 4 passes to fully remove the excess stain from the surface, so be diligent. Repeat the process for each section of your piece. Remember to work quickly while also paying attention to the evenness of your application. Let the stain dry for 24 hours before applying another coat. Allow the gel stain to dry completely before deciding if you want to do additional coats. The color will probably look a little different once completely dry.
If you do want to stain the piece darker, apply the second coat the exact same way you applied the first one. The second coat will fill in any streaks and deepen the color. Part 3 of Select the gel stain top coat of your choice. The top coat seals the gel stain and protects the finish of your piece. Choose a top coat that matches the base of your stain — if you used an oil-based gel stain, use an oil-based top coat.
If you used water-based stain, go for a water-based top coat.


|
Best Raspbian Apps App Wood Glider Plans Pdf Error Woodworking Ear Protection Network Under Bed Drawer Ideas 03 |

Sharen
07.01.2021 at 10:49:34
SYRAX
07.01.2021 at 13:45:22
Akulka
07.01.2021 at 11:29:26
ulviyye
07.01.2021 at 19:31:15