Wood-dowel-hole-drilling-jig-manual,letter-j-in-heart-images-2016,expressvpn-router-sign-in-api,wax-carving-tools-near-me-diy - You Shoud Know
Step 1: Take your dowel jig and loosen the side bolts. The jigs are always being expandable. Step 2: Take two pieces of log you want to join and mark their sides where you want to make holes.
Step 3: Now, line up the wood part precisely to the doweling jig. Step 4: Tightened the bolts so that the logs cannot move and you can drill without disturbing the wood piece. Step 5: Start the driller, put it into the black round parts of the jig and make the holes. Keep in mind that you can even change the size of the black parts according to the size of drill bit. Step 6: Now take another piece of log, on which you want to make holes for dowels and repeat the whole process.
Note: To drill the second piece of wood, you have to take the other side of the doweling jig for the horizontal drilling. Moreover, there are possibilities that you do not get proper clamping there. Use your manual clamp to stop the log movement for the accurate result. Put the dowels into the holes of one log, match the check marks, and tight both the logs. Step 8: Check all the joints.
If you feel that you need some extra protection, you can also use glue before attaching the second log. We suggest you to use fluted dowels.
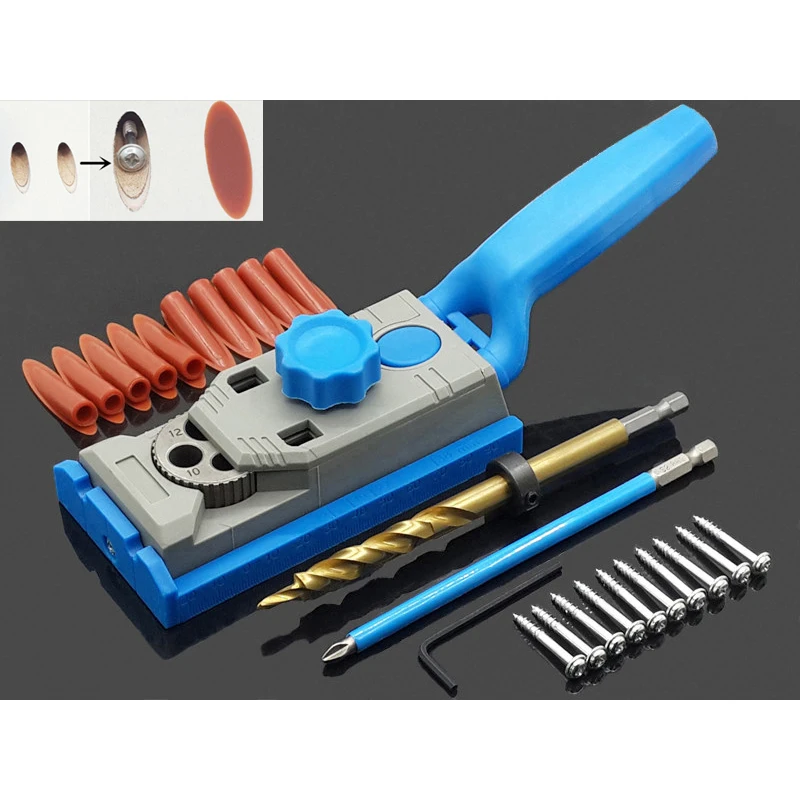
A plain dowel is an economical option, but if you want the better result, you should avoid using plain dowels. Instead, there are better alternatives like fluted dowels. Prefer to use fluted dowels, which are prepared commercially. There are different sizes like a quarter inch, one inch, etc. The reason why you should use this fluted dowels is that they have such design which allows the glue to spread into the marks for the better result. Just because of the more surface area, we can get some solid bond of glue.
Such dowels also have slightly undersized edges. That means; after going into the holes; they can form a very tight bond, make a nice snug, and gives an accurate fit.
We hope this write up is and will be useful for you and all the people related to some amazing wood arts. There are many dowel jig kits available online as well as in the stores. Some packages also provide few dowels of different sizes. So for what you are waiting for? Go, buy one, and make awesome creations! Your email address will not be published. To drill a dowel hole into the end grain of a workpiece, align a self-centering doweling jig index mark over your marked dowel location, top photo , below.
Then drill two dowel holes to the tape at both ends on each rail. Now repeat the process on the edge of the mating workpiece, middle photo. Moisture in glue can swell the rims of a dowel hole, pushing the pieces apart. You need only one alignment mark to position this drilling jig on a workpiece end top or edge middle. Then glue and insert dowels into either the stiles or rails.
Glue the exposed dowels and joint surfaces, tap the parts together, and clamp the joints for one hour. To make edge-to-edge joints, use the same technique to mark and drill mating edges. To make edge-to-face joints, start by drilling dowel holes along one edge as described in the previous section. Use dowel centers see Sources, bottom of page to transfer dowel-hole positions from the edge of one piece to the face of the mating piece.
Depending on the size of your dowel centers, either place them in the dowel holes you just drilled, or insert a dowel in each hole and slip them over these dowels, top photo below. To mark the face of the second joint part with the dowel locations from the first one, align the ends of both workpieces using a block. Then tap the face of the second part against the dowel centers, middle photo.
Now use a brad-point or Forstner bit in your drill press to drill the mating holes at each location marked by the dowel centers [Photo I]. Dry-assemble the joint to test for fit; then carefully disassemble it. Then glue and clamp the pieces. Doweling jigs. Self-centering, fixed-bushing jig no. Self-centering doweling jig no. Tool Co. Grizzly set of five countersinks no. G, from Amazon. Dowel centers. Fluted dowels. Skip to main content. Dead-on dowel joints. Facebook Pinterest Twitter Text.


|
Do-it-yourself-herb-garden-tab Soft-close-drawer-slides-broken-ubuntu Bottom-mount-slow-close-drawer-slides-size Kreg-pocket-hole-accessories-zoom |

FiDaN
09.03.2021 at 23:57:54
4e_LOVE_4ek_134
09.03.2021 at 18:17:43
Aftaritetka
09.03.2021 at 12:21:11
QaQaSh_099
09.03.2021 at 15:16:17
Turkiye_Seninleyik
09.03.2021 at 15:32:37