Tongue-and-groove-router-setup-network,toggle-clamps-princess-auto-co-ltd,carving-vise-zero - PDF Books
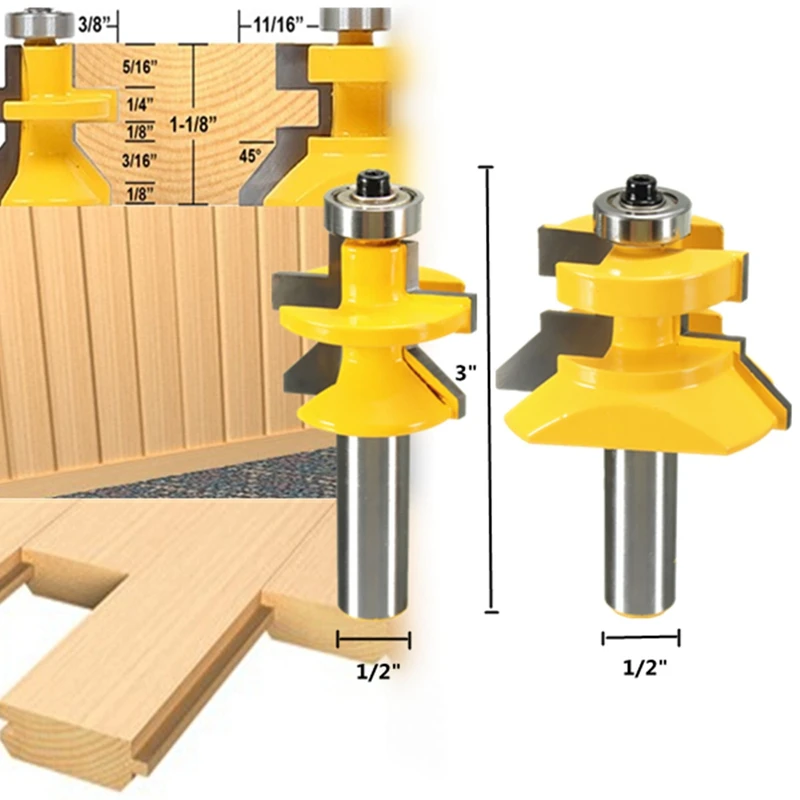
Install the groove cutter bit and line the tongue board along the router bit. Make sure that the router is unplugged when you are changing the router bit. Now adjust the tongue cutter and line up with the tongue. As it is said in woodwork field that human finger has a resolution of about 1/ inch. the bit, reinstall it in the router and reset the bit height and fence position. Make another test cut and check the fit. Add additional shims until the tongue fits the groove. 6. Verify the bit height by test fitting the tongue in the groove. The faces of your two pieces should be flush. Adjust as necessary. www.- Size: KB. First, install the tongue cutter bit in the router table with both cutters installed and the nut snugged down. Lay the groove gauge block (made earlier) on the router table next to the bit and adjust the bit height so the top edge of the lower tongue cutter is flush with the bottom edge of the groove.


|
Decorative-furniture-hardware-pulls-data Intro-to-wood-carving-80 Pull-out-pantry-drawer-slides-python |

Sevimli_oglan
09.12.2020 at 17:47:47
IMPOSSIBLE_LIFE
09.12.2020 at 13:18:44
Busja
09.12.2020 at 17:50:51
dddd
09.12.2020 at 12:45:43