Locking-drawer-router-bit-3d,16000-woodworking-projects-201,woodworking-branding-stamp-60,ball-bearing-drawer-slides-sticking-pdf - Test Out
Add to Cart. In stock. Questions and Answers. Product Reviews. Related Products Check items to add to the cart or select all. Crown Molding Shaper Cutters. Bird's Mouth Router Bits. Full Bead Router Bits. Router Bit Medium Wood Box. Login Register Registered Customers.
If you have an account, sign in with your email address. Sign In. Forgot Your Password? Personal Information First Name. Last Name. Sign Up for Newsletter. Password Password Strength: No Password. And the joint is not only functional, but attractive as well.
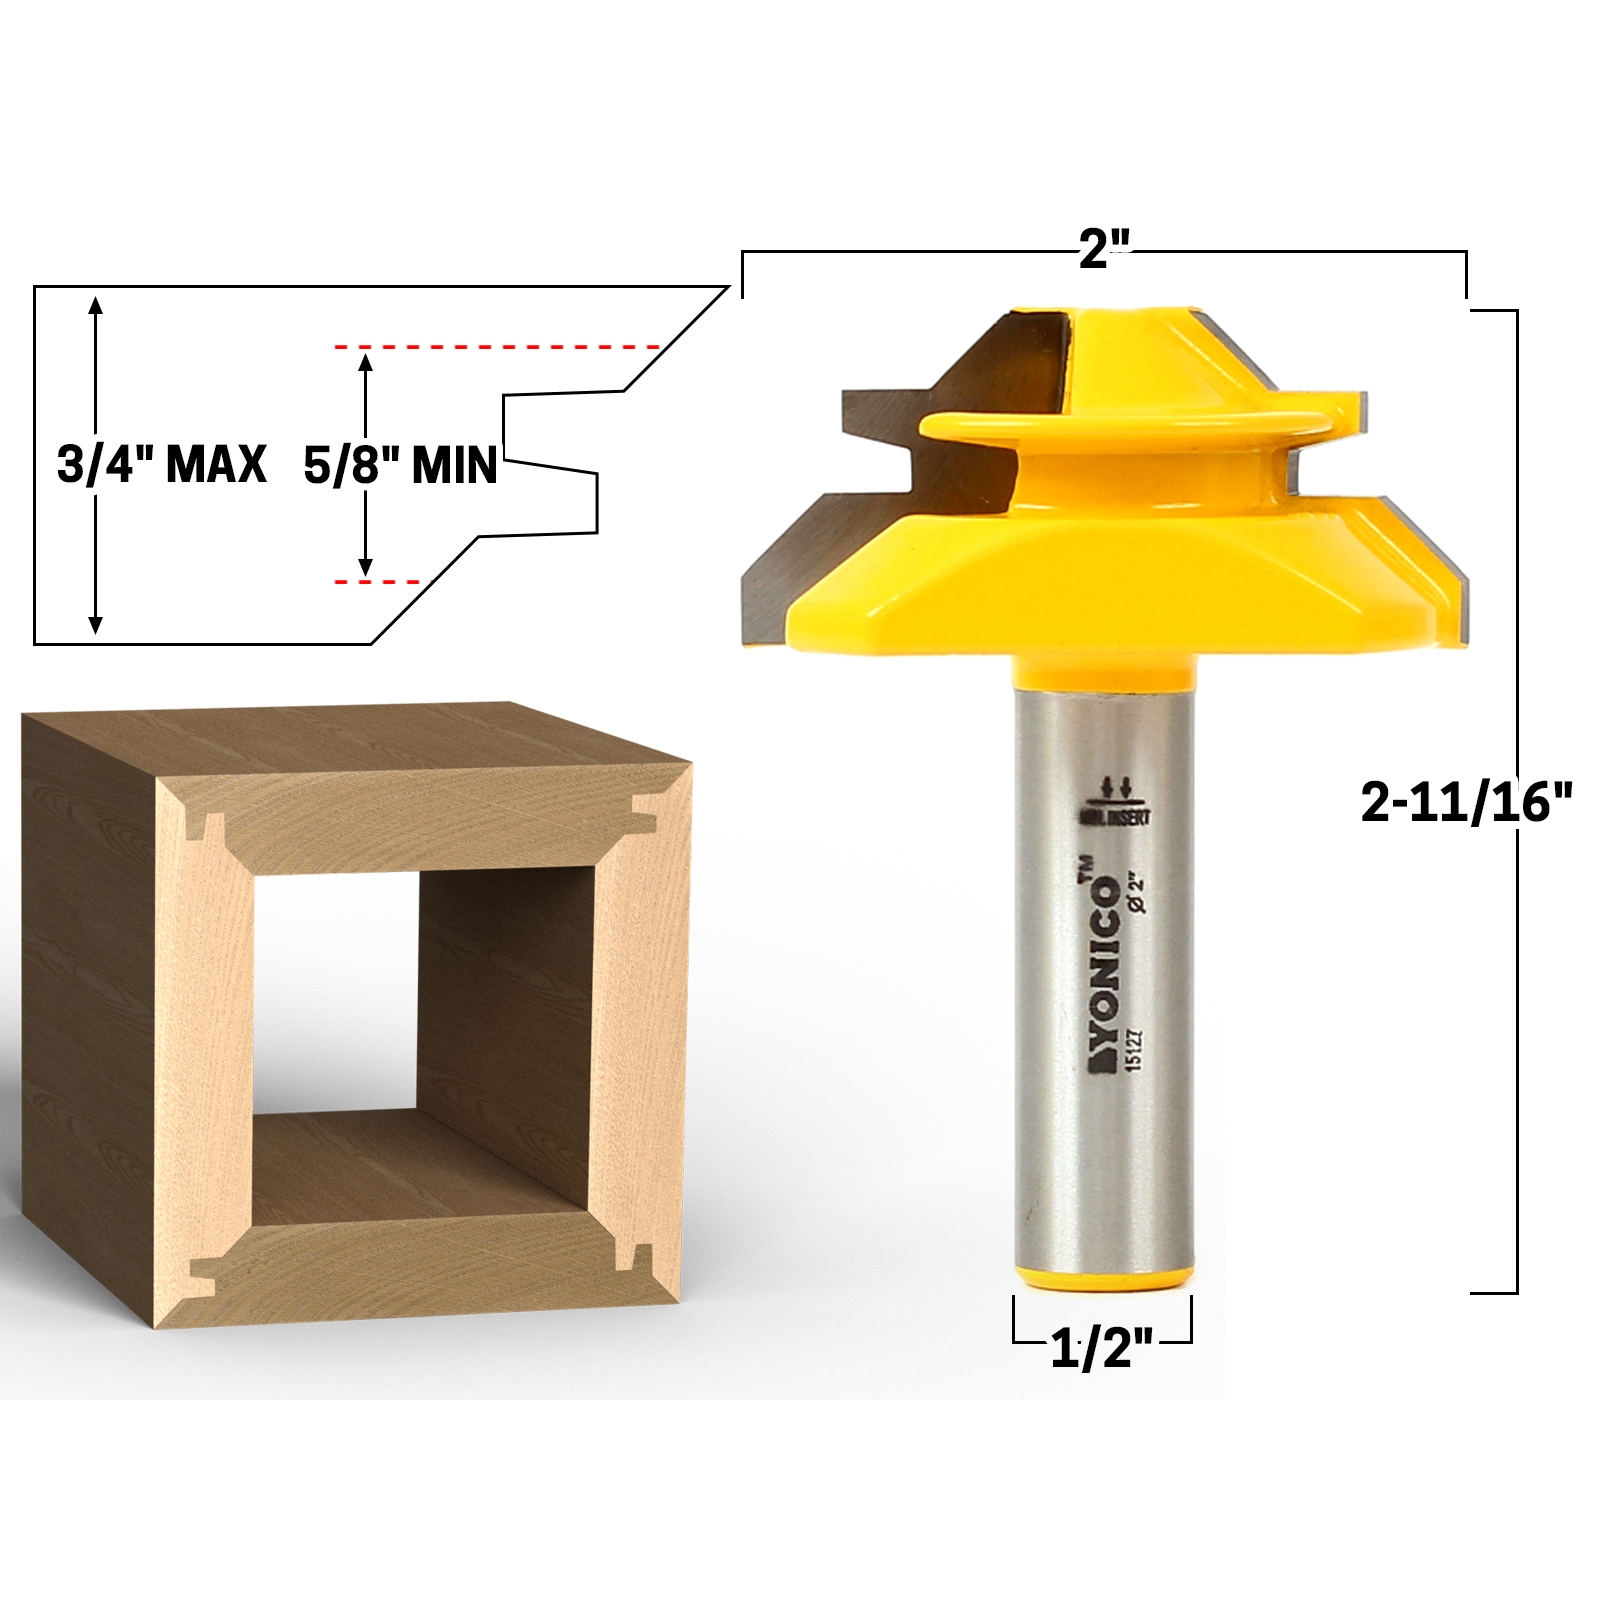
Unlike stub tenons made on a tablesaw, the wedge-shaped tenons created by a drawer-lock bit self-align both workpieces for a perfectly mating joint.
Furthermore, once you've set the bit to the correct height, you need only adjust your router-table fence to make a variety of mating cuts. One safety note before we get into using this bit: Remember that a drawer-lock bit should always be used in a router table, never a handheld router. That's because most of the bit must be captured inside the fence when milling drawer or box sides. Close up the opening around the bit by making an auxiliary face for your router table fence.
Position your router table fence that distance back from the upper cutting edge of the bit. For flush-mount drawers, or drawers to which you'll add a false front, place the fence only the thickness of the drawer side from the bit's lower cutting edge.
You also could use this dimension for milling the drawer backs. This ensures that the inside dimensions of the drawer remain constant. Keep one end of the drawer front against the router table fence and mill the workpiece using the miter gauge as a guide. Turn the workpiece around, keeping it face-up, and mill the other end.
If you're making more than one drawer, machine all of the drawer fronts and backs, if you like using this setup. We like to rotate the bit so the cutting edge is forward, then lay a straightedge against it for reference, as shown below.
Stand the drawer side on end, placing the inside face against the fence. Use the pushblock, as shown below , to guide the drawer side through the bit. After marking and installing biscuit joints in several boards that I've glued up edge-to-edge, I Skip to main content.


|
Titebond-ultimate-wood-glue-msds-ii Making-wooden-flower-boxes-uk |

NIGHT_HUNTER
09.05.2021 at 15:46:21
wise
09.05.2021 at 23:36:31
ELIK_WEB
09.05.2021 at 10:13:44
Student
09.05.2021 at 14:52:57