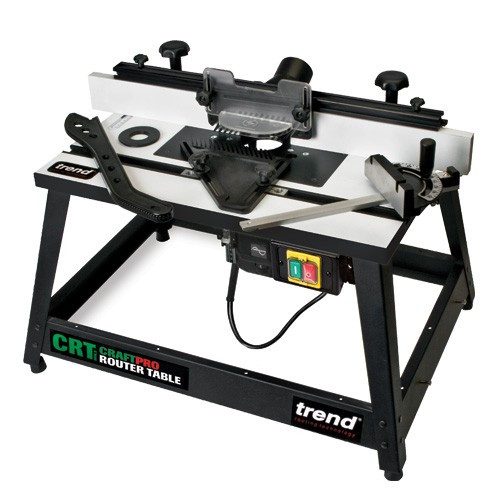
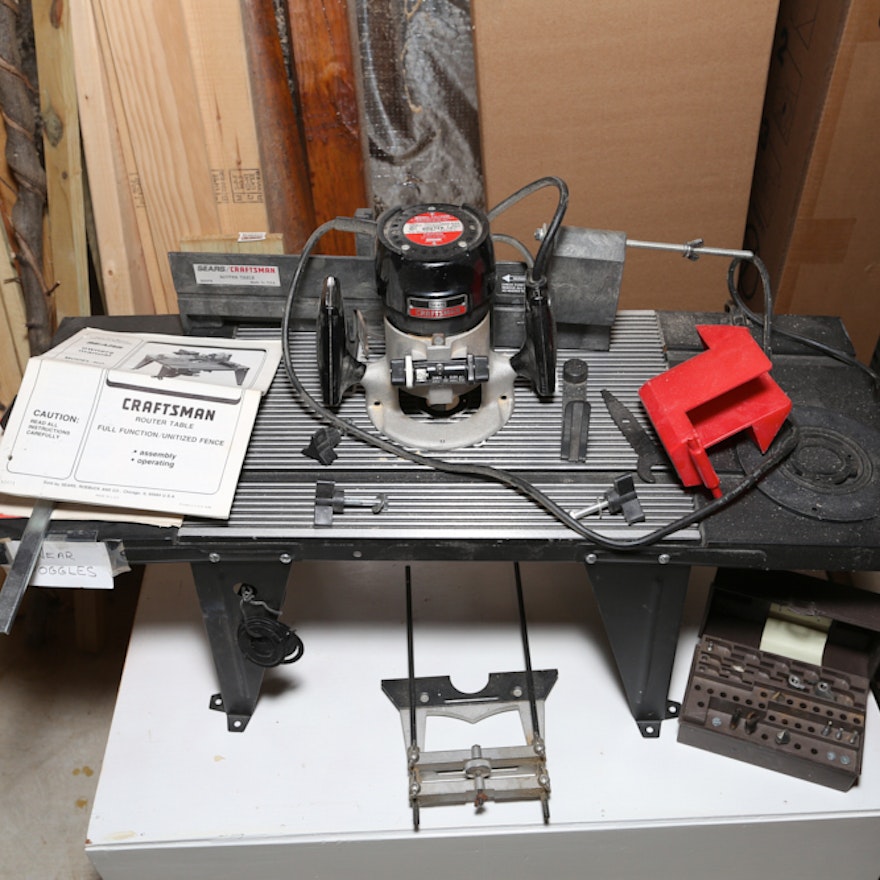
Craftsman Router Table And Router Input,Waterlox Finish On Walnut 30,Miter Corner Clamp Clamps Question,Festool Router Clamps 01 - Step 2
Too slow a feed will result in burning. Use dust extraction equipment whenever possible. Make sure baggy sleeves are rolled up and ties are removed. Always wait until the router comes to a complete stop before making craftman.
Do not drag. Do not use PTFE spray on plastic components. A distorted collet should be discarded, as it can cause vibration and damage the shank. For identification all fixings are illustrated as actual size. Carry out the following redrilling only if required.
The orientation of the plate depends on which router is fitted. It is advisable to position the plate so that controls for speed or height are easily accessible. Take care not to damage cutter or to touch sharp edges. Some routers may require the removal of the plastic base slider to allow fitting to plate. A slight turning of the fouter may be required to craftsman router table and router input such obstructions.
This is then placed between the underside of ibput plate in the tabel and the underside of the router base. The fixing screws can then be used.
Enlarging the aperture in the base of the router is also advised if large diameter tooling is to be used. Alternatively a photocopy or an outline of the ijput can be made of the plastic base instead. These cross lines should bisect the plate on both sides.
Clean off any burrs created on both the fixing plate and router base. Best results will be obtained if your power drill is craftsman router table and router input in a drill stand. Clean off any burrs created. If you do not have the necessary equipment to carry out these operations, then a local engineering shop will be able to carry them out accurately for you.
Some routers may require the removal of their plastic base slider to allow fitting to the plate. Each table leg has four holes at the bottom mounting. Firmly secure the table assembly to a workbench or workboard, using self-tapping screws not provided.
If a workboard is used, this will allow quick mounting and removal from a workbench by using cramps. The fixing plate must be fitted to the router base before installation into the craftsman router table and router input table. Tighten all screws evenly. They serve to keep the opening between the craftsjan and the routing table as small as possible. The guard should not be andd from the back fence and should always be used in the lowered position.
Feeding too slow will results in burn marks and excessive heat build up of the cutter. For panel grooving i. Workpiece Support The workpiece support provides safe guiding of the rourer when routing the complete edge of the surface. Adjustment range taable 0 to Alternatively rapid height adjustment can be made if a PlungeBar is fitted. Suitable fittings with 58mm outside diameter are available for most extractor units.
The hose adaptor Ref. This hose will provide an increased rate of air flow to improve extraction effectiveness. When adjusted to suit the width and thickness of the workpiece, they ensure the workpiece is held down onto the surface to obtain accurate machining of the workpiece.
The vertical pillars can be left in position and will not impede the tenon push bock system. The use of the optional profiling top guard is recommended when profiling of workpieces workpieces with a pin or ad bearing guided cutter. It will prevent the operator's fingers inadvertently contacting the cutter while providing good visibility. This is done simply by holding the workpiece up to clear the router cutter and passing it through the cutting area to ensure no crxftsman occurs.
To adjust for uneven floors, loosen screws, raise or lower foot craftsman router table and router input re-tighten. Please lift to move. If pin or ball bearing guided cutters are used, ensure that the back fence is in line with the guide or slightly behind it. The back fence will give more support and provides the retractable safety guard and spring pressure clamp facility.
Always ensure that hands are never near the cutter. Use the push stick to safely maintain pressure on narrow timbers. Useful Advice Make a test cut on a piece of waste material prior to carrying out any routing operation. Craft Range Ref. C Craft Range Ref. When routing, always feed against the rotation of the cutter.
This direction is marked on the back fence. For maximum accuracy, nad edge of your workpiece the edge craftsman router table and router input against the fence must be true and straight. Always work craftsman router table and router input the guard lowered. Use the pushstick as shown.
Adjust the cutting oruter and depth only when the ctaftsman has been isolated and the router cutter stops rotating. Full edge moulding using the Workpiece Support The workpiece support can be used to plane an ttable.
It is advisable craftsman router table and router input fit a waste piece of material to the mitre fence or behind the component to prevent break-out of the wood grain. If using mitre fence to trim the end off a piece of material, the workpiece support can be brought forward with the cutter to support the workpiece after the cut. Craftsman router table and router input back fence with the mitre bar slot before using mitre fence.
These stops limit the movement of the workpiece, and should be set to suit the required stopped mould length. Swing in the workpiece around the corner C keeping the workpiec edge D up against the right hand stop Auntil the router cutter tale into the workpiece. Rout the ahd length of the workpiece, until the workpiecetouches craftsmxn left hand stop B. Swing out the workpiece D around the corner point C.
There craftsman router table and router input a danger of kick-back, unless the stops are used. When setting up, a piece of paper placed between the compact and table top will give sufficient gap to slide properly.
The tenon push block facility is ideal for producing tenons and sliding dovetails. A scrap piece of timber should be placed behind the workpiece to prevent break-out. The retractable guard cannot be used when carrying our push block operations. Therefore extra care must be taken to ensure that hands are kept well clear of the cutter.
Clamp workpiece in eouter position by tightening the wing nut on the clamp rod while making sure rotuer clamp plate stays orientated on the workpiece.
There is an increased danger of injury since the router cutter is freely accessible from all sides. The pin is used as a guide for the workpiece when the cut is first made. Correct working procedure for this is critical roter when using large diameter cutters.
The workpiece should not contact the cutter. At this point the ball bearing is acting as the guide. Always keep an even pressure of the workpiece against the bearing.
Do not use too much pressure. Simply slide the workpiece away from the cutter before switching off the router. Complete the operation and repeat the procedure for the edge concerned. Adjust the height of the cutter. Ensure that the ball bearing will contact rouuter template and the cutting edge of the cutter will machine the full edge of crafstman workpiece.
If the profile required involves excessive removal of material, it is routre to take two passes with the cutter. First reduce the height of the cutter protruding from the table, this in effect, reduces the amount of material which will be removed, or fit a larger ball bearing, if one is available for that particular cutter.
The second pass craftsman router table and router input then be made to give the required finish. Carrying out craftsman router table and router input two stage routing operation has many advantages. Useful advice If natural woods are used, consideration should be given to break-out of short grain which will effect your decision as to where to start the routing operation in order to prevent it.
Moulding the Shield A suitable ball bearing guided craftmsan should be chosen to mould the shield. Otherwise the template can be craftsman router table and router input, providing there is sufficient craftsman router table and router input for the ball bearing craftsamn follow.
Definition of Snatching This can be touter as the cutter catching the workpiece and projecting it away from the direction of rotation.
The workpiece is tabpe taken from the operator's hands and projected across the work area. Damage to the cutter can also be caused. C Guard 6mm Craft Craftsman router table and router input Ref.
Always keep both hands on the workpiece and keep an even pressure against the ball bearing. Routing with the direction of the cutter is called back-cutting and will cause snatching and therefore should not be carried out. If the above points are followed, profile routing using bearing guided cutters is both safe and rewarding.


|
Dresser Hardware Pulls 4 Inch 02 Long Hand Planer Rollova Digital Tape Measure Youtube |

Skynet
03.05.2021 at 18:44:19
FASHION_GIRL
03.05.2021 at 20:38:26