Best Price Kreg K5 Pocket Hole Jig Youtube,Absolute Lumber Products Ltd Usa,Woodwork Ideas For Beginners 5th,Wholesale Woodworking Materials Volume - Plans On 2021
Some have dust extraction ports. We looked at a number of cheaper pocket-hole jigs that compete with Kreg. The main problems with them are excessive play in the components which makes accuracy very hit-and-miss and less robust construction. In general, they aren't as versatile, and most are two-hole rather than three-hole systems. Kit contents can appear impressive, but the numbers are often padded with small items like screws or dowels. A Kreg Jig is an investment, though it doesn't have to be a large one.
That's not a great deal extra for the long-term accuracy and durability that has made Kreg the market leader. With any jig, setup is key. Don't rush things, particularly when you first get your jig. The old woodworker's adage of "measure twice, cut once" is true here, too. The most common mistake comes when setting the jig and drill collar to the thickness of your wood.
Check twice, drill once. Although pretty straightforward, initial testing with a few pieces of scrap wood is a good idea to get used to the way the jig works. You can fix errors. If you do make a mistake, you can make almost invisible repairs with a Kreg pocket-hole plug cutter.
This cuts wooden plugs the same size as your hole. Glue in the plug, sand it down, and nobody will be any the wiser! In theory, no. In practice, many professionals recommend it. Wood — even plywood — will expand and contract as humidity changes. So it's possible screwed joints can work loose over time. A little wood glue will ensure your joints remain solid. Kreg Jigs are designed to allow you to make strong joints, regardless of material widths.
For instance, if you have boards two to three inches wide, you would use guide holes A and B. For narrower material, you would use B and C, and so on. Instructions are included with your jig, including recommendations when fixing much wider panels. Lots of places. Besides the Kreg website kregtool. Both have clear tutorials, dozens of tips and tricks for using a Kreg Jig, and literally hundreds of interesting projects, too. Beware, though — Kreg joinery can get a bit addictive!
Hands down the best jig set Kreg has to offer. If you have small or large woodworking projects that require pocket-hole drilling, no other system will do. It's the one to get if you are planning on building a deck. This jig kit will eliminate most guesswork and help you create a strong, sturdy build.
If you want a jig system but don't need a large set or simply want numerous tools for a reasonable price, this handy option is both practical for most jobs and value-priced for most budgets. Ideal for consumers with small projects and those who are more concerned with overall price than versatility; it's not useful for many larger woodworking tasks.
A good choice for jobs that require well-angled pocket holes for large pieces, but may not suit your needs if you want a more comprehensive and versatile system. BestReviews wants to be better. Please take our 3-minute survey, and give us feedback about your visit today. BestReviews spends thousands of hours researching, analyzing, and testing products to recommend the best picks for most consumers.
We only make money if you purchase a product through our links, and all opinions about the products are our own. Read more. With a little electrical ability and some patience, you can convert a regular V mini-fridge or freezer into a 12V refrigerator. Doing this could be complex and time-consuming, but it will get you a true refrigerator for a fraction of the cost of buying an ARB or Dometic fridge.
Any kind of stove will give off at least some fumes. Note: Unfortunately, Dometic has discontinued the Origo stove. From what we understand, this is due to denatured alcohol not being readily available outside the US. No, we will NOT sell you ours! We will update our recommendations once we can fully evaluate other options. It runs on denatured alcohol, which you can find by the gallon at most hardware stores and Walmarts, and some camping stores. The Origo is dead simple to use. To light the stove, you turn the knob to fully open and stick in a lighter.
And denatured alcohol is cleaner-burning and produces fewer fumes than propane — which is a huge plus when cooking inside a van. But our stove still heats up quickly, cooks well, and does everything we need it to do — all while giving us safety and peace of mind. You can use the Coleman Classic both inside and outside your van. The downsides include everything that could go wrong with using propane in an enclosed space, especially explosive fumes and carbon monoxide make sure you have a CO detector.
And buying 1-lb fuel canisters gets expensive after awhile. Having a larger tank is cheaper, but introduces more failure points into the system. Built-in cooktops are significantly more expensive than portable stoves. Installing them could be complicated , including adding plumbing to connect your cooktop to its fuel source. They also eliminate the freedom to take your stove and cook outside.
But if you want your DIY campervan to really feel like a home, a nice countertop with a built-in stove goes a long way. Oven units can get expensive and take up a lot of space, but if you have the budget and really want an oven here are some options:.
Coleman makes a foldable camp oven that sits on top of any camp stove. Another option is using a solar cooker. Solar cookers harness the power of the sun to heat up food inside a reflective box. You can buy one, or make one yourself.
No matter if you just need drinking water or if you want a full-blown sink setup, having a water source in your van is a must. Will you be cooking in your van? Do you plan on boondocking away from civilization for extended periods? If you really want your van to feel like a home, nothing beats having a built in sink and faucet. There are a few ways to go about setting up your water system, and you can make it as simple or as complex as you want.
But all built-in manual pump systems share the same basic components:. We think a manual water pump is the best choice for vanlife. We have this Whale foot pump in our van, and it works flawlessly.
Whale Systems makes excellent products primarily for marine use, but their products also work great as the basis for van water systems.
And the foot operation means that both of your hands are free for washing. Installation is also really simple — just screw it to the floor and clamp on the tubing. This is a combination hand pump and faucet that works well and is cheaper than buying both a foot pump and a faucet. These hand pumps are good choices for a van build, but for us the lack of hands-free operation is a big downside. It needs to be made out of FDA-approved material to prevent dangerous chemicals from leaching into your water.
It also needs to be big enough for your needs. This will vary from person to person. At a bare minimum, humans need 0. So, our gallon water tank plus our 6-gallon portable reserve tank can keep us going in the wild for days before we need a refill. When we started putting together our water system we decided to look for a stainless steel tank.
Fusti tanks are designed for wine storage and fermentation — but they also work perfectly as DIY campervan water tanks. Our fusti tank keeps our water fresh-tasting and chemical-free, and the large top opening makes it easy to refill. We just fill up our 6-gallon reserve tank , dump it in the fusti tank, and repeat until full. Polyethylene water tanks — like this Gallon one — are the standard for RV and marine use. They come in a variety of shapes and sizes, and you can even have them custom-made if you need specific measurements or connector locations.
Depending on where you place it, you could have to run a potable water hose inside your van, or install an exterior water connection.
Another option that simplifies filling is to position the water tank near your side door. Polyethylene tanks work just fine and many people use them successfully. The cheapest and easiest way to supply fresh water to your sink is with refillable plastic water containers. There are many styles available, including jerry-can style containers , the extremely common Aqua-Tainer , or standard 5-gallon water cooler jugs. Which one you go with really depends on personal preference and the dimensions of your kitchen cabinets.
This setup has a few advantages. It also simplifies refilling — when your tank runs out, you can pull it out, refill it, and replace it. That means no risk of spilling and no installing a water fill attachment to the outside of your van. We have a 5-gallon clear plastic Hedpak container that our sink drains straight down into. With 5 gallons of gray water capacity, we only need to empty it every days.
Dumping is easy — just remove the tank from under the sink and pour it out into an RV dump facility or other approved area. If you use biodegradable camp soap like we do, you may be able to dig a hole in the ground at least feet away from a body of water and away from your campsite , dump your gray water, and cover it back up.
This involves cutting a hole through your floor to route plumbing and attaching a suitable holding tank to the underside of your vehicle. While this is a whole lot more complex, it does open up some space under your sink for storage. Another great option is the Dometic 2-Burner Cooktop and Sink Combo , which includes an attached propane stove. What kind of tubing to use to connect the dots was incredibly confusing for us at first, and it took us awhile to weigh the options and figure out the best route.
The cheapest and easiest option is to use flexible beverage tubing to connect your water tank, pump, and faucet. Some people choose to use PEX tubing in their van builds.
We tried using it at first, and it turned out to be nothing but a headache. The trouble with PEX is that it requires special tools and fittings for installation, which dramatically adds to the cost. For ease of installation and overall quality, beverage tubing is the way to go. If you want running water without having to pump it yourself, you can install an electric water pump. Electric pumps give you on-demand water flow, and can be paired with just about any faucet.
The downside is a more complex installation process , including wiring and electrical. This is also the most expensive option. Our detailed blog post on our water system install is still in the works. In the meantime, here are some resources that we found helpful:. This setup consists of a standard 5-gallon water cooler jug paired with a Dolphin hand water pump , which easily pumps out water for drinking, hand washing, and cleaning dishes.
When you finish one jug, just swap the pump onto the next one. When you need a refill, you can exchange your empty jugs for full ones anywhere that sells water cooler jugs. Or just fill them up at your campground or other water source on the road. Folding camp sinks are inexpensive, pack away easily, and work perfectly for a cheap vanlife sink setup. Camp sinks come in a few different styles, from double basin folding sinks to collapsible bucket-style basins. This is our primary method of getting water.
You can also find water refill stations at some grocery stores. If you use a 5-gallon water cooler jug in your system, you can easily exchange empty jugs for full ones just about anywhere grocery stores, office stores, hardware stores, Walmart, etc. Developed campgrounds and parks will have potable water spigots you can use to refill your tanks.
We always make a point to fill up whenever we stay at a campground. The AquaBrick easily filters the nastiest water you can throw at it — it will even filter pool water.
If you want safe drinking water no matter the source, this is your filter. Simply fill the 4L bag with water from any source, hang up the bag, and let gravity take over. After you insulate your new home, the next step in a van build is installing a floor. This is an easy way to make your van look awesome — our shiny faux-wood laminate floor gets a lot of compliments — and really makes it feel like a home.
But there are a few things to think about before laying down the floor in your van. However, we ended up redoing our floor after a year, and we added some sound deadening material.
It was well worth it. Most vans will need 2 rolls of Noico Sound Deadening Mat to cover the entire floor. Some vans like extra long Sprinters may need more. The subfloor provides a stable layer — basically a sheet of plywood — for your floor to sit on. The thicker the subfloor, the higher the cost and weight, and the more valuable interior space it takes away.
Here are the pros and cons of each:. We have laminate flooring in our van. The only downside is that our dogs have trouble walking on it without slipping. If you have dogs, we recommend getting a laminate floor with some texture.
It comes in many different styles including wood-look and tile-look. The cost is similar to laminate flooring. But overall, sheet vinyl is a solid choice for any DIY campervan. Cork flooring not only helps insulate your floor. Cork comes in many different styles and colors, and it always looks unique. But cork is expensive — it can cost between four and ten times as much as laminate or vinyl flooring. It also stains and scratches easily, which is a concern living on the road. It gets dirty easily, retains moisture, and smells.
If you like the feeling of walking on carpet, we recommend getting a nice rug or floor mat and putting it on top of your floor. Check out our blog post on installing our floor for a step-by-step guide to laying down subfloor, Reflectix, and interlocking laminate flooring. You can use the same material for your ceiling and your walls, or you can mix-and-match two different materials.
You can also stain and paint it any color, or just cover it with a tapestry. Plywood comes in several different types, the most common being pine and lauan. Lauan is cheap, it bends easily, and in our opinion its grain pattern looks nicer than pine. This type of plywood is a great option for furniture, but we think lauan is a better choice for your walls and ceiling. A more expensive option is to go with cedar plywood. Paneling looks awesome — the cedar paneling on our ceiling is one of the defining features of our van.
And we cut ours to random lengths and stained it several colors to really give it that mismatched, rustic look. You can typically find paneling in pine and cedar. Pine is cheapest, looks fine, and will do the job. But if you have the skills and patience, using paneling really adds a lot of character to any van interior. Installation can be simple or complex depending on your van. However, you may need to add studs or nailers in some situations. What tools do you really need for a van build?
While having access to a full wood and machine shop would be awesome, the truth is you only need a few basic tools to build your van. If we had to choose just one saw to use on our next van build, it would be a jigsaw. No contest. Other saws excel at cutting straight lines, but jigsaws can also cut curved lines and any other shape you can think of.
You can even cut through metal with the right blade — which comes in handy when installing a vent fan. While other types of saws may be better for specific things a miter saw is by far the best for making straight and accurate cuts on pieces of lumber , no other saw can do everything that a jigsaw can do. Just make sure you get some high quality blades with it.
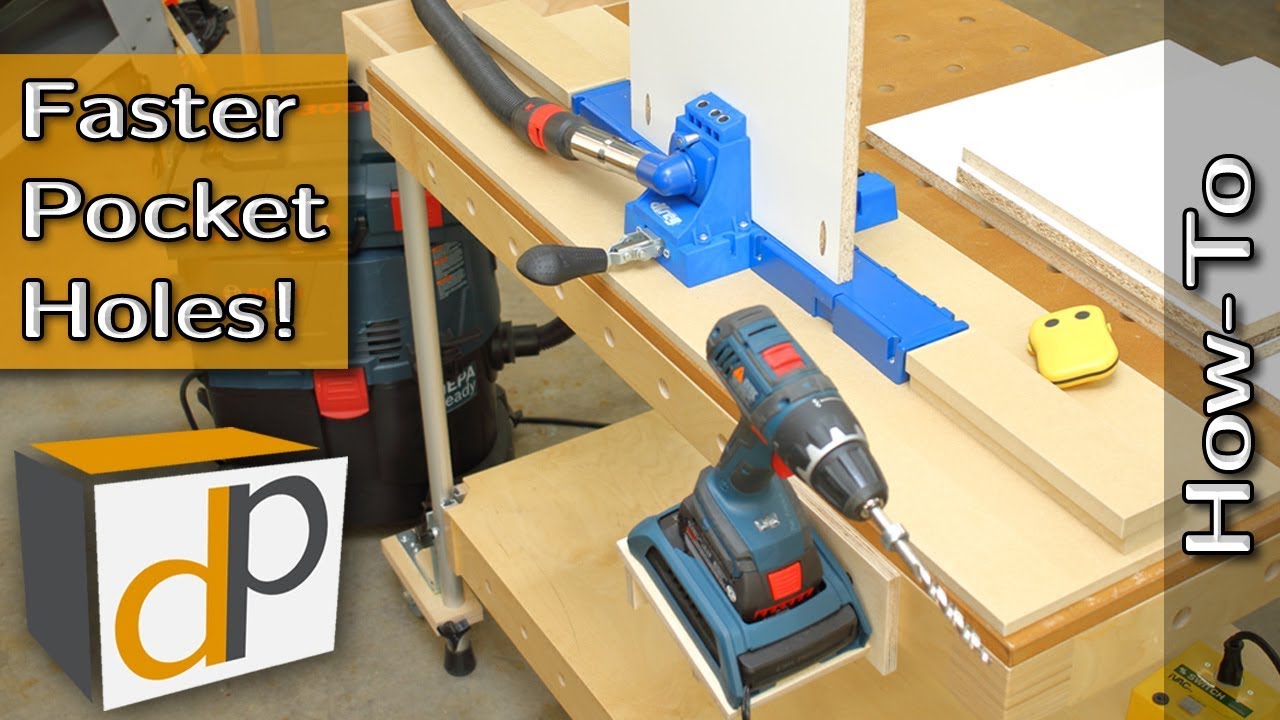
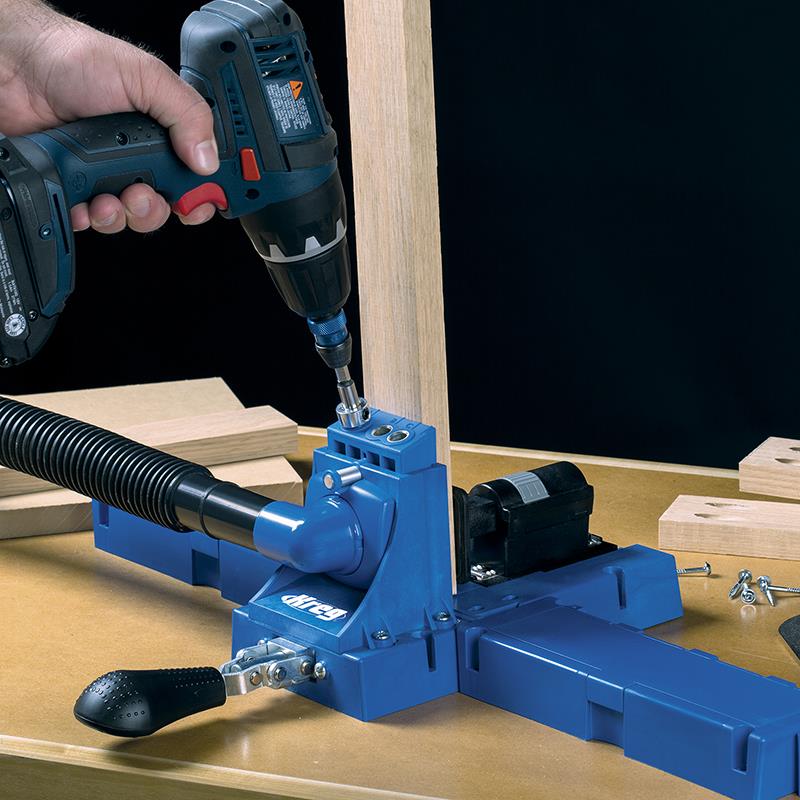
This is the next tool you should have in your van build toolkit. A good cordless drill is essential for drilling holes and driving screws. We normally hate using caulk guns because many of them are difficult to squeeze, but this caulk gun from Newborn is incredibly smooth and effective. A Kreg Jig pocket hole kit is technically not essential, but we think that using one is a great way to make strong, long-lasting joints when building furniture for your van.
In fact, we wrote an entire blog post about how pocket holes can make your van build easier. Kreg makes several kits , but the R3 is the basic one we recommend. We also recommend picking up the Kreg Face Clamp , but you could just use regular bar clamps to clamp your workpieces. Your windshield is the number one source of radiant heat getting into your van. We have Eclipse Sunshades installed on our van.
Interested in some Eclipse Sunshades for your van? This little heater can crank out a lot of heat. Our portable buddy heater made our van toasty in a matter of minutes, and our insulation kept much of the heat in when we slept. It uses 1-lb propane canisters, or you can connect it to a larger tank with an adaptor. It also has safety features such as an auto shutoff if it tips over, if the pilot goes out, or if it detects low oxygen levels.
Finding reliable cellular service and the internet that comes with it is a constant challenge in vanlife , especially if you do computer-based work on the road. It can take a weak cellular signal and amplify it into usable internet for web browsing and getting work done.
Since we got our WeBoost , we can camp for extended periods in more places than we ever could before — all because we can get internet. The OllieRoo Extension ladder is very compact and lightweight. It easily stores in the back of our van and extending it to get up to the roof is simple. This ladder allows us to do things like clean our solar panels, install new antennas, and add wiring for our portable solar panel.
This is especially good for fiberglass roofs like ours, since they may not take the weight of someone walking around on them. Our magnetic mesh bug screen lets us keep our doors and windows open while keeping mosquitoes, flies, and other insects out. The magnetic seal keeps your van protected even while entering and exiting. In our opinion, having one of these is an absolute must for living on the road — especially in humid areas.
If your vehicle has a smaller door opening like an RV, a screen meant for a standard door will work fine. We could only find standard door screens, so we bought two and hot-glued them together to cover up our side door. Our Accu-Rite thermometer helps us keep an eye on the temperature and humidity levels inside our van — all great information to have. This little unit can mount on screws, and it also has handy magnets on the back.
We use the magnets to stick it right onto the exposed metal of our vehicle frame. Ventilation is extremely important in the rain. As a bonus, it also reduces annoying wind noise while driving on the highway. The Auto Ventshade is fairly inexpensive, easy to install, and makes a great addition to any van make sure you get the correct one for your specific vehicle.
The whole thing fits under our front passenger seat. Definitely a useful item to have. These manuals are a wealth of information on everything from regular maintenance schedules to removing your rear air handler unit. A road atlas is incredibly helpful if you find yourself stuck in a dead zone without cached GPS maps.
Living on the road puts you in a wider variety of situations and environments than being stationary. It covers primitive camping, edible plants, encountering wild animals — even disaster situations like nuclear war. We have this Bulldog Car Safe hidden in our van.
It holds everything we need it to. And the way it mounts makes it difficult for anyone to remove it without the key. We have the Coleman camp stove toaster , and we love it. The AeroPress is just plain awesome. You can make great-tasting coffee and espresso drinks in under 40 seconds. The shorter brew time allows you to use a finer grind, and the resulting brew is low-acid and easy on the stomach. We make coffee a whole lot more frequently since we got an AeroPress.
And with the optional stainless steel filter , you can reduce waste and ditch paper filters altogether. This OXO palm brush really helps us conserve water while washing our dishes. We fill the reservoir with water and a few drops of Campsuds , and we only squeeze out what we need — so it takes care of both the initial rinse and getting our dishes soapy with minimal water usage. Dirt, leaves, and twigs get tracked into our van every day, and we need to sweep it out constantly.
This mini dustpan and brush set is our favorite tool for sweeping. We bought ours for our wood shop a few years ago, and we had to bring it with us in the van. But now is the time to take a step back and go on some test runs in your van. Take it out for a weekend here or there or better yet, a week or more. Try living in it as you expect to on the road. We guarantee there will be things that worked well in your head but not so much in reality. Luckily, we already had plans to return to our former home soon for a wedding — so we stayed for a little bit longer and modified things to work better for us.
If you have the available time, taking your DIY campervan for a test run or two is a great way to identify any problems while you still have access to tools, package deliveries, and a place to work. Doing this might help you nail down the type of van you want, or you might get an awesome idea for your own build. The resources on this list have a ton of great ideas and information that will help with your van build. Included are everything from awesome websites, blogs, and forums, to helpful Youtube videos and informative ebooks.
This is amazingly comprehensive, thank you for sharing! Hi Stephanie, so glad this was helpful! Hope that helps! Hopefully you can tell us if this is doable or not. We are thinking of buying an isolator, hooking that up to 2 external batteries, and adding an inverter to charge our laptops and for other accessories. Is it possible to do that? If it is possible, what else would we need? Hi James and Sasha, thanks for reaching out! While you can certainly power all those things and recharge your batteries from your alternator, having that level of power usage without solar might be challenging.
Lithium has a lot of advantages over other types of batteries, but it is also more expensive upfront. Especially if the alternator will be your primary charge source, I would get a DC-DC charger like this one from Renogy instead of an isolator. DC-DC chargers are able to accommodate the variable voltages put out by modern alternators, and do a better job of fully charging a wider range of batteries, including lithium. Electrical definitely can get expensive, but if you plan to camp out for several days then a little bit of solar can go a long way towards keeping your batteries topped off and keeping you off grid.
A basic W system is a great place to start for most people. This is the most detailed and patient cvan construction manual I have ever seen, thank you so much! Too practical! Did you have YouTube Channel?
Hi Jade, so glad you found this helpful! I have sail for years and for months using only a alcohol stove burning methyl hydrate.
I found it gave off more water than propane and nasty fumes if you button the boat up. You will only button up once when burning methyl, once the choking, burning throat and eyes kick in. Propane is a real hazard on a boat bc it is a heavy gas and will end up in the bilge. I work for years for Bell in construction and ran a generator every day and hydraulics on a bucket truck a few times a week in Ontario Canada.
Plus we ran our truck none stop all winer when working for heat and carried a 50 lbs portable propane tank inside the truck which basicaly kept in a locker standing up with a 1 inch hole in the floor. Nothing beats a generator if used at the correct time and place. The other thing I never see addressed in van life is a second alternator or up graded alternator.
Keeping in mind some lower power alternators put out more than bigger ones at idling and bigger ones put out more while at highway speeds. Ideally having one of each. Hi Steve, thanks for the insight. I've built farmhouse end tables and coffee tables. I've built mallets, I've built signs and several other small projects. In this review I will tell you what I like about the saw, and then I'll tell you what I really don't like about this saw. It may be a deal breaker for a lot of people.
We built this DIY modern farmhouse coffee bar sideboard table using plywood and pine. You can build one like this as well using basic tools. This is a great beginner woodworking project. Check out the build video and supply list below. We started a weekly woodworking Best Price Kreg K5 Pocket Hole Jig Ltd show covering all types of woodworking topics and the woodworking business. We want to share what we have learned so far.
As a beginner woodworker you will make mistakes. However, I would like to share with you five common woodworking mistakes beginner make. Hopefully by sharing this information you will avoid these mistakes.
Watch the video below for the full list. Check out our pantry makeover! We built this pantry on a budget so we could get better organization in our kitchen. We love building home organization projects help maximize our space. If you are looking for kitchen organization tips and ideas, building a DIY pantry could be what you need. I wanted to build a wooden mallet and make them unique. I started by ordering purple heart wood, ambrosia maple and birdseye maple from Woodcraft.
In this video, I show you how to build this easy DIY farmhouse style end table with a drawer.


|
Kitchen Drawer Hinges Effect Wood Veneer Rolls Canada University Woodwork Ideas 30 Bed Sheet Fasteners Walmart Zoom |

GUNESHLILI
10.05.2021 at 13:14:16
ANAR_Icewolf
10.05.2021 at 15:54:18
Grow
10.05.2021 at 18:31:20