Woodworking-plans-hall-table-noise,circle-cut-wood-home-depot-online,japanese-hand-saws-australia-journal - Test Out
Skip to Content. Looking for Something? Search anything and hit enter. Home Tables — Hallway and Console. Category Tables — Hallway and Console This list of hallway table free woodworking plans are projects we have found across the Internet.
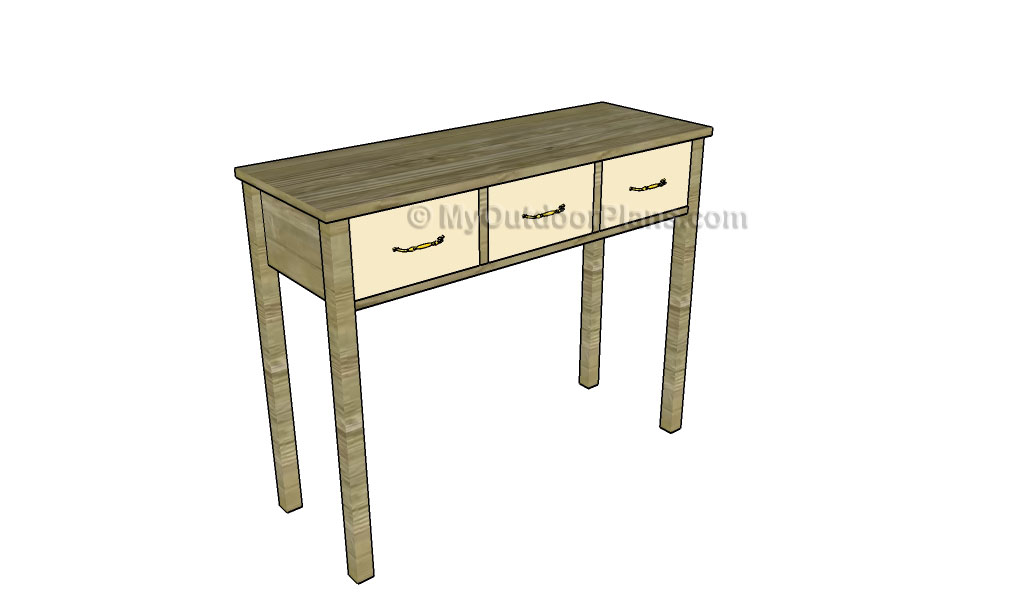
At just over 7 inches wide, this entryway table is perfect when space is tight. This sofa table measures 6 feet long and 14 inches deep. You can adjust the …. A hall table is a perfect place to set the stage with your personal style. Whether your door opens directly into the living room or you have a grand foyer that's large enough for small parties, we have all the hall table plans you'll ever need.
There's even some tiny tables that mount to the wall, so they take up only inches of precious floor space. These narrow and sophisticated tables are great as console tables behind a sofa and they make great serving buffets for casual dining.
Choose a classic woodworking plan or create a whimsical attention getter with plumber's piping and found materials. Whatever you choose, your home will say thanks for the great new decorating accessory. Home PlansPin. Hall Table Plan and tutorial. Sofa Table Planx. Pottery Barn Inspired Console Table.
How to Build a Sofa Table. Space-Saving Entry Table. Build a dining room console table. Farmhouse Snack Bar - Buffet. Build it: Console Table. Basic table tutorial. Wipe off any excess glue with mineral spirits, sand the plugs flush, and re-apply stain as needed. Allow to dry. Paint the legs except for the ends and allow to dry.
We used Behr Raging Sea. Use the guide for drilling pocket holes in the side rails image 1. Paint the side rails except for the ends and allow to dry. Drill two pocket holes on each end of the stretcher. Stain except for the ends and allow to dry. Position the side rails flush with the top end of the end assemblies, with the pocket holes drilling perpendicular to the long side pointed toward the top of the assemblies. Place a white index card, for example between the face of the clamp and the leg to limit any marring.
Use the layout for the end rails to create the middle rail, including the pocket holes drilled 3 inches from the end. Paint except for the ends and allow to dry.
Look at the end grain of each of the boards. You'll notice the grain pattern may have a curve, either up looks like a smile or down looks like a frown. Position these so that the end grain patterns alternate between the smile up curve and a frown down curve.
Don't position two frowns or two smiles adjacent. This helps limit any buckling or curvature when gluing up the top. So will another step mentioned later. Apply painter's tape to one face of each of the 2x2 oak squares. You will use these oak squares as cauls when clamping the top slats. Position three or more bar clamps open on a level work surface and position the top slats on the clamps in the pattern you determined and with an inch or so between the parts.
Apply glue to the joining edges, butt the parts together with the ends flush and clamp lightly in place. Position the cauls, tape side against the top slats and butted against the bar clamps, and clamp lightly in place image 1. Continue to tighten the clamps on the top slats and cauls, making any adjustments as needed. Allow the glue to set.


|
10-inch-table-saw-blades-lowes Types-of-mallet-hammer-360 Swiss-wood-carving-museum-map |

StiGmaT
22.02.2021 at 23:38:53
Roska
22.02.2021 at 10:33:16
Ledi_Kovboya
22.02.2021 at 12:53:28
AXMEDIK_666
22.02.2021 at 15:26:31
Elektron
22.02.2021 at 16:55:37