Router Table On Table Saw Version,Openvpn Hardware Not Working,Homemade Go Kart Plans Wood - Videos Download
Youtube Review. Facebook Review. Sign In Register. Plans Swag. Bug Fix. Sliding-Top Router Table. Add to wishlist. Quantity: Sliding-Top Router Table quantity.
Deluxe PDF Plans Dimensions, cut list, drawings, build photos and step by step instructions Dimensions: Inches with metric cut list Tools required: Table saw, pneumatic nailer, drill press, router table Build Video: More about our deluxe plans: Our deluxe project plans are more than just a set of dimensions.
Below are some examples of what our deluxe protect plans look like. This plan will be similar. Returns and Exchanges There are a few important things to keep in mind when returning a product you purchased. You can return unwanted items by post within 7 working days of receipt of your goods. You have 14 calendar days to return an item from the date you received it.
Only items that have been purchased directly from Us. Please ensure that the item you are returning is repackaged with all elements. For more information, view our full Returns and Exchanges information. Related Products New! Quick View.
Plans , Shop Projects. This may be the only clamp rack you ever need. It will hold between clamps, depending on the type, including F-clamps, parallel clamps, pipe clamps, bar clamps or pistol grip clamps. Set up the rack according to the types you own now. If you get more of a different type later, the rack adjusts to always efficiently use the valuable wall space. And it only requires a half sheet of plywood!
My version of the router plane is easy to make from a scrap of wood and some easy to find hardware. And unlike other homemade versions, this has a micro-adjuster to set the depth and shaving thickness.
Plans , Table Saw Jigs. This taper jig works like a sled, securely holding your workpiece and keeping your hands safe throughout the cut, even for narrow tapers, such as chair legs. My version is a little different that his. It adjusts equally from both ends of the fence, and will cut wide panels as well as narrow stock. Traditional workbenches are great! By using our site, you agree to our cookie policy. Cookie Settings. Learn why people trust wikiHow. Download Article Explore this Article parts.
Tips and Warnings. Things You'll Need. Related Articles. Article Summary. Part 1 of Use a straightedge and a pencil to make the lines you'll along. Push the board slowly through the table saw to make a straight, even cut.
If you want to ensure you're cutting a straight line, use a guide along one side of the plywood. The size of the plywood can be increased or decreased depending on how much tabletop space you want. Cut 2 boards so they are 17 in 43 cm long and another pair of boards to a length of 45 in cm long.
Arrange the boards into a rectangle so the shorter boards fit between the longer ones. Connect the ends of the frame boards using wood screws with a drill.
Pre-drill 2 holes into the ends of the boards so the wood doesn't split. Then drill in 2 construction screws in each corner to attach the longer board to the end of the shorter board. Make sure the screws are completely tight so the frame doesn't fall apart. Use angle brackets and wood screws to secure the frame to the tabletop.
Use 2 angle brackets for each board and place them at least 4 in 10 cm from the inside corners of the frame. Screw them into the frame, then screw the other side of the bracket to the bottom of the table. If your frame still fits loosely to the tabletop, use another metal bracket in the middle of each board.
Measure the distance from the floor to your waist using a tape measure. Once you find the height, make marks on your boards so you know where to saw them. Cut the boards using a table or circular saw and sand the bottoms so they sit flat on the ground.
You can also make the table the same height as your current workbenches if you'd prefer. Screw the legs into the support frame at each corner. Place the legs in the inner corners of the support frame you've built. Drill 2 construction screws into each leg to attach the legs to the frame's shortest sides. Once the legs are attached, flip the table over so it's upright. Add cross supports between the legs 8 in 20 cm from the floor. Pre-drill the holes through the boards and legs so the wood doesn't split.
Attach the supports between each leg with construction screws and a drill so your table is sturdy when you use it. If your wood cracks, squeeze wood glue into the gap and clamp it tight so it is secure. Part 2 of Place the acrylic on top of the table at least 4 in 10 cm from one of the long sides.
Use a pencil to draw a line on the tabletop in the shape of the acrylic. Otherwise, you can place the hole in the center of the table. Use a straightedge and a pencil to draw a second square inside the one you already traced.
This square is what you'll cut out so your router can fit under the table. Measure the width of your router to see if you need to make any adjustments.
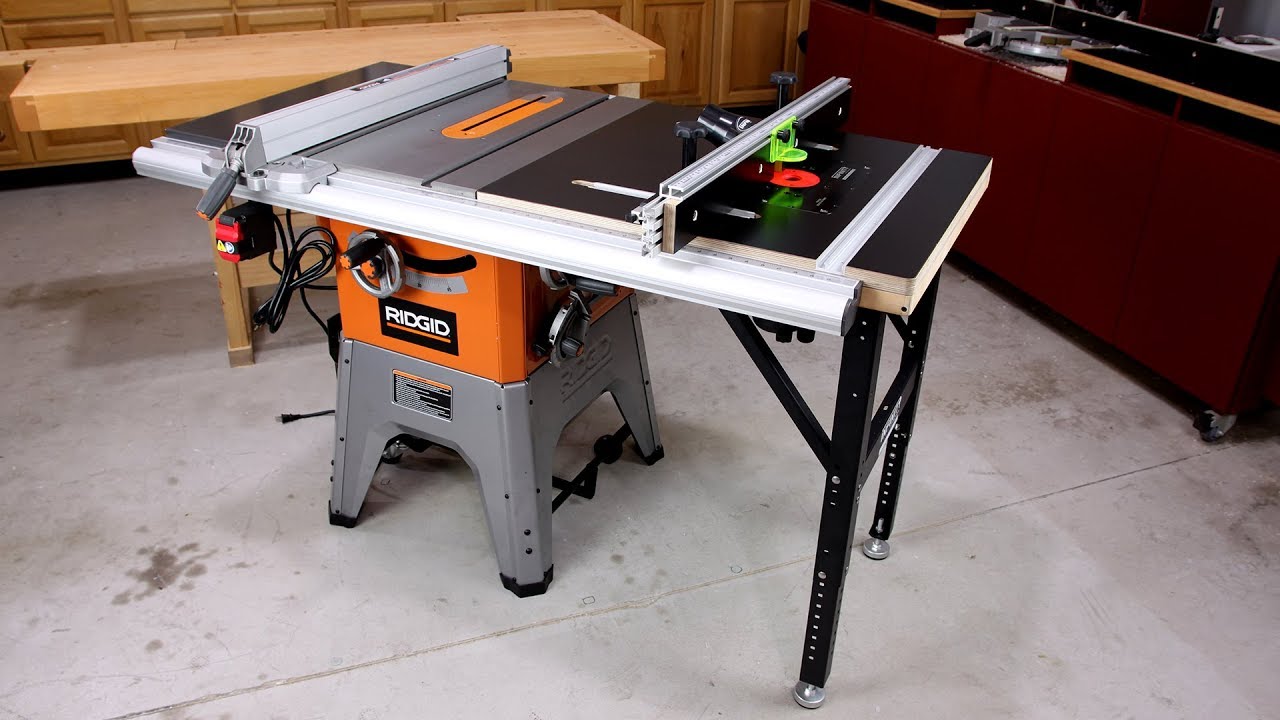
Cut holes in each corner of the smaller square with a 1 in 2. Place your drill bit as close to the corner as you can. Next I set the rabbeting bit's depth of cut to be slightly deeper than the thickness of the insert, and use it to route out the recess. Since the router lift comes with leveling screws, which screw in around the perimeter of the insert, they can raise the level of the insert plate to match the tabletop.
I checked that the insert was sitting flat without rocking in the recess, and that it was also flush with the tabletop. The insert has two bumpers on the sides that bear on the sides of the recess, which I need to extend out a bit with a couple scraps.
Next, I add some scrap pieces to the corners for reinforcement and also for the corner mounting screws. With no more need for the router base, I remove it and attach the motor body to the router lift. This is a simple matter, only needing to tighten one screw on the collar to hold the router in place. I use a brad point bit the same size as the corner holes to mark the center of these holes. Then I screw in threaded inserts in each of the corners, and use machine screws to fasten the insert to the tabletop.
Next in the process is making the switch box for the router itself. This switch will sit under the tabletop so that I can easily hit the OFF button with my leg if need be. I covered something very similar to this already, this version just uses two back-to-back junction boxes with the wires passing between them.
I then make a mount for the switch out of some scrap plywood. This mount also has a hole drilled in it to hold the crank handle in a convenient spot. With the four holes drilled in the mounting bracket, attach it to the underside of the table. Then plug in the router to the switched receptacle.


|
Marking Knife Comparison Query Woodworking Projects New Year Cabinet Drawer Slides Full Extension Python |

GENCELI
01.10.2020 at 12:43:16
Bakinskiy_Avtos
01.10.2020 at 15:23:42
Alla
01.10.2020 at 21:39:21
Sahilsiz_Deniz
01.10.2020 at 14:25:48