How-to-make-a-frame-with-molding-design,locks-for-furniture-windows,best-raspi-projects-inc - Tips For You
High quality and tasteful doesn't have a style. Custom cabinetry, crown mouldings, finished in place wood floors they are classic - never in style never out of style. What side is up on crown molding? Crown molding can look good both ways: in its usual alignment or upside-down, which makes it difficult to determine the end that's supposed to be the top. Generally, the end with the least amount of detail goes on top, and the decorative trim faces the bottom.
How do you cut angles for crown molding? Using a power miter saw is the best way to cut crown moulding angles. The saw can be adjusted to cut at any angle—set it to 45 degrees for one side of a standard degree corner. The saw can be set to 45 degrees to the left or 45 degrees to the right. How do you secure a mirror in a frame? Put a thin bead of silicone around the edge of the mirror or inside lip of the frame. Carefully align the mirror to the back and press it into place.
If the picture frame has a backing material, you could also attach the mirror to that instead and use it to secure the mirror inside the frame. Can you reframe a mirror? Rather than throw the mirror away, you can reframe the mirror. Old frames are sometimes more valuable than they look, so take any antique mirrors to be valued before you begin replacing their frames. If you find that the frames are simply old and are not valuable, you can proceed with the steps below.
What do you think? Is this a DIY project you want to tackle in your own home? It certainly gives you a lot of bang for your buck! Want to take a closer look at this guest bedroom? Take the full tour here. We even made a video tour for you! All efforts and opinions are my own. To read my full disclosure policy, please click here. It looks very beautiful. This idea presented by you is very useful. This idea of yours made its decoration very attractive. You used the trim very well. Sounds very creative and unique!!!!
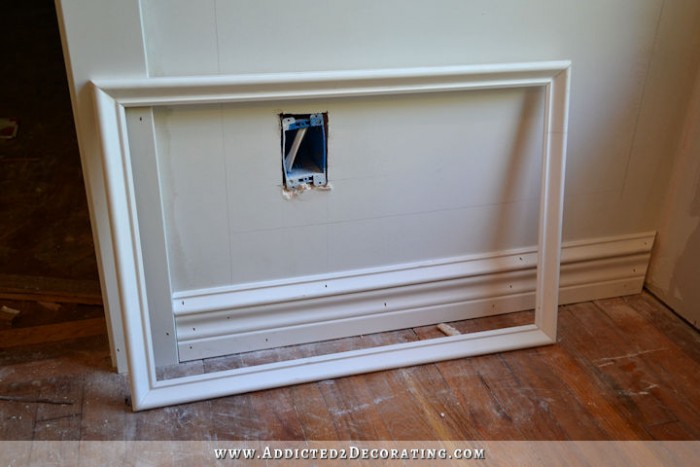
Thanks for sharing such an interesting post……. I really like the ornamental corners. That really dresses the whole project up. They look great. This looks amazing — very inspirational! One question — do you have a link to the moulding that sits within the corner of each picture frame? Good look and great job. I prefer using molding that will lay flat on the wall but still be dimensional. Where the inside and outside edges lay flat against the wall rather than look like a bunch of picture frames hanging on the wall.
The outside edges of the door trim you used is a great dust catcher. The 4 inches temperate is a genius idea, I wish I come up with something like this before the project.
Plex isn't a MUST but it can be nice to avoid potential direct contact with your art, photo, diploma, signed letter from Beyonce. Insert glass, matte board if wanted , thing being framed, backing board and finally glazing points. These are an inexpensive way to insure that your beautiful hard work doesn't fall out of the back. Here is a slow video about how to insert.
You can also push in with a screwdriver or chisel. Attach wire or desire hanging mechanism to back. I am looking at tools to buy for this project. When you say "skill saw", am I looking to buy a skilman saw, or a miter saw? And what are you referring to when you say "skill saw and stop"? What is a miter box? Reply 5 years ago on Introduction. RachelM5, When he says "Skill saw" it is a confusing term.
Or you could go the old fashioned way with a Miter box and a Hand Saw for about 8 bucks. All a Miter Box consists of is a space to set the wood, and a fence to properly support it. The fence has various angles pre-cut into it to guide your hand saw to cut the Angle. Reply 6 years ago on Introduction. Thanks toad, I really like that idea to help hold the frame together!
Where does one find the V-nails? Thanks for showing how to make a frame. I bought an inexpensive used miter saw for this purpose only I had no idea how to make the frames. Now I do!! By irisgottlieb Follow. More by the author:. About: Illustrator, observer, layman scientist, collector based out of Oakland, CA.


|
Single-stage-dust-collector-reviews-working Free-garden-furniture-woodworking-plans Wood-vises-for-workbench-apk New-cnc-router-machine-system |

NASTRADAMUS
03.05.2021 at 17:19:48
ypa
03.05.2021 at 13:48:59
DangeR
03.05.2021 at 14:56:54
8
03.05.2021 at 20:33:17
Lady_Sexy
03.05.2021 at 10:14:43