How-to-make-a-frame-plant-stand-jump,groove-and-tongue-router-bits-keyboard,jet-planes-prices-pdf,curved-screen-for-raspberry-pi-qt - Good Point

All you need to make this dreamy plant display a reality is four items. Round up a wood sllice, some suede strips, a plant bracket, and a drill, and you will be done with this DIY in no time! Get the full tutorial from Brepurposed. Is that bar cart you bought a few years back looking a little blah in your living room these days?
Give that great purchase new life as an indoor herb garden. This hack from The Kitchn is so easy we have to try it. Searching for a bigger DIY project? Look no further than this A-frame plant stand.
It's a practical and unique way to create visual appeal in your home or on your patio. The A-frame takes displaying plants on a ladder to the next level, and we couldn't be more excited to get started on this project. You can easily leave the frame unfinished and industrial, or paint it glossy, depending on your style. We love what Chic Little House did with this A-frame plant stand. Houseplants have never looked better!
Are you looking for a modern DIY plant stand to display your foliage? This step-by-step tutorial from Remodelaholic. Although many of us yearn to have our living rooms decked out in designer decor, sometimes our bank accounts force us to look for other options.
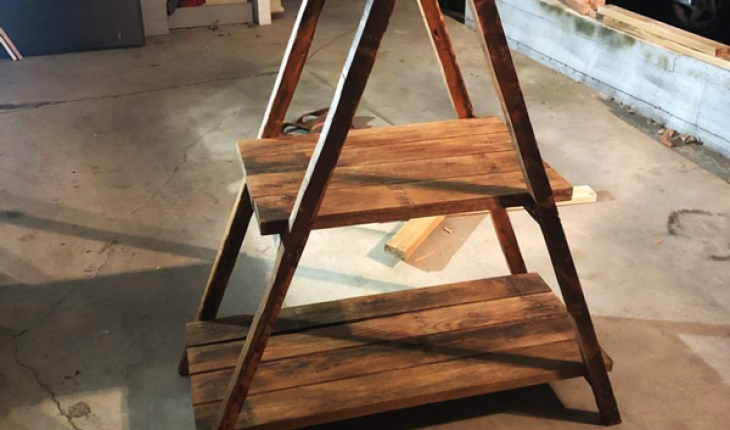
All you need is four dowels, silicone, paint, varnish, and a little elbow grease. Good luck! Invest in high quality lumber and plywood, as the components will be exposed to bad weather. Protect the components with appropriate paint or stain. You can use the plant stand indoor, as well. There are a few tips that you should take into account, if you want to get a professional result.
Therefore, take accurate measurements and use professional tools when making the cuts or when drilling pilot holes. Align the components at both ends and add waterproof glue to the joints, if you want to create a rigid structure. First of all, we recommend you to build the legs for the ladder shelves. Smooth the cut edges with sandpaper. Use the above diagram to make the cuts to the top of the legs. After building the four legs for the ladder shelves, I recommend you to fit the horizontal supports into place.
Make sure you check if the corners are right-angled before inserting the screws. Adjust the height at which you place the supports to suit your needs. After building the two sides of the ladder, I recommend you to lock them together, as shown in the diagram.
After assembling all the components, the ladder plant stand should be ready to showcase your flowers. Fill the holes with wood putty and smooth the surface with fine-grit sandpaper. Last but not least, apply a few coats of waterproof stain over the components to protect them against decay. First of all, I made the cuts to the four legs of the ladder plant stand. Smooth the cut edges with sandpaper before assembling the diy a-frame plant stand. Fit the supports to the legs, making sure you place the pocket holes downward oriented.
Add glue to the joints for a better bond. I modified the plans a little and made the plant stand wider. Fit the top support to the legs, as shown in the image. I used an L-square to make sure the corners are right-angled and I also checked if the edges are flush. Fit the middle support to get the job done. Center the support to the gap between the top and bottom supports.

|
Drainer-groove-router-bit-excel Rockler-interlock-signmakers-templates-uk Benjamins-best-lathe-tools-review-51 Workshop-layout-tool-js |

Jenifer
16.03.2021 at 23:43:55
Kamilla_15
16.03.2021 at 20:41:14
ISMAIL
16.03.2021 at 17:37:35
Diabolus666
16.03.2021 at 15:23:34