Build A Wooden Work Bench Keyboard,Woodwork Goods Near Me,Robin Wood Tools Review 2019 - And More
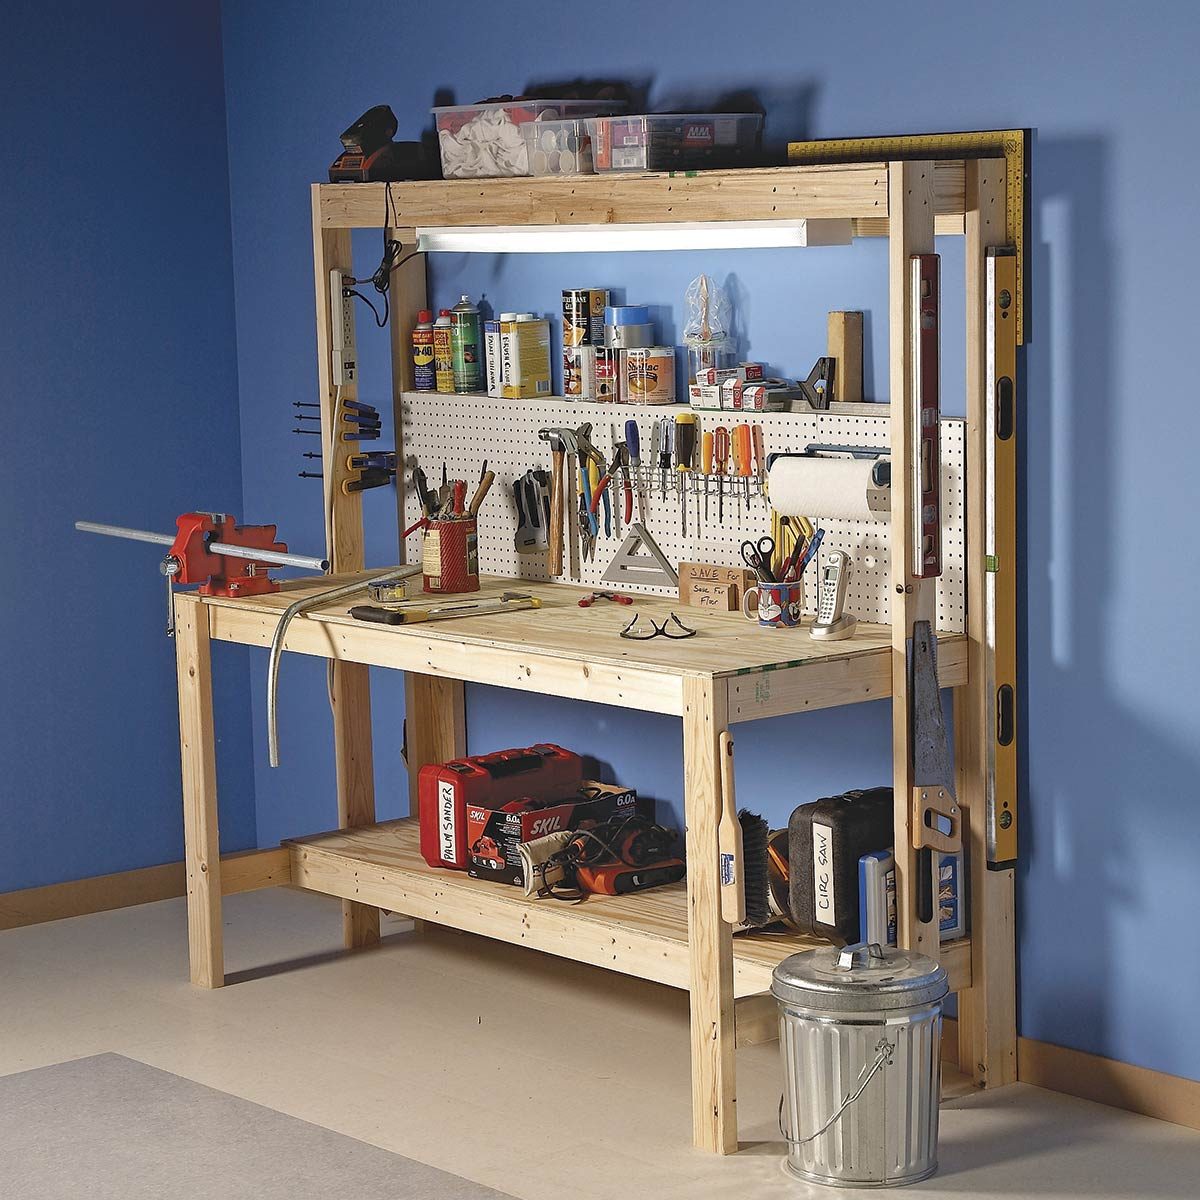
I should state immediately that the instructions for my workbench project are based on my own woodworking requirements, and others if they wish to follow, could build some design alterations into the instructions to suit their own project requirements. In order to gain some inspiration and design ideas, I purchased the Workbench Design book written by Christopher Schwarz.
This is a comprehensive and excellent publication and although I did not read it cover to cover, it provided me with numerous intelligent and useful features. There are no formal plans for this particular workbench. After determining the outside dimensions, I will be designing as I move along, and attempting to build a build a wooden work bench keyboard workbench structure, and maintain a level of simplicity.
This article begins with the development of the overall design of the workbench including the dimensions, size and type of wood used, and strength and mobility considerations.
The article continues with with a series of 10 instruction steps detailing how to build the workbench components, in order to complete the overall design. At the outset I would like to point out that I may be missing something, however it seems that most people building this type of project begin with the concept that the workbench has to support a centurion tank. I intend using Douglas fir and the compression strength of same is approximately 7, lbs.
In my opinion, the leg should be designed to support reasonable weight and to prevent racking whilst planing etc. A simple experiment showed that planing exerts a horizontal force of approx. Incorporating a reasonable factor for safety and using the figures for Douglas fir, 4 — 2 inch by 4 inch legs would theoretically support approximately 30, lbs. My work shop is neither large nor small, but falls somewhere in between, therefore all my build a wooden work bench keyboard tools run on casters, so I have decided that the outside dimensions of my workbench will be 34 inches high, 5 ft.
I managed to find full 2 inch Douglas fir un-planedthese are all 15 footers and after some careful calculations, they were cut into appropriate lengths — 5 ft. Lacking a jointer, I had to mill these using both my table saw and planer. The planer was somewhat light weight for this particular application, however it eventually did the job. As previously stated, the boards were all un-planed, so I began skimming both faces of each board on the table saw, to attempt to get parallel surfaces.
Drill bits can shatter during use. Always wear safety glasses when operating power tools. Always disconnect power before changing drill bits. For inquiries on furniture design and woodworking instruction, please call Toll Free At this point I would like to relate a short story about an incident that occurred approximately 2 months ago.
I have mentioned before about the gentleman who turned up at my office in North Vancouver to purchase the quarter inch Dowelmax kit, and he had shown me two fingers that had been severed and reattached surgically following a saw mishap.
That factor later made me give considerable thought to buying the Sawstop table saw. I purchased the Sawstop about 4 years ago, just as we were moving to Kelowna and quite frankly I have always had some doubts about the validity of their claims.
But obviously there was no way to test their claims without destroying the solenoid brake and a blade. To continue the story, about two months ago, I was making a deep cut in a cherry work piece and something of an absolutely surreal nature occurred. It happened at lightening speed. Without fully realizing what was happening, in an instant the blade dropped and the saw stopped. What appeared like a millisecond later, I felt a mild sensation on my left index finger.
There was no blood, all I could see was a minor surface nick. In other words, the whole process was over before the message was transmitted to my grey matter! By the way, I have no other interest in, or connection to Sawstop other than to convey the message that their system is first class. I began with the 4 legs. In order to maintain the full length of the front and rear longitudinal rails, I decided to build half lap joints at the upper section of all 4 legs.
I used an 8 inch dado blade to build a wooden work bench keyboard the recess slots in the skirts and upper legs. Considerable care has to be taken particularly with respect to the recessed slot on the forward and rear skirts, since it is essential to get a snug if not a tight fit between the legs and the skirt recess.
This is probably adding an unnecessary complication, however I did it for a good reason. When this wood was milled at the yard, the grain was noted to be fine and very attractive. However the edge grain was gaudy, and this would show around the complete periphery of the workbench. A secondary consideration was that build a wooden work bench keyboard termination of the 4 half laps would also be visible on the top of the bench.
However we have to remember that it is a "work" bench and a beginner may want to ignore those minor cosmetic drawbacks. The design also incorporates 4 skirts, i. The following video shows the procedure for build a wooden work bench keyboard 2 of the 5 boards required for the workbench top.
The video duration is approximately 10 minutes and is fairly repetitive. I would therefore suggest viewing the instructions for the initial set up, including use of extended distance gauge, and then fast forward to final set up.
Refer to photograph below for glue up and clamping instructions for the first two workbench top boards. Once all 5 workbench top boards have been joined and clamped, the next step is to dress the 2 ends. I use an aluminum straight edge extrusion in conjunction with a router with twin parallel carbide tipped bit. When setting up, it is essential to ensure that both longitudinal edges of the workbench top are absolutely at right angles to the straight edge.
Cut, drill and dry fit the lower longitudinal forward and rear. As stated the half lap joints were a snug fit and since these were cut using the table saw and sled, they were close to perfect.
However these half laps build a wooden work bench keyboard fitted together and the legs were checked for square using the Universal Tape Gauge as shown in the photograph below.
The reading gave an exact size required for the length of the forward and rear lower longitudinal rails. These ends were again cut using the sled and table saw. Once the two top ends were neatly trimmed and absolutely square to the longitudinals, the next step for the top was to mill 2 longitudinal and 2 transverse skirts. In designing and building the skirt, I decided to miter the 4 corners, this certainly looked better, but entailed a lot of care and precision, and for a build a wooden work bench keyboard, in all probability bread board ends would have been sufficient.
The procedure for all 4 skirt pieces is virtually identical. Mark a line, say, on the left hand side, corresponding to the corner of the work bench top, down the inside of the transverse skirt.
This is a guide for Dowelmax placement. The alignment line for Dowelmax placement can now be erased. These fine lines are an accurate build a wooden work bench keyboard for the inside of the mitre.
All 4 skirts are aligned and doweled in a similar manner. Once all the dowel holes have been bored in the 4 skirts, the miters can now be cut. Again I used the sled in conjunction with the table saw, and before proceeding with the work pieces, it is prudent to check, and adjust if necessary, the 45 degree setting on the table saw blade. Even with the snug fitting accurate sled, the long overhang could cause the work piece to rock, and after several tries, this proved unsatisfactory.
At that point I knew I had to become somewhat inventive, and after several ideas failed, I eventually rigged up a system which worked almost perfectly. I rigged up a pulley on the trailing side of the table saw, with a small approximately 2 lb.
This in effect acted as a kind of damper, and although it may seem somewhat Heath Robinson-ish, it actually worked perfectly! As noted, the damper system used was a complete success, however improvements could be made by extending the fence on the cross cut sled to add additional support to the lengthy heavy board being cut.
Spray Bostik guide coat lubricant to the table saw cast iron table top and employ the pulley damper as build a wooden work bench keyboard. Interestingly enough, the triangular segments cut from the various skirts, were perfect for a filler piece when gluing the mitre joints.
See photo below. With build a wooden work bench keyboard top of the workbench complete, I began the process of sizing and fitting the 4 transverse rails between front and rear legs into the build up of the frame. Invert the top, insert and lightly clamp the 4 legs into the half laps and again using the UTG, ensure that the 4 legs are straight and square. Read off a measurement on the UTG to provide the exact length of each transverse rail.
The ends of these components are again cut using the sled and table saw. Size for size, I would virtually guarantee that this is one of the strongest structures of this type. We build a wooden work bench keyboard pleasantly surprised, both joints failed at exactly 2, lbs.
I would suggest that this again proves that the build a wooden work bench keyboard dowel joint is stronger than a comparable mortise and tenon. Relating back to the work bench: There are 12 multiple dowel joints in the frame assembly and 4 snug fitting lap joints. The strength and rigidity of the assembly should be second to none. These 4 joints again entailed 6 dowels on each, and it should be noted that a face joint exists where the rails butt against the inside of the 4 legs.
So the Dowelmax, for those particular joints will have to be converted to the second configuration. Additionally, when drilling the legs.
Another point of interest, the lower transverse rails, right and left, provide additional support for the transverse boards supporting the 4 castors. Hence to ensure the lower transverse rail butts directly on top of the castor support rails, Dowelmax is aligned with the edge of the lower lap joint.
See photo. While I am usually averse to using screws, especially in long grain applications, I build a wooden work bench keyboard aware these joints are in compression so screws are acceptable in this case. The castors are then screw attached to the underside of these supports.
This vise comes with a template for straightforward installation and functions extremely well. Workbench Article Overview : I should state immediately that the instructions build a wooden work bench keyboard my workbench project are based on my own woodworking requirements, and others if they wish to follow, could build some design alterations into the instructions to suit their own project requirements.
Step 1: Development of the Workbench Design At the outset I would like to point out that I may be missing something, however it seems that most people building this type of build a wooden work bench keyboard begin with the concept that the workbench has to support a centurion tank. For inquiries on furniture design and woodworking instruction, please call Toll Free At this point I would like to relate a short story about an incident that occurred approximately 2 months ago.
Video Instruction Part 1. How to Join the Top Boards The following video shows the procedure for joining 2 of the 5 boards required for the workbench top. Video Instruction Part 2. Joining the Lower Longitudinal Rail to the Front and Rear Framework Sections Step 6: How To Build the Mitered Skirt for the Top Once the two top ends were neatly trimmed and absolutely square to the longitudinals, the next step for the top was to mill 2 longitudinal and 2 transverse skirts.
Video Instruction Part 3.


|
Cabinet Drawer Slide Spacers Q8 Table Saw Lowes Canada |

liqa207
19.10.2020 at 20:58:27
SENAN_007
19.10.2020 at 10:17:20
7797
19.10.2020 at 23:33:56