Mounting Drawer Slides On Bottom Youtube,Jet 1221 Variable Speed Midi Lathe Tv,Rockler Deluxe Murphy Bed Hardware Kit Usb,Vision Hardware For Special Conditions Analysis - Step 3
Start by ripping two side pieces to the cabinet depth minus the frame thickness ; then cut them to length. Label them left and right with pencil marks on the inside faces.
Now subtract the thickness of the back from your fence setting, and cut the bottom panel to width. Then cut the bottom to length. Then notch the bottom front corner of both side pieces for the toe kick [ below ]. A toe kick allows you to stand closer to a cabinet without bumping the front with your feet. Drill two pocket holes on both ends of each part. For even spacing, make a template from a piece of perforated hardboard as a drilling guide.
Click here to watch a free video on how to drill shelf pin holes. A dead-square cabinet requires a dead-flat assembly surface to avoid twisting the glue-up.
First lay a side panel on your work surface with its dadoed face up. Apply glue to the dado and insert the bottom. Then glue the dado on the other side panel dado and mount it on the bottom. Then cut two stretchers that length to space the front drawer stretcher that distance from the front top stretcher and pocket-hole-screw the drawer stretcher in place [ below ]. Measure and center the back drawer stretcher flush with the bottom of the front drawer stretcher.
Check for square, as with the upper cabinet [ below ]. After the glue dries, cut the back to fit. Then glue and nail it in place. You can join face frame parts using everything from dowels to half-laps to mortise-and-tenon joints, but we like pocket-hole joinery.
Why those sizes? From that number, subtract twice the stile width for the rail lengths. Position the middle rail so its top edge is flush with the upper face of the middle stretcher.
Cut the upper and lower vertical dividers to fit between the middle rail and the top and bottom rails. Using two pocket-hole screws at each joint, assemble the frame [ below ]. Check that the top stile ends sit flush with the top ends of the case sides. Clamp the frame in place, including the middle rail to the drawer stretcher [ below ]. Then fill the holes. If you have put off learning to make cabinet doors, these easy-to-cut stub-tenon-and-groove joints will help you overcome your door horror.
Divide the job into these six simple steps. Then cut a groove the length of the scrap. To ensure the groove is centered, turn the scrap end for end, and make a second cut [ below ].
Cut grooves in both stiles and rails. Assemble and clamp the frame and panel, measuring between diagonal corners to check for square. Thanks to their adjustability, European-style hinges make mounting doors as easy as assembling them. Place a hinge cup in a hole with the straight hinge edge parallel to the stile edge [ below ], and mark the center of the mounting screw slots. Then drill screw pilot holes and install the hinge. Repeat for the other hinge.
Hold the door in position centered vertically in the opening, and mark each hinge screw mounting location at the center of each oblong hinge screw hole along the frame edge. Drill pilot holes and screw the door to the frame. Refer to the hinge instructions for details on adjusting the door position. Imagine all the potential pitfalls about making drawers. Test the saw settings in scrap; then cut dadoes at both ends of the two sides.
It should just touch the teeth of the blade. Next, rabbet both ends of the drawer front and back to create a tenon that fits the side dadoes [ below ]. Tenons should fit dadoes snugly, with the outside faces of the front and back flush with the ends of the sides.
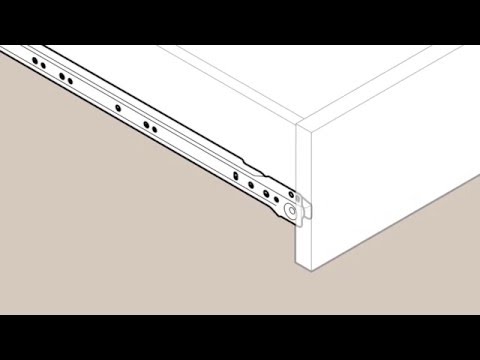
Glue each tenon, assemble and clamp the drawer, and then check for square. Assemble a frame-and-panel drawer front as you would a small version of a cabinet door. For order questions, please contact customer service directly at or via our contact form. Says priced by set so seems per pair. If my drawer has a depth of Do they make a side mount version similar to this product? I don't see to be able to find one. Possible I'll need to build a partition between my 2 drawers so I can use bottom mount on the top and bottom drawer?
I'm looking to replace existing HB, is HB the same bracket? Will the 21" undermount fit a drawer box with an outside dimension of 22"? Welcome visitor you can Log in or Create an account. The final cost of the order will be calculated at the checkout page. Enter keyword This site requires JavaScript to function properly. Please enable JavaScript in your web browser.
Compare product with:. Product comparison. Click to zoom. Trade Professional? Click here for more information about benefits just for you. Shipping delays may occur. To My Favorites. To comparison list. Add to cart. Want a year of FREE shipping? Click here to learn about our PRO Membership. Related Products. Type Locking Devices. Bracket Type Rear;. Type Brackets. Product details. Questions and Answers. Type your question below and we'll check if it is already answered.
Learn more How to Use This Tool Type in your question. If we find a matching question in our database, we'll show it immediately.
If there are no results found, please post a new question here. Answers will come from other customers and from our product experts. Have a question about our products?
Please Log in to post questions. John T. You will receive 1 left and 1 right hand slide for 1 drawer. Pricing is based on 1 set of 2 slides. I did not mean to report as inaccurate, I thought it was a link that would give me additional information I Have This Question Too No, your James N.


|
Fine Woodworking Chisels Questions Kreg Jig Screw Chart Template Kuksa Carving Kit |

SeXy_GirL
16.04.2021 at 12:13:43
SABIR
16.04.2021 at 11:45:42
xuliganka
16.04.2021 at 12:56:57
Dusty
16.04.2021 at 12:51:37