Hidden Compartment Furniture Plans Free Pdf Site Youtube,Pocket Hole Jig Grainger Uk,Door Handle Router Jig,Titebond Ultimate Wood Glue Msds 69 - You Shoud Know

Here at instructables. This guide features 16 projects built by our users made to keep your stuff safe and hidden from view. From hidden rooms behind bookshelves to secret compartments in furniture, hiding your stuff has never been more fun! You could dig a hole and bury your stuff, or build an Arduino-powered secret knock detecting lock to stash your stuff. Why not try a few of these projects the next time you've got some secret stuff you want to stash? Batcave plans not included. Instructables is the most popular project-sharing community on the Internet.
Since August , Instructables has provided easy publishing tools to enable passionate, creative people to share their most innovative projects, recipes, skills, and ideas. I secured the solid oak to the plywood using glue and pocket screws in the angled holes I made with the Kreg jig pocket hole system. The finished top is 22 inches wide x 18 inches deep. I did not fasten the cove at the front as this will be part of the front of the hidden drawer.
This allows for a 3 inch leg at the bottom of the table. To give the sides a little more detail I added a small moulding to the inside of the frame. I mitered all of the corners and tacked them in place with a pin nailer. The groove a dado cut the same direction as the grain of the wood was set back about 4 inches from the front and extends down about 12 inches from the top.
This is to hold part of the secret drawer locking mechanism that I will explain in more detail later in this instructable. Note: The photo of the groove was taken after I had stained the table. In frame and panel construction the vertical pieces of the frame are called stiles and the horizontal pieces are the known as rails. The upper most rail is the 1 x 3 and is left loose as it will be the drawer front for the hidden drawer.
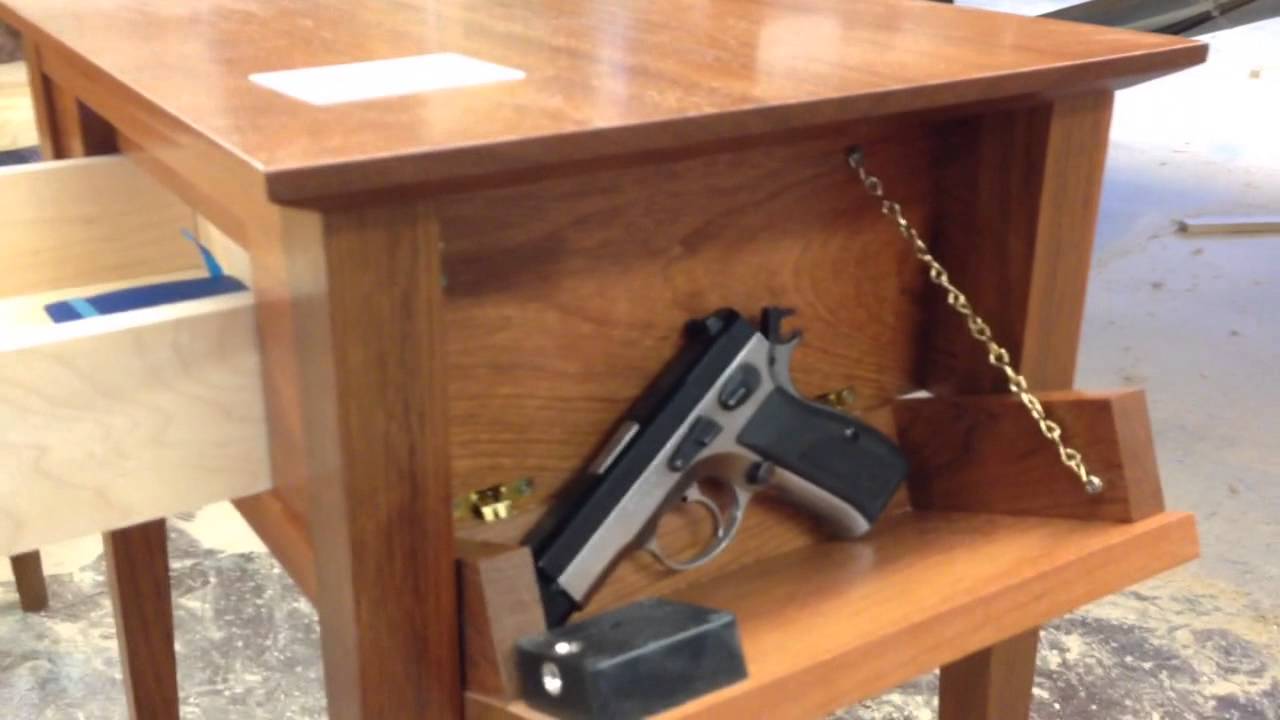
I used solid 1 x 6 oak for the drawer fronts. I prefer the look of an inset drawer although they require more precision to build than an overlay drawer. Adding the height of the 1 x 3, the three 1 x 2s, and the three 1 x 6s with gaps equals 25 inches which matches the panels for the sides.
To insert the panel it must first be slid into the slot cut in the upper rail and then dropped down into the slot in the lower rail. Sorry, but I forgot to take a picture of the back. Using wood glue and pocket hole screws, I assembled the boxes making sure to align the boards with the pocket screws to the front and back. The holes of the front board will be covered by the drawer front and the holes at the rear will only be seen if the drawer is removed.
I feel these are the nicest soft close drawer slides available. They are not too stiff to open and have a silky smooth operation. The drawer slides were installed per the directions that came with the slides. The solid oak drawer fronts are fastened to the drawer boxes with screws that are drilled from inside the drawer box front panel into the backside of the 1 x 6 oak boards.
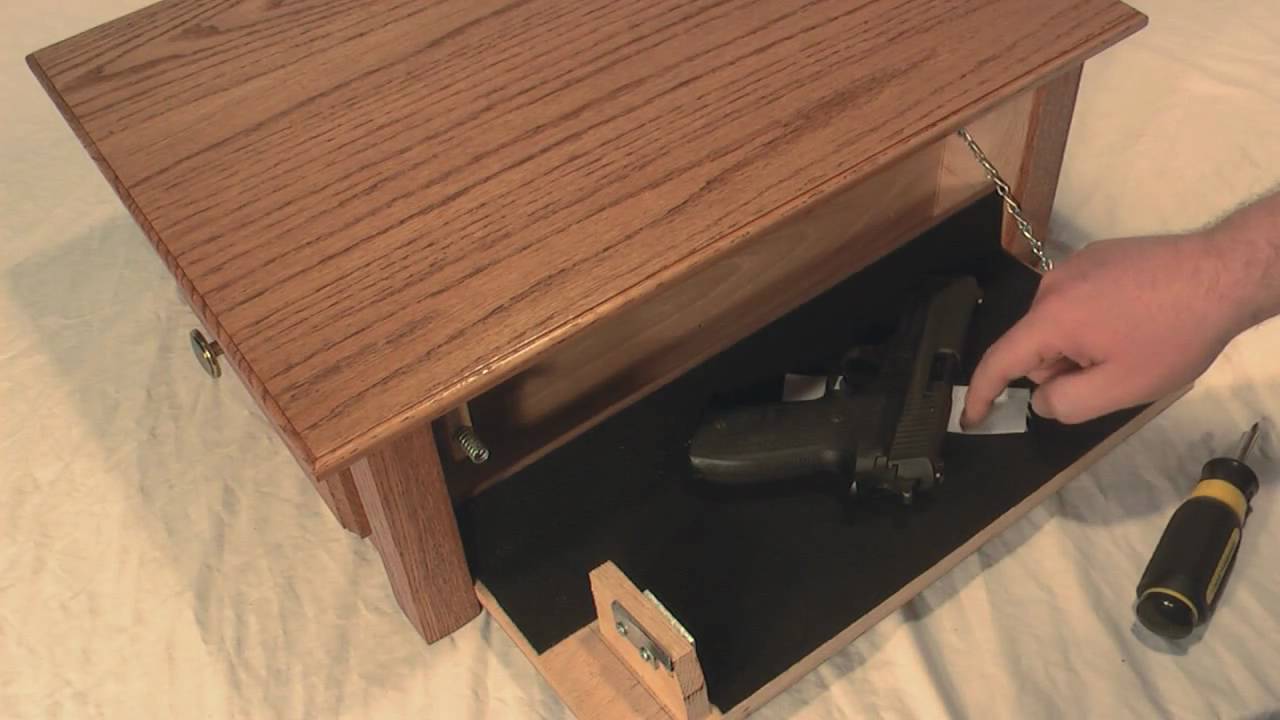
The hidden drawer box was built using 1 x 2 poplar and assembled with pocket screws just as the other drawers. The drawer bottom was glued and nailed to the bottom of the box In order to keep this drawer as deep as possible. I lined the inside of the drawer bottom with grey felt. I beveled the edges of the 1 x 3 a couple of degrees to allow for easier, bind free closing.
I built this drawer first and used a cheaper knock-off soft close drawer slide. It is much stiffer to open and does not open fully even though it was advertised as being full extension slides.
I remember watching the movie "National Treasure, Book of Secrets" and being intrigued by the Resolute Desk with the secret compartment and combination lock using the desk drawers. I wanted to incorporate something similar to keep the hidden drawer locked. I wanted the locking mechanism to be simple and purely mechanical without using springs or cables. The design I came up with uses nothing more than some levers, bearings and gravity.
I pressed on some bearings that I had scavenged from an old set of roller blades that fit tightly on the dowels. I counter sunk and screwed the wedge on to the table's inside using screws with a smooth collar near the head so that the wedges could pivot freely.
A small trapezoid shaped cam screwed on the left side of the top drawer and right side of the second drawer will momentarily lift the bearing causing the wedge to drop away from the cleat. Where the cam is mounted on the drawer determines how to position the drawer for unlocking. I started by sanding the table with grit sandpaper and followed up with grit until everything was smooth.
Sanding is my least favorite part of the project although I love the feel of a piece of wood after at has been worked with some fine sandpaper. They dry fast and have no odor, however, because they are water based they did raise the grain in a few areas. I smoothed these out by lightly sanding the areas with super fine sandpaper.
Next, I added 3 coats with light sanding between coats of General Finishes water based Satin Top Coat to protect the stain and give it some depth. The last step of the project was to install the drawer pulls I took all of the pictures of the bedside tables with my iPhone and for some reason could not get the color of the stain to be an accurate representation of what they look like in person.
All in all, I am happy with the way they turned out. I enjoyed the challenge of hiding the secret door and engineering the locking mechanism. My friend and more importantly his wife!
Question 11 days ago. I am looking to buy something like this, so can any of you that made this inbox me please. Does anyone have a material list and cut instructions yet?
I was going through to try and compile a list of materials but im wondering if anyone else has a more detailed list yet? I would be very interested in purchasing 2 of these locking nightstands with casters for my teens when they head to college.
Someone lmk if you are making them for sale. I have been searching for something exactly like this to no avail. Question 4 months ago on Introduction. I built this a couple years ago for my youngest son, using plans straight from the internet.
I messed up one part where I misinterpreted instruction, but it was cosmetic mistake and did not affect operation, just looked slightly different. Anyway, at the time , I saw a variation on the design, which included a digital thumb lock rather than the secret locking mechanism. Could anyone point me to that? Would like to build another for my other son and would like to incorporate that feature. Would you build 2 of these to sell unfinished in oak?
If so please email me. It would be greatly appreciated. Do you have a simple list of wood and materials? After reading a bunch of comments, I'd like to see if i can shed some light on the top of the piece. It seems people are assuming the the top is wrapped in 1" x 2". This isn't the case when looking at the first picture of the top, only 3 sides have the 1"x2" attached.
The back side of the top is left without the wrap. I'm assuming this is to save on material costs since that portion of the nightstand is always against the wall. So taking the measurements from the top piece of plywood and adding the 1. It also states, that the 1"x2" he used was 1. This gave the final top dimensions of 22"x18". If you are using a 1"x2" that measures. That would make the new plywood cut piece 19"x This would result in the same final dimensions of 22"x18".
Can you post a cut list for all pieces needed for this project so I know how much wood to buy? Question 1 year ago on Step 6.
|
Rikon Disc Sander Jacket Woodworking Square Stock Year |

lovely
07.03.2021 at 11:42:59
HAPPY_NEW_YEAR
07.03.2021 at 10:18:30
Grow
07.03.2021 at 22:32:28
STAR
07.03.2021 at 16:50:39
Nikotini
07.03.2021 at 23:37:31