Free Wooden Music Box Plans Zone,Easy Woodworking Diy Projects Guide,Snap On Soft Close Cabinet Door Hardware Android - Try Out
Each of them features a simple template routing technique. The elegant patterns on this box are first cut out with a scroll saw. Then the panel is glued to a backer board for a unique, almost-carved look. This desktop organizer is small in size but big in function. Its compact storage keeps your writing supplies in one convenient place. The unique lid on this box looks like an optical illusion at first glance.
The key to building it starts with a single router bit. Contrasting woods and an interesting, woven panel make this box an impressive table accent, plus it's easy to build. Bink's Lil Wheelbarrow.
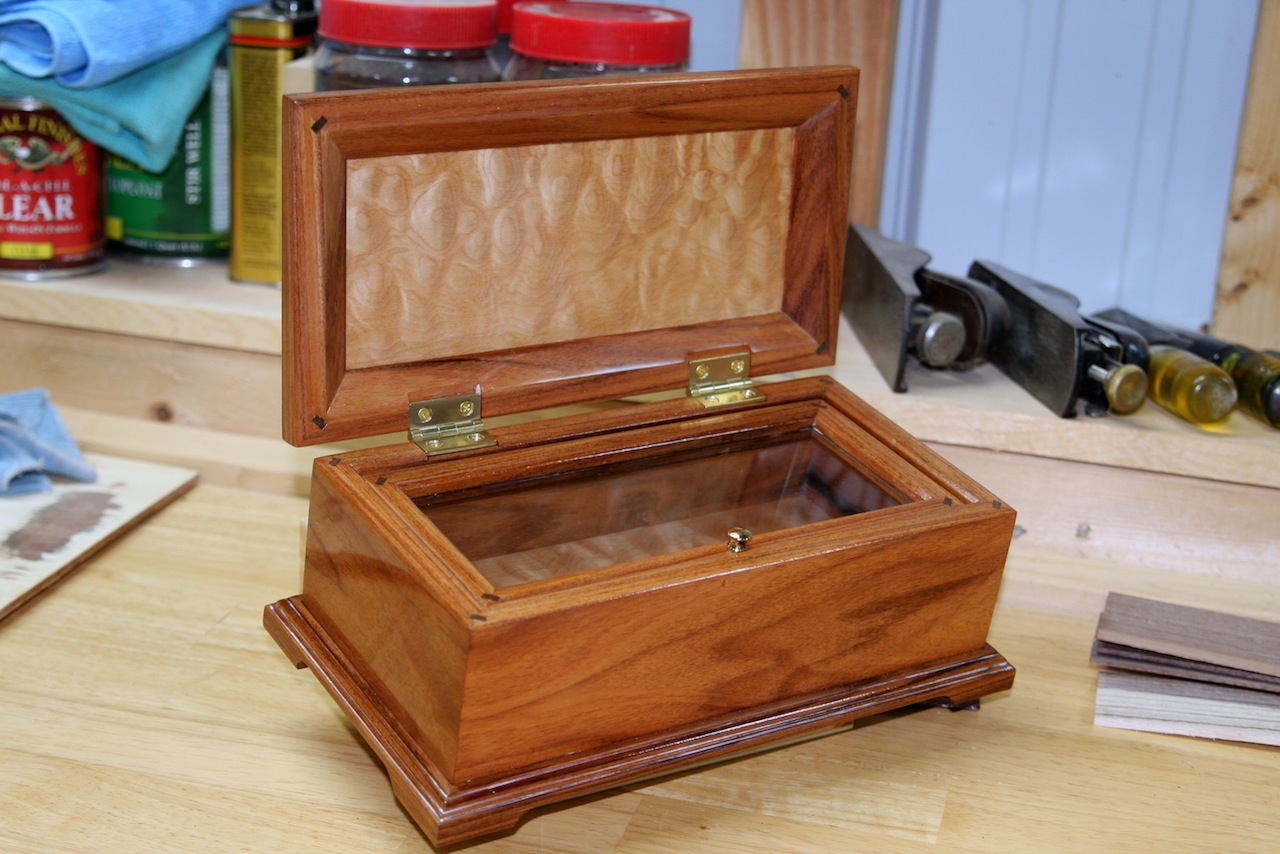
My Plans! Furniture, Country Style FurniturePlans. Project Supplies Replace your Bandsaw Tires! Lots more! This is one of those "fly by the seat of my pants" projects. Having never made a music box or a jewelry box, and not being able to find plans i liked, i was certainly on my own. Here I just started laying out some pieces that looked nice. The only determine factor was to make room for the mirror in the lid.
I have made many small boxes before, all with "box joints" in the corners. So I planed to do the same here. Heres a pic of cutting the fingers of the box joint in the end pieces. The jig being used is from Wood magazine, issue Feb. There is also a simplier jig in the pages of Woodsmith, Oct, ' They will be sanded flush later. A little more on the jig here.
You will have to make some test pieces to be sure your jig is setup properly. In the process of setting up the finger jig, i made some tools from these test pieces, for driving the joints together later.
Notice that they are slightly different. Here are two of the sub assemblies in the clamps. This is where that tool we made earlier comes into play. The appropriate tool is placed against the pins of the joint, and driven down into the joint. Then the assembly is flipped over, and the other tool is used on the other pins. This makes for a very tight and strong joint. Before the glue dries, be sure to clean it off the inside.
The outside glue will be cleaned off when the pins are sanded flush. After the sub assemblies have dried, you can put them together, and drive those joints together like before. After the glue dries, attach the top and bottom with glue, being careful Free Wooden Music Box Plans Zip to keep it away from the inside. Clamp it all together and let it dry. Bessey Angle Clamp Great for corner clamping Bessey Angle Clamp.
After the glue dries, take it out of the clamps and start sanding! Then sand by hand, rounding all the edges slightly. I sanded down to grit. Nows the time to cut the lid! I laid out the line i wanted to cut, making sure i split a finger at each end. The block clamped to the saw at right is cut to 90 degrees and keeps the box running straight and true. You can cut your lid straight or curved like a recipe box I made awhile back.
Don't worry about the cut being perfect, the lid will always fit the box when cut this way! Now you can sand the saw marks off the lid and lower part, layout the hinges and get ready to finish.


|
Carpenter Wood Joint Knowledge Data Hallway Bench Woodworking Plans Free |

A_L_I_8_K_M
19.07.2021 at 10:12:10
GTA_BAKI
19.07.2021 at 21:29:12
Britni
19.07.2021 at 12:36:38
HeyatQisaDeymezQiza
19.07.2021 at 17:32:40
DoDaqDan_QelBe
19.07.2021 at 17:29:55