Door Pivot Hinge Installation Detected,Triton Tra001 User Manual,Setting A Wood Plane Blade 5g - Try Out
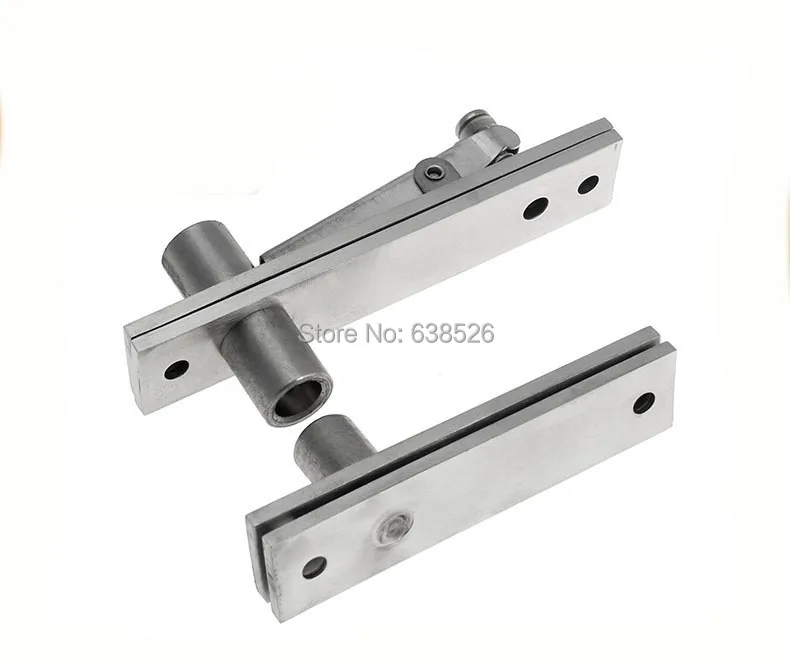
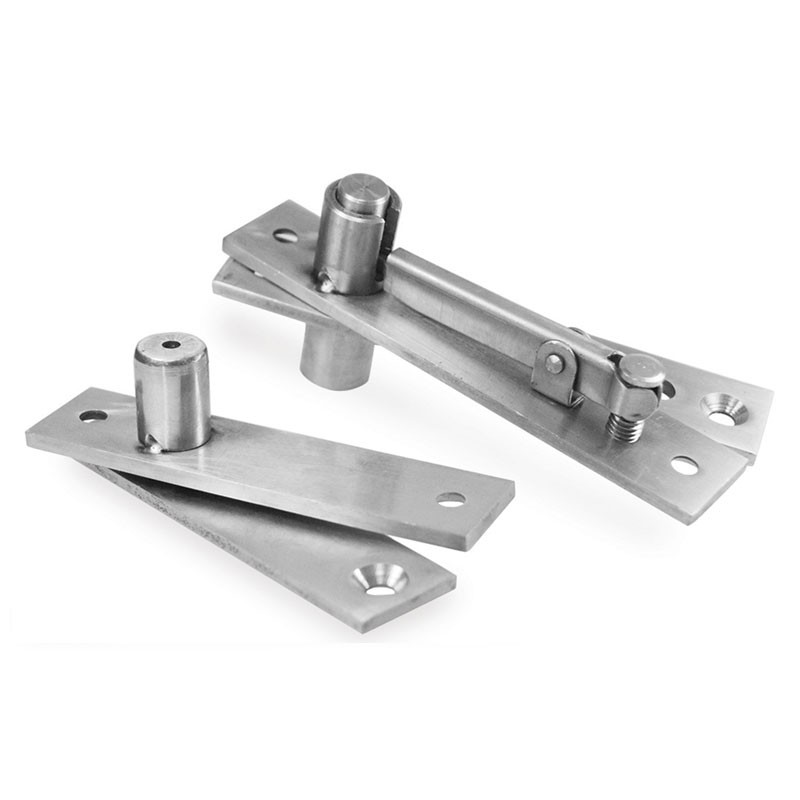
Side Mount Hinges:. The pivot hinge is distinguished from the side-mount hinge in that it holds the door glass from the top and bottom. There are some advantages to this configuration. The seals for the door edges don't have to start and stop to go around the hinges. The hinges are self centering spring loaded hinges, so you can set the door so that it will swing into the shower as well as out of the shower. One advantage to the pivot hinge is that it's range of motion is degrees, where a wall mount hinge only have degree of movement.
They swing 90 degrees in, and 90 degrees out of the shower. This is not the case on pivot hinges. The most popular hinge is Prima hinge. Prima hinge. Pivot Hinges with Header Bars:. Standard Cutout. The pivot hinge requires a glass cutout to receive the hinge body. It is critical that you center the hinge when installing the hinge in the hinge cutout. To center the hinge in the cutout, loosly assemble the hinge in the cutout.
The glass edge should line up on the pivot pin side of the hinge plate. Slide the door to the right and put a mark on the glass, now slide the hinge the oppisite direction and put a mark on the glass. Center the hinge between the marks and tighten the hinge plate screws. The bottom wipe will close off this space. Steam Cutout Steam Showers only.
To provide a tight consistent seal on a steam shower we use a special glass cutout which keeps door pivot hinge installation detected gap at the top of the door to door pivot hinge Door Pivot Hinge Installation 2020 installation detected same spacing as is used on the sides. Pivot Shower Door installation. If you additional panels in your shower installation, they should be in position. They don't have to be fully installed, but they should be in place, and the door space should be the W value as specified.
The basic procedure is to mount the hardware on the door, position the door, mark the footprints of the hinge foot, remove the door, remove the hinges, position the hinge in the footprint and mark the screw locations, drill the holes for the screws, insert anchors, and install the hinges. Make sure the hinges are centered in the hinge cutouts. The first step in a door install is to verify the dimensions and door pivot hinge installation detected the unit.
On the Door pivot hinge installation detected Order paperwork shipped with your door there is a dimension box on the left hand side. These are the Centerline Space Dimensions the door was manufactured to fit. Using these space dimensions layout the unit. We recommend putting small marks on your tile so you will know where everything should be installed.
Installation of the Fixed Panel:. To achieve a perfect fit door pivot hinge installation detected will need to do a trial fitting of door pivot hinge installation detected of the components.
Install the U Channels as per the layout. Inspect the bottom of the U channels to make sure the screw heads a not sticking up to where the glass will hit them when installed. Your U Channel installation kit contains four set of setting block of various sizes.
Place these blocks in the bottom of the "U" channels two per panel of glassand stand up your fixed panels. Put a level on the exposed vertical edge of the glass. If the panel is not standing straight remove the panel and change the setting block sizes to get the panel to stand correctly. With door side glass panels in place measure the door pivot hinge installation detected space W at the bottom and at the top of the opening.
This needs to match the W value on your Work Order. You may need to pull outor push in the side panels to achieve the correct door spacing. With the side panels placed so you have the correct W space.
The bottom U channels should be flush with the glass, or close to it. You can set piece of the header on the top edge of the glass to determine how much of the "U" channel needs to be cut off. The U channel will not fit up into door pivot hinge installation detected header bar. Mark the U Channels, remove the glass. Don't loose you setting blocks, they tend to stick onto the bottom edge of the glass.
Remove door pivot hinge installation detected U Channels and trim as required. This time put a small bead of Silicone on the back side of the each piece U channel. Wipe Door Pivot Hinge Installation 4g off any excess door pivot hinge installation detected which might squish out as the U channel is installed. Replace the setting blocks, and reinstall the panels.
Assemble the header bars using the corner brackets. The brackets have sloped set screws so as you tighten up them they pull the header bars together. Install the wall Mounting Brackets into the header bars which are going to touch the walls.
Put some of the unused thin setting blocks on the top edge of the glass panels and carefully place the header on top of the unit. With the header in place and tight against the wall use your drill to start pilot hole for the screw of the wall mounting door pivot hinge installation detected. Remove the header bar and drill the hole door pivot hinge installation detected the Wall Mounting Bracket screw.
Take care to drill the hole at the correct angle. Install the anchors so they are flush with the surface. Cut a piece of clear vinyl for the top of each panel. With the clear vinyl in place spray the vinyl with Windex and then carefully pound the header into position using a rubber mallet. Take care to not damage the header bar finish. After you have the header partially on measure the door door pivot hinge installation detected at the bottom and top.
If the opening does not match the W value for the Work Order you need to make the appropriate adjustments now. Hint: Fitting the header onto the glass using the vinyl can be difficult. Some professional installers will use this trick to make the install go easier. Cut two inch lengths of vinyl for each panel and place on the top corners of the fixed panels. Now put a bead of silicone along the top edge of the glass.
Install the header. You may still need to use a rubber mallet to put the header in place, but it will be much easer.
The small lengths of vinyl center door pivot hinge installation detected glass in the Header Bar, and the silicone will makes it secure. It is much easer to make adjustment using the technique.
Disassemble the hinge by removing the two screws holding the pressure plate. It should be easy to see how the hinge pivot mechanism will fit into the notch cut in the door glass.
Notice that there is door pivot hinge installation detected room to move the hinge inside the notch. Hint: If you super glue the hinge gasket to the hinge and hinge plate it will make it easier to work with during the installation. Don't get glue on the outside surfaces, it may damage the finish.
Assemble the bottom hinge around the glass. The screw heads are on the inside of the shower. You should have a gasket on both sides of the glass so there is not metal to glass contact. At this point we want to mount the hinge in the center of the notch. Failure to put the hinge in the center of the notch may limit you ability to make final adjustment to the door.
Hint: With the hinge loosely assembled on the door, slide it all the way to the right and put a mark on the glass on the right side of the hinge. Then slide the hinge to the left and put a mark on the glass next left side of the hinge.
Using the two marks as guides center the hinge between the two marks and tighten the hinge screws. Now mount the top hinge using the the same process you used on the bottom hinge.
We want to install the handle or knob at this point so that it will be easer to position the door in the door opening.
There different styles of handles and knobs, but most of them use the same through the glass mounting system. On the back to back handles there is an inside handle door pivot hinge installation detected an outside handle. The inside handle has two small set screws.
When mounted these set screws face door pivot hinge installation detected so that you can't easily see them. Use the allen wrench provided loosen the allen screws and separate the two handles. Now loosen the screws holding the plastic washers. Take note of the order of the plastic washers and sleeve. When assembled on the door there is a plastic washer on each side of the glass, and the sleeve is in the hole between the washers.
The plastic washers protect the glass from the metal handle. Don't tighten the screws to much or you will break the washers. Now slide the inside handle onto the studs with set screws down.


|
Kitchen Drawer Channels Demo Laguna Sud 2019 Woodpecker Woodworking Supplies Pdf Diy Christmas Woodworking Plans |

mfka
23.10.2020 at 17:34:18
can_kan
23.10.2020 at 17:15:43
Azeri
23.10.2020 at 13:36:38