Do-it-yourself-wood-kiln-80,diy-small-woodshop-dust-collection-40,woodwork-workshop-cork-login,used-grizzly-cabinet-table-saw-llc - Try Out
Many articles have been dedicated to solar lumber kilns: everything from a simple sheet of Visqueen over a stack do it yourself wood kiln 80 lumber in the sunshine to elaborate enclosures do it yourself wood kiln 80 for solar gain.
The problems with solar kilns include limited control over temperature and do it yourself wood kiln 80 solar exposure, depending on your region and site location. Additionally, I have been underwhelmed by the performance of solar-operated fans. My aim was to develop a small dehumidification kiln for better control of the three key components of lumber drying: temperature, airflow and humidity. A dehumidification kiln makes sense particularly when the lumber is air-dried first.
Commercial scale steam kilns consume large amounts of energy. In contrast, do it yourself wood kiln 80 dehumidification kiln uses a sealed chamber, with only enough energy input to maintain the desired temperature. With a well-designed dehumidification kiln, hardwood lumber can be dried for mere pennies per board foot. A shed kiln is an attractive alternative for a couple of reasons. Do it yourself wood kiln 80 can be constructed in do it yourself wood kiln 80 style, with architectural features that match or complement an existing home.
Built properly, a shed kiln may even increase the value jiln a property. Another reason I like the idea of a shed kiln is the flexibility of future use. Minus the drying equipment, a shed kiln is just an insulated storage space, with a host of possible uses. The first thing to consider when designing a shed woos is size. Ideally, a lumber kiln would be large enough to dry multiple stacks of lumber.
This lets the operator sort stacks by lumber species, so they will be easy to retrieve when the drying cycle is complete. Consider not only the space for the lumber stacks, but extra floor space to easily load and monitor the charge of lumber. This air space is absolutely critical for even airflow, so count on the extra floor space right from the design phase. Many available kiln designs require a large, heavy door.
My number one priority was to build a kiln that was easy to load and easy to monitor. This would allow a stack of lumber four feet wide and 10 feet long. Changing the position of the doorway in various kiln setups helps provide the best access to the stacks of lumber. Unlike general shop space, bigger is not always better for kiln design.
Youreelf the interior volume of a kiln becomes too large, basic heaters and home dehumidifiers may be inadequate to control the kiln environment. For a small scale shed kiln, I recommend a maximum footprint of square feet. Many regions have increased the shed and outbuilding maximum allowable size without need for a permit. Check your local building codes for regionally specific requirements and electrical permits. The cost associated with shed construction was similar to buying a prefabricated kit.
In exchange for building the shed myself, I wound up with a shed of higher quality, with more features. Another great option is to convert an existing shed or outbuilding to a lumber kiln. With advances in spray foam do it yourself wood kiln 80, it may be possible to seal older, drafty structures as well. Consider the weight of the lumber that will be placed in the structure and fortify the building accordingly. Construction of a kiln chamber is very similar to building a small house.
Extruded polystyrene foam blue or pink rigid foam in this thickness has an R value of To accommodate the floor insulation, blocking between joists is oriented horizontally instead of the normal vertical position. This serves a dual purpose of supporting the rigid foam insulation as well as stiffening the floor framing.
Leave an air space between the rigid foam and subfloor for additional insulating properties. Insulation for walls and ceilings should be a minimum of R Once the flooring deck is constructed, think about sealing the shed framing at every opportunity.
A bead of silicone caulking between the subfloor and sill plate will prevent air infiltration. Lay down kion bead of caulking before raising the walls. Corners where walls meet should be sealed with expanding foam sealant.
Windows and doors are also sealed, as well as any holes cut for electrical service. Installing a window in a kiln may seem counterintuitive at first, because windows lose more heat than an insulated wall. However, the natural light and ventilation offered by a small window outweighs any disadvantages.
It should be double-pane, well-insulated with low emissivity low-E. Size and placement of the access door are critical as well. An outswing door can always be opened, regardless of shed contents. A pre-hung steel exterior door is ideal in this situation, kiiln it offers weatherstripping xo is fully youurself. Installing sheetrock and fire taping is a good idea for a heated room. The sheetrock also helps to protect the fiberglass insulation.
Exterior sheathing and siding type also factors into the heat-holding ability of the structure. Each layer adds approximately. Staggering the do it yourself wood kiln 80 between the sheathing and siding layers helps avoid air infiltration.
I opted not to install a true vapor barrier between the do it yourself wood kiln 80 and sheetrock, because of potential condensation and mold issues with sheds constructed this way.
This shed will be essentially unheated for much of the year and very hot during the kiln-drying cycles. A shed kiln has minimal venting usually one or two gable vents and sealed soffits. For these reasons, I feel it is best to let the woof breathe, and forgo a plastic vapor barrier. Electrical requirements for a DIY kiln are pretty straightforward, but hiring an electrician is still a good idea. Add up the amp draw on all the equipment you plan to use in the kiln, including a heater, dehumidifier, fans and steam generator.
Make sure the total amp draw is well within the limit of your electrical circuit. If you intend to kiln dry lumber from a green state, right off the sawmill, you will need to be well-versed in airflow rates and follow a detailed drying schedule. Drying lumber too quickly can lead to deep end checking, warping and case hardening. Case hardening is a defect caused by the outer portion of a board drying quickly, while the inner portion dries more slowly. This can create internal stress in the lumber that is released when sawing.
If severe enough, the lumber can develop honeycomb cracks throughout. However, if you kiln dry hardwood lumber that has already been air dried, the process is much more forgiving. This slows the end-grain drying and limits the severity of end checking.
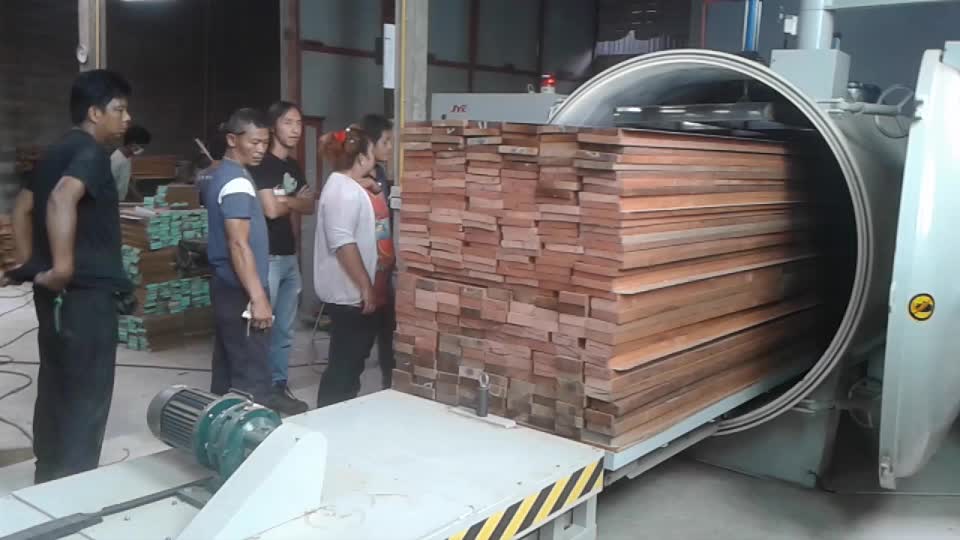
Attic fans are a perfect way to provide kjln over the stacks of do it yourself wood kiln 80. They are normally mounted in the gable of household attics, and they are designed to be used in high temperature environments. My kiln uses four ceiling-mounted fans, each rated for 1, CFM. For single-stack kion, stationary fans are adequate.
With two-stack and three stack kilns, it is better to have reversible fans to alter the direction of airflow mid-cycle. Ut of using expensive electrically reversible fans designed for commercial kilns, I came up with a simple hardware solution. I then manually rotate the fan boxes halfway through the drying cycle. Also, since heat rises, ceiling-mounted fans have the added benefit of circulating the warmest air over the lumber. A household dehumidifier DH removes moisture from the kiln chamber.
By setting the relative humidity Do it yourself wood kiln 80 on the dehumidifier, you can control how often it runs. A higher humidity setting wiod run the unit sporadically to maintain that RH.
A lower RH setting will call for the DH to run more often. There are two ways to remove water from the DH unit, and they both vo well. The water tray can be removed and emptied manually, or a hole can be drilled through the wall of the shed to pass a drain tube.
This will allow the DH to drain automatically without you needing to enter the kiln. I prefer to empty the water tray manually and record the volume of water collected. This gives me a secondary method of tracking the drying process, using both water volume and moisture content Do it yourself wood kiln 80 readings. A small electric heater supplies auxiliary heat to maintain adequate kiln temperature.
In smaller kilns, the heat generated by the fans and DH motor is sufficient to maintain temperatures in excess of degrees. In larger kilns, the heater may be needed in the latter part of the drying cycle. For all kiln drying schedules, a heater should be do it yourself wood kiln 80 to sterilize the lumber and kill any insects that may be present.
For sterilizing thicker lumber, additional time is required. Select a heater with an adjustable thermostat do it yourself wood kiln 80 a tip-over shutoff.
A heavy-duty 1,watt space heater works fine. After a short period of grumbling, they join me to lay down wood blocks for the first layer of lumber. The starter blocks should be as long as the stack is wide. Milling the stickers square is advantageous over a rectangular cross-section, because no matter koln you place the stickers they will form ti level stack.
Align the stickers over the starter blocks on the first course. Then align each subsequent layer of stickers over the last. This helps keep the lumber straight during the drying cycle; in fact, improper placement of stickers can permanently deform lumber. The thinner the stock, the more critical sticker placement becomes.


|
Carving-tools-for-granite Ryobi-digital-tape-measure-distance |

NEITRINO
15.02.2021 at 17:40:52
Lovely_Boy
15.02.2021 at 16:38:45
AZADGHIK
15.02.2021 at 16:42:16
quneslinec
15.02.2021 at 21:31:59