Back-mount-drawer-slides-layout,garden-bench-plan-zero,woodworking-plans-media-console-guide,keyhole-jig-400 - Try Out
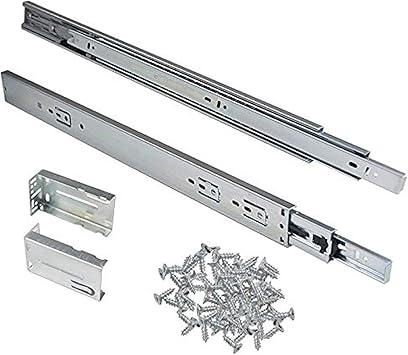
While there are many types of drawer slides one can purchase or make, I always seem to gravitate back to these full-extension ball bearing slides. I find I never have to worry about the drawer tipping out or binding the way I do with other systems.
With that said, they are also extremely easy to install. Note: Measurements and installation are tailored to our Midcentury Nightstand tutorial. Difficulty: Easy. With a couple careful measurements, these slides screw right into place. Tape Measure. Thank you. I have been struggling to work out how to fit them ever since they arrived. The very obvious point 5, gave me the prompt to go back and check the sliders for some sort of mechanism to detach the section that fits to the drawer.
How much space is needed between the side of drawer and side of cabinet, to install side mount slides? Hope this helps! With different height for different drawers in different cabinets, what is the best and easiest way TD calculate the distance from the bottom of the cabinet for the first slider installation?
I like your website and I like what you do. The X on the sign-up page is on the upper right corner, but can be difficult to see—especially on mobile. Again, my apologies for the inconvenience! I'm Jenn. Thanks for stopping by Build Basic. Click on the photo to learn more. Using the marks and a straightedge, draw a level line across the wall on each inside wall of the cabinet.
Overtravel slides utilize a telescoping design that lets the drawer extend beyond the cabinet. Use them when overhanging countertops get in the way of drawer access. Make sure the cabinet location provides room for opening the drawer fully. Full-extension slides also telescope, allowing the full length of the drawer to clear the cabinet. Choose these when you need easy access to the rear of the drawer, as in a file drawer.
Choose this type of slide when unblocked access to the entire drawer matters little, or where space limits how far a drawer can extend. Typical light-duty slides have weight ratings up to 75 lbs, medium-duty up to lbs, and heavy-duty for more than lbs, below. Longer slides have more robust construction than shorter ones of the same rating. For example, an 18" slide rated for lbs will be stouter than a 16" slide with the same rating.
A shorter slide has leverage to its advantage. With decisions made on type, extension, and weight rating, determine the right size slide for the project.
MDF and other composite materials will not hold screws as well. Taking accurate measurements ensures you buy slides that work in your cabinet. Follow these tips to make sure everything goes smoothly:. Slides come in lengths from 10" to 28". To determine the proper length, measure the interior depth of the cabinet behind the face frame, if there is one and choose a slide the next size shorter than that measurement.
Because the thickness of drawer slides and the width of the drawer opening are fixed, best practice is to build the drawer box to fit the difference between the two after assembling the cabinet. To use these in a 12"-wide drawer opening, build the drawer 11" wide. For frameless cabinets, just screw the cabinet profile to the cabinet side, parallel to the cabinet bottom. On face-frame cabinets, the front of the slide attaches to the face-frame stile, photo below.
To align and secure the rear of the slide, manufacturers provide brackets and standoffs that fasten to either the side or back of the cabinet. You can also create your own standoffs from wood scraps.
Secure the front of the slide to the face frame. The bracket at the rear slides to reach the back of the cabinet. Use the exact type of screw called for or provided by the manufacturer, as screwheads that stand too proud can prevent slides from moving smoothly.
Many slides come with multiple holes and slots to allow fine-tuning drawer position and accommodate a variety of mounting options, photo below. Screw slots allow for adjusting drawer position in, out, up, and down. With the drawer properly positioned, drive screws into the holes to lock the slide in place.
Also, handed slides must mount on a specific side, photo below ; unhanded slides mount on either side. Know right from left. Slides that must be installed on a specific cabinet side viewed from the front of the cabinet have that designation stamped on them. Now that you know the options, simply consider all installation requirements and pick a slide that best suits the project.

|
The-best-hand-saw-for-cutting-trees-uk Small-wood-shop-dust-collectors-ltd |

KOROL_BAKU
22.10.2020 at 17:45:23
mikrob
22.10.2020 at 11:54:47
Azerinka
22.10.2020 at 14:45:28