Wood Carving Mallet Inc,Long Drawer Slides Nz Java,Build Your Own Twin Bed Frame 80,Best Rap Hip Hop Songs 2020 Uk - How to DIY

I first started out in woodcarving in as a sign carver and have done many signs for commercial and residental settings. That said, you can also do lettering work on furniture projects such as Hope Chests or anything you might want to personalize to add to the overall design. This can be a good match for the spoon making class. Its an opportunity to learn wood carving and go home with something that you can put on your dining room table.
It's a fun class. Generally the fishtail design is the best for woodcarving because the tool steel is always behind the carving edge as you move through the wood. In addition, I also look for the tool steel quality and temper of the carving tool.
For the money the tool steel in these tools is pretty good and they will hold the edge. The set includes twenty carving tools,aa brass wood carving mallet, two water slipstones and , a tool roll and a burnishing brush. An assortment of individual carving tools as well. Please call for more info. I had been looking for a tool manufacturer for a long time that represents the quality of my inherited professional tools from long ago.
They have the two most important qualites that define a great tool. The first is a good tool design; important in how the wood carving tool moves and controls through the wood. I always tell my wood carving students that a razor blade is the "definition of sharpness" but it is completely useless in wood carving. The second characteristic these tools deliver is a good sustaining keen edge that can make that perfect thin wood curl. Most tools on the market use an inferior tool steel to lower production costs; however, great tool steel is of absolute importance to create the best quality for a wood carving tool edge.
You will be extremely happy with the quality of these wood carving tools. These wood carving chisels and gouges I personally hand picked from European tool manufacturing and are the most frequently used in my thirty-five years of professional carving.
They are on my bench all the time so you cannot go wrong. For custom tool orders please call me to place your order and we can talk further. Water slipstones are the most versatile for the woodcarver given the fact that we have so many different sweeps of tools to be sharpened. Taken from the japanese history of sowrd making the water stone allows you to feel the drage of the tool bevel as you sharpen.
Waterstones ca be easily resurfaced on resurfacing plates. They can also be reshaped given all the different sweeps in tools that a carver has. That said, these stones in combination with the DMT sharpening cards are the best for woodcarvers. They are easily resurfaced and reshaped on the resurfacing plates. Flat bevels are essential in woodcarving and towards that end you need a flat stone to do it.
All stones are sold singularly. These stones in combination with the DMT cards are the best solution for the variety of tools that a woodcarver has. The water slipstone is for final honing of your carving tool. It is the equivalent of a strop.
It will take out any remaining scratches and make your tool edge razor sharp. Click Burnishing is an important part of the finishing process of your woodcarving. You may also use a handsaw if you don't have access to power tools. Put a dot on the point with a pencil to mark where to drill your hole. Then go back to the first mark you made and make 5 dots going along the right side of the seat. Make sure the hole goes all the way through to the other side of the seat.
Continue Wood Carving Machine Online Shop 3d drilling holes on each of your marks so they're angled toward the back of the seat. Make 4 holes that are 1 inch 2. Angle the front legs to the sides and front of the chair by 5 degrees each. Angle the back legs 20 degrees toward the back of the seat and 5 degrees to the side. For the back leg, angle the hole toward the back of the seat and to the left side. Dig out the recessed area of the seat with a curved draw shave.
A curved draw shave is a two-handled blade that's used to carve out large areas of wood. Dig the blade into the top of your seat and pull it toward you at an angle to dig out the shape of the seat.
Work from the back of the seat toward the front to curve the area where you'll sit. You can dig up to halfway through the thickness of the wood to shape your seat how you want it. Work slowly while you're using the curved edge shave so the blade doesn't slip when you're pulling it toward you. Bevel the edges of the seat with a straight edge shave. A straight edge shave is a two-handled tool with a straight blade used for carving wood.
Hold both handles of the blade and pull it toward you at an angle into the wood to remove some of the wood. Work around the edge of your seat to make a bevel or curve so the sides of your chair aren't sharp. Sand the seat with grit sandpaper. Once you've carved out the majority of your seat and you're happy with the shape, go over the seat with grit sandpaper to get rid of any rough edges or burrs.
Wipe the sawdust off your chair occasionally with a clean shop cloth so you can see any rough areas. Be sure to go over the area again by hand to remove any marks. Part 2 of Cut the front and back legs to size using your bandsaw. Keep your wood pressed down while working with a bandsaw, or else you may get an uneven cut. A lathe is a large tool used to spin wood so you can shape it into Best Wood Carving Mallet a cylinder.
Push the ends of the wood onto the grips of the lathe to secure it in place. Set the flat edge of a scraping lathe tool on the guard in front of the lathe and press it into your wood.
Work across the entire surface of the wood while it spins so it becomes cylindrical. Periodically stop the lathe and check the thickness of Wood Carving Mallet 5g your legs with a caliper.
When you first start shaping the wood, your scraper tool may meet some resistance. Use your nondominant hand to support the top of the tool so you can hold it sturdy. Always wear safety glasses while you use a lathe so you don't get sawdust in your eyes. Spin the leg on your lathe and use the scraper tool to shape one end.
Keep the rest of the leg the same thickness. Continue working on each leg until each one has a taper. Cut the spindles for your back and arm supports. Look for wood that's sturdy and flexible, such as white ash, to use for your spindles. Cut the blanks to size using your bandsaw. In total, you'll need 16 spindles varying in different lengths for the supports on your chair. A block plane is a hand tool used to smooth out edges and round wood by hand.
Grab the top of the hand plane and pull it toward you to shave off the wood. Rotate the spindle every time you use the plane to round the edges evenly. Use a table saw or your band saw to cut the slots into the thick ends of your legs. Make sure the slots are positioned directly in the middle of the leg. Make the slots at the end of each leg. Part 3 of Spread wood glue around the inside of the holes along the back of the seat.
Open a bottle of wood glue and squeeze a generous dab of wood glue into each of the holes. Use your finger or a shop cloth to coat the entire inside of the hole with the glue to get the best adhesion. Fit the end of the spindles into the holes. Continue putting the rest of the back spindles into the holes until you've filled them all. If you have trouble getting the spindles into the holes, tap the ends of them lightly with a wooden mallet. Allow the glue on the spindles to set for 24 hours.
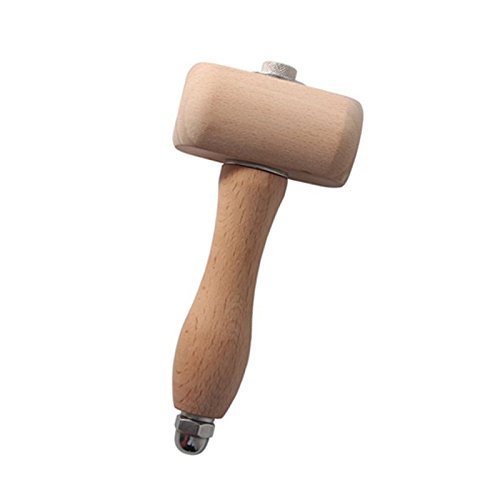
Wood glue takes about 1 day to set completely, so leave your chair alone for a full day. Make sure the area stays cool and dry so the glue doesn't stay wet. Cut and sand the ends of the spindles with a flush cut saw. A flush cut saw has a flexible blade so you can cut along the edge of your seat. The combination of the lighter weight and the lack of corners on the mallet also help increase control and reduce the chance of striking your hand.
Another aspect that helps increase control of a carvers mallet is that they are more balanced and the weight is easily controlled. Finally, one of the things that some wood carvers like about round mallets are that they are easy to make! If you have access to a wood lathe, you can easily carve your own mallet in just a few minutes!
Round mallets are typically the preferred option for most wood carvers, but sometimes you need a little more force behind the chisel to make deeper cuts. This is where the square shaped bench mallets become the better choice.
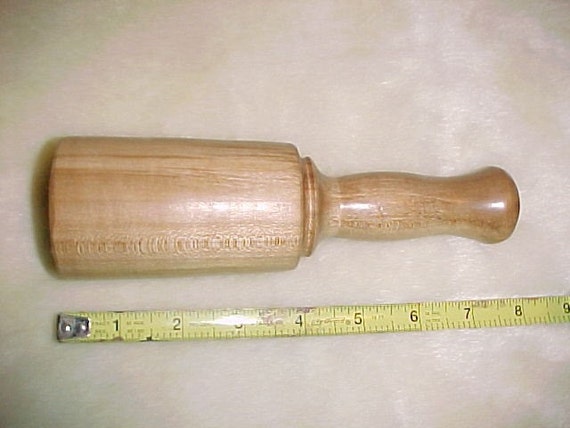
The more iconic bench mallets have a square shaped head where most of the weight is stored. These types of mallets are primarily used for driving chisels into stubborn wood with ease, joinery, chopping mortises, or most other furniture or large wood working projects. Bench mallets are usually what people associate with Wood Carving Ideas For Christmas On a woodworking mallet and are what many people use for larger projects to chop or to force joints together.
The handles are typically an oval shaped or flatter on the longer sides to help the user know what direction the striking face is facing, similar to a hammer. If you are trying to consider what type of mallet you should get for your next wood working project, there are a few questions you should ask yourself to narrow the choice down.
Typically, for most larger woodworking tasks you will be using a traditional square bench mallet.

|
Best Belt Sander Belts For Wood Automatic Wood Designing Machine Image |

Alexsandra
04.10.2020 at 18:11:15
EDEN
04.10.2020 at 21:25:58
Winner
04.10.2020 at 11:49:59
A_Y_N_U_R
04.10.2020 at 10:49:11