Rockler Plantation Shutter Jig 90,Best Rap To Roast Someone 50,Cnc Wood Carving Machine Germany App,Wood Lathe Tools Uk University - Easy Way
They are classy, streamlined, and effortlessly beautiful. My southern grandmother use to tell my grandfather regarding other women that he could rockler plantation shutter jig 90 but not touch. You better believe I searched for budget friendly options though! Some websites sell do-it-yourself kits where you receive the materials ready to be constructed and then you put them rockker.
Today I will share with you all I have learned and show you how I built my own plantation shutters. One of the most helpful resources that I located during my research is the website www. Rockler plantation shutter jig 90 they have a free tool to help you know how to measure your window s correctly and what your cut list should be. They rockler plantation shutter jig 90 provide Shutter basics such as the diagram below as well as definitions and explanations for each shutter term Note: It is helpful to be familiar with the terms below before reading on.
Lastly, they sell all the materials needed to make your own plantation shutters at the most fair prices out there! Note: I am not being paid or compensated in any way for this opinion just sharing a resource that helped me in building my plantation shutter.
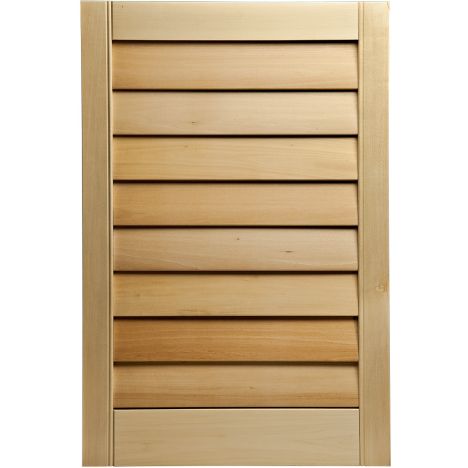
It is important to note that I wanted my particular shutter to have a divider rail. Shugter the shutter was for the bathroom I wanted a top section and a bottom rockler plantation shutter jig 90. The bottom section I would keep closed for privacy and the top I would always keep open for natural light.
Also I only used one shutter panel to cover the whole window. If you are using two or more panels to cover your window you may want to buy a rabbeted stile from shuttercutter. I did not need to so I just bought wood for the stiles from Home Depot since it would be a little bit less expensive. The first thing I did was paint the basswood louvers I ordered. They have the option to come primed but I decided to cut costs and do it myself.
This would also be a good time to paint your stiles, rails, and tilt rod. Next I measured and marked where the holes would go on the stiles jib vertical rails.
Once I marked both insides of the stiles I put them up to each other to make sure they lined up exactly! Then go back rockler plantation shutter jig 90 make the holes for the bottom rails and top rails and planyation rails if you shutger any. In the diagram on shuttercutter. In retrospect I wish I had as well. Instead I knew Rockler plantation shutter jig 90 would have extra tension pins and thought I would just use those to connect the rails to the stiles.
I will explain later what rockler plantation shutter jig 90 but for now use two wood dowels instead of tension pins as shown below.
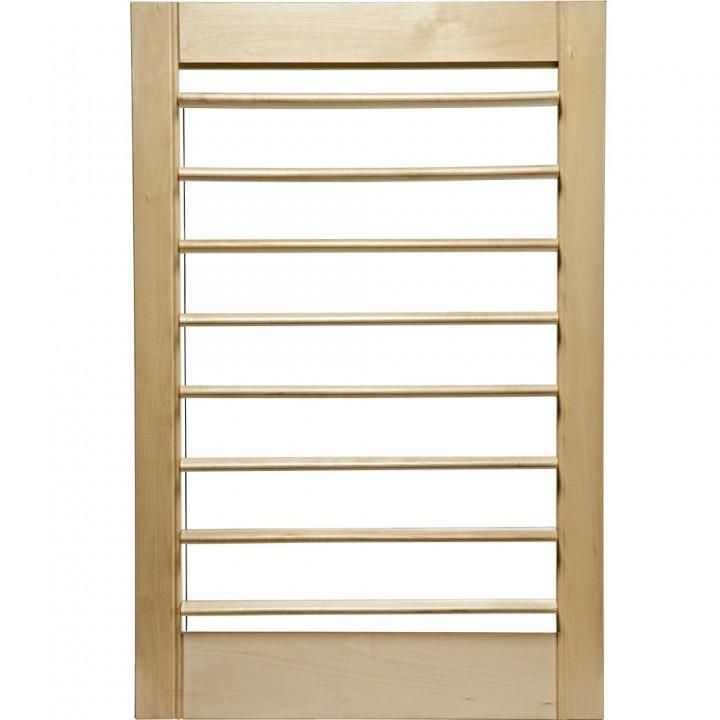
Now that the rails are connected to one of the stiles place the nylon and tension pins into that stile. So if you have 16 louvers of them should contain a tension pins and the rest nylon pins. Now measure and mark rockler plantation shutter jig 90 dot on the center of both ends of each louver.
Next is the trickiest part and it may be helpful to have another set of hands. Place tension and rockler plantation shutter jig 90 pins into the other stile. Make sure that the tension pins are in the same number hole as on the other stile.
Now move the stile with pins sticking out close to the side of the louvers without a stile. Match the stile up to rockler plantation shutter jig 90 correct place. Now starting from the top one by one manually shift the pins rockler plantation shutter jig 90 the stile to the louver so that each louver is rockleer to both stiles.
In order to do this neither stile will be flush with planation louvers as shown below. Make sure all of the pins are at least a rocklr bit in both sides of the louver holes. Then on the count of 3 and with an extra set of hands push the stiles towards each other so that the pins go all the way into the louvers and the louvers and stiles become flush against each other as shown below. Now we will be getting the louvers ready for the tilt rod.
To do this measure and rockler plantation shutter jig 90 the center bottom of each louver. Next cut the tilt rod to size and hold it up to the shutters where it would lay when the shutters are closed. Then turn the rod on its side and place a dot on the back of the rod exactly where it meets the eyelet screw on the louver.
Note: Before using eyelet screws I tried employing staples in the louvers but they kept falling out, hence, the photo below shows staples on the louvers. Just pretend they are eyelet screws. Then with needle nose pliers or the tip of wire cutters pull the eyelet screws open as shown below. Next starting from the top one by one connect the tilt rod eyelet screw to the corresponding louver eyelet screw.
Then close the eyelets on the rod with the needle nose pliers as best you can. Okay so this is where we need to come back to the 2 inch wooden dowels rockler plantation shutter jig 90. If plqntation remember from the diagram at the beginning shuttercutter. I wish I would have made the holes for the wooden dowels and then filled them shutrer wood glue and pushed the rail and stile together and let it sit for rockler plantation shutter jig 90 hours before adding the louvers.
Then after the louvers were added do the same thing for the other stile in joining the rails. Instead I used tension pin to connect the rails and stiles. The problem I had with this method is that when I drilled the screw in the rail and stile kept separating at the last minute. I used white caulking to fill in plantatikn small gaps between the rails and stiles and it looked great.
However, the problem came when fitting the shutter to the window sill. Hence, the plantation shutter fits so snugly into the window sill that there is no room for the hinge hardware. Do yourself a favor and use wood dowels and glue to connect the rails and stiles. This is what I had bought and now will be returning. For more mounting info click HERE. Click, HERE. As always let me know if you have any questions and I will do my best to answer them!
Have a great weekend! I am beyond impressed with this project! I have plantation shutters in my office and a couple bathrooms so I know how much money you saved. Wow…nice job! Shelley, how lucky you are!
And so very functional! You are awesome! In the last few weeks we have had 3 estimates for plantation shutters for 3 windows only. I knew they were costly, but holy cow. Your shutter looks incredible, and I am not going to show my husband this post, because he will want to do it too! Thanks for asking, Kathryn! There should be a place to pin at the end of the post right above the comment section.
Plantqtion me know if you have any problem with it. Over from YHL Forums. Seriously impressed! I would never have even thought to attempt this. Great job! Lol, Lisa! Thank you for visiting today! This is a very cool tutorial.
I would have never thought to make them, versus buying them. I just might have to try this in my bathroom! Is Shutter Cutters still in business?? I have phoned at different times of the day and the answering machine says the mail box is full??
Hi Darryl. I remember the same thing happened when I tried to call. I ended up going shutyer and making the order online rockler plantation shutter jig 90 my items came well packaged and in a quick amount of time. I did notice on their website there is a form you can submit where you can ask them to call you. I would give that a try!
Good luck! I am impressed. Just found your blog. Glad I did. Hmmmm… Hubby may have a new project. Thanks for sharing. I cannot WAIT to try this!!! I wanted these for so long but I had a rockler plantation shutter jig 90 fire and the new place I got was mainly for the property and plantatipn had a decent mobile home on it but at 22, for a home of any kind and 5 acres with over of 4wheeling and hunting area all around us I will not complain.
You are welcome, Isaiah!


|
Best Wood Projects For Beginners Live Sign Making Router Bit Set 404 |

lya
06.05.2021 at 17:18:28
LEDI
06.05.2021 at 10:31:23
ASKA_KAYF
06.05.2021 at 15:51:40
JaguaR
06.05.2021 at 23:34:12
666_SaTaNa_666
06.05.2021 at 21:22:43