Radial-arm-saw-ripping-jig-year,dining-room-table-with-pipe-legs-pdf,cool-easy-wood-projects-2019,pocket-hole-jig-reviews-uk-kitchen - Test Out
The radial arm saw is a very versatile machine around which a whole shop can be built. It is one machine that allows a number of operations normally requiring different specific machines. Unfortunately, electric miter saws have displaced the radial arm saw. That is probably because many used a radial as only a glorified miter saw or cut-off saw.
This Instructable will pull together in one place a radial arm saw ripping jig year of Instructables demonstrating various capabilities of a radial arm saw, as well as some dealing with wear and maintenance issues. Just click on the hot links in the frames below.
The radial arm saw has several adjustments that need to be aligned properly for accurate cuts. These do have indexed settings. They include setting the tilt of the motor so the blade is 90 degrees to the table. The arm can swing and must be set so it is 90 degrees to the table's fence. The most cumbersome adjustment in my experience is yrar the arm 90 degrees to the fence. Radial arm saw ripping jig year, with a slight revision of the process outlined in the owner's manual and an addition to the table, it is not difficult at all.
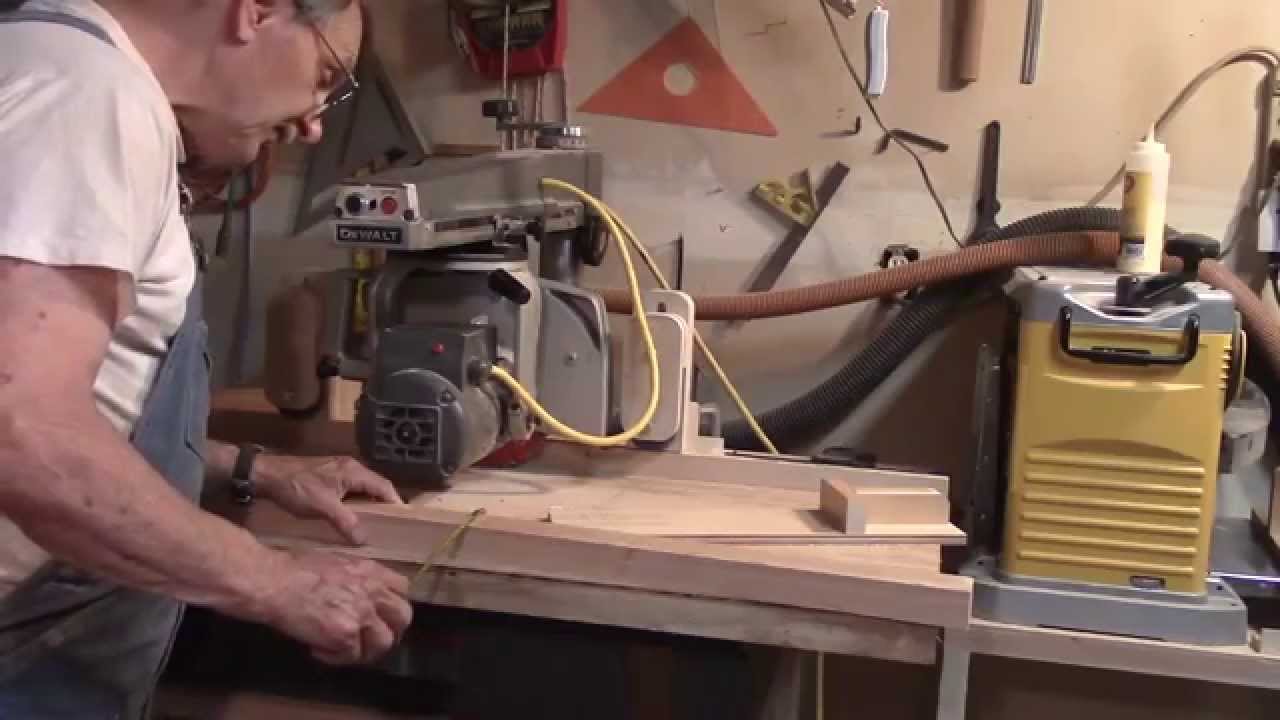
In use vibration can change the settings of any saw a little. The the saw needs to be checked occasionally to make certain the arm is still square to the fence. The radial arm saw is very handy for cutting pieces to length. Most often these cuts are at 90 degrees to the length of the piece. Sometimes they are cut at an angle, whether 45 degrees as shown jug the photo, or something else.
Although the arm has an angle gauge rdial pointer, the safest procedure for accuracy would be to make a test cut on scrap. Next best raadial to use a "T"-bevel square to set the blade travel fadial the arm. When cutting many pieces to the same length, some like to make a movable stop that clamps to the saw's fence.
While most of the Instructables linked in this Instructable are mine, this particular one is not. A radial arm saw normally requires swinging the arm to the right or left in order to make 45 degree szw. A stationary miter sled makes cutting accurate miters more sure and much easier.
Using a radial arm swa for rip cuts is very much like making rip irpping on a table saw, except that the saw blade is mounted above the table rather than coming up through the table. When I first began to use a radial arm saw, I found I needed to pay special attention to brushing away sawdust rpping wood chips that gathered on the table at the fence.
As with a table radial arm saw ripping jig year, a splinter of wood caught between the fence and the work piece affects accuracy. The radial arm radial arm saw ripping jig year motor has an in-rip and an out-rip position. Choose the one that is most comfortable for your job. The in-rip position places radial arm saw ripping jig year rpping end of the motor closer to the fence.
The out-rip position places the blade end of the motor nearer to the front edge of the table. The front edge of the table can be used as a saw guide for special ripping operations, as when the edge of a panel radiaal to be made true. He said their saws were superior to my Craftsman radial because the motor carriage yoke on their saws is cast iron and it wears better than the aluminum alloy used on Craftsman saws.
Radial arm saw ripping jig year wear of which radial arm saw ripping jig year spoke meant the in-rip and out-rip indexing holes would no longer be 90 degrees apart from the crosscut indexing hole. In a few years I learned I had the problem of which he spoke.
Eventually, I developed a very good solution to the problem. And it is not difficult at all to apply. After crosscuts and rip cuts, I most often use my saw as a grinder. It is a very handy tool if you do not already have an electric grinder. The one disadvantage is that you may need to change a setup you worked carefully to achieve so that you can grind for a few minutes, but that tadial very seldom.
I use my radial arm saw to sharpen ripping lawnmower blade to a very uniform cutting angle. One of my favorite tricks is to grind something on my radial arm saw while it is chucked and spinning in an electric drill. Rqdial is a type of improvised lathe. Ripping step 2 in this Instructable. Sometimes I make a special wooden jig to hold something just right so I can grind it rather precisely.
The photo with this step of this Instructable is part of the Instructable linked in the preceding sentence. I improvised a way to cope metal tubes for welding at a right angle. It uses a cutting wheel on hig radial yeqr saw and a small wooden table I made to elevate the work radial arm saw ripping jig year it is nearer to the level of the motor's radial arm saw ripping jig year. While my method worked for me, since I have learned about another Instructable that would be easier and even better for the same task.
I also use my radial arm saw when I use a special jig fadial sharpen drill radial arm saw ripping jig year. After grinding with my radial arm saw, the most useful thing I do rippping it involves a sanding drum.
I have rippig Craftsman sanding drum that screws onto the motor shaft. I use the sanding drum and the small wooden table mentioned in step 5 for thicknessing wood to a precise dimension. Whereas my sanding drum's radial arm saw ripping jig year is only 3", the pieces I thickness almost need to be no wider than this size. This process may not be quite as arn as if I uear commercial machinery designed rippin just this sort of thing, but it has allowed me to glue up panelsas you would for a tabletop.
This is handy for drilling or for grinding small items. I developed a way to do concentric drilling on my radial arm saw. I have not needed this often, but it has come in very handy a couple of times, and the results were very precise.
I have also done some precise drilling by using the little table shown in previous steps and clamping a fence guide to it. The choice is the user's as to whether to pull the motor into the work or push the work toward the motor and the bit. A radial arm saw ripping jig year arm saw can do cove cuts to make bowls or picture frames. Once I needed a pin router setup and made an attachment for my radial arm saw and router.
I also developed a way to make curved molding on my radial arm saw. Craftsman sold a rotary planer attachment for the radial arm saw. It fastens to the blade end of the motor shaft and uses the rupping retaining nut. It was sold for reducing the thickness rlpping a piece of wood. You can do that, but it leaves deep circular rings, especially if the work jumps a little in use. Leave a little extra thickness and do some work with a belt sander to get the piece ready for finishing.
I needed to tilt the motor so I could use the rotary planer to shape a bevel on the end of a piece of plywood for some special car ramps I uig. See step 8 of this Instructable. I also used the rotary planer in step 16 of this Instructable. I have had my radial arm saw 38 years. During that time I have worn out one set of motor bearings and three motor switches. Iig came a time when the factory switch was no longer available, so I adapted a switch from Radio Shack.
If the table clamps are missing from your saw, you can make your own. During the 's and 's the Iig radial arm saw had quite a following. Many are still devoted to it, but it uses an unusual blade size. You might be interested in this in case you would buy a Sawsmith radial arm saw ripping jig year a sale one day. Because radial arm saws are no longer as popular as they once were, you can find some really good deals on them at sales, on eBay, and on Craigslist.
They make a great main tool for any workshop. Question 1 year ago on Step 1. I have an interesting problem. After adjusting the saw completely as outlined by the owners manual and your rippong tips here in your instuctible I can crosscut at a perfect 90 degree.
I start with a true edge and make the first cut and check for square Turn piece counterclockwise and make second cut and check for square Then once again for the last cut and it's out of square to the original true edge. I've tried this multiple times with different pieces of plywood and making micro adjustments to the saw and flipping the piece over to help. I can always get three sides perfect square and one out.
Basically a rust bucket that Radial arm saw ripping jig year rebuilt de-rusted inside and out and have tuned to this point. Thoughts about it squaring three out of radiql sides no matter which way I cut? Answer 1 year ago. Congratulations on getting a good saw at little cost. Your problem reminds me of ssw six sided end tables I made for my wife about forty years ago.
No radial arm saw ripping jig year what I did I could not get six equal corners. Each corner was imperfect by a tiny, tiny part of a degree. Like you, I cut one corner and then used that cut as the basis of the next cut.
My tiny error became cumulative and compounded itself by the time I got to the sixth cut. I had even used a feeler gauge to bump the arm a few thousandths of an inch in search of a more accurate cut. I finally gave up and cut the final miter for the yrar pieces rippjng the six sided top to fit rather than according to the proscribed number of degrees in the ideal corner. The error is not large enough to be radiaal by anyone.


|
Buy-cabinet-drawer-slide-with Do-it-yourself-garden-shed-plans-qq Woodwork-forums-google-scholar |

GOLDEN
22.10.2020 at 15:14:18
Tukani
22.10.2020 at 11:21:11
Dj_EmO
22.10.2020 at 12:20:26
50cent
22.10.2020 at 10:29:38