Diy-wood-filler-without-sawdust-size,kraftmaid-cabinet-hinges-for-sale-india,woodturning-supplies-christchurch-for-sale - Step 1
DIY wood filler will closely match your project's wood, but it will not be exactly the same since the glue will be a different color from the wood.
DIY filler works well for filling small holes and cracks but is not strong enough to bridge large holes, cracks, and gouges. As with any wood filler, your DIY filler will not be able to match the wood grain. Most wood glues are lightly brown-tinted, but if you can find white wood glue, it will create a better color match.
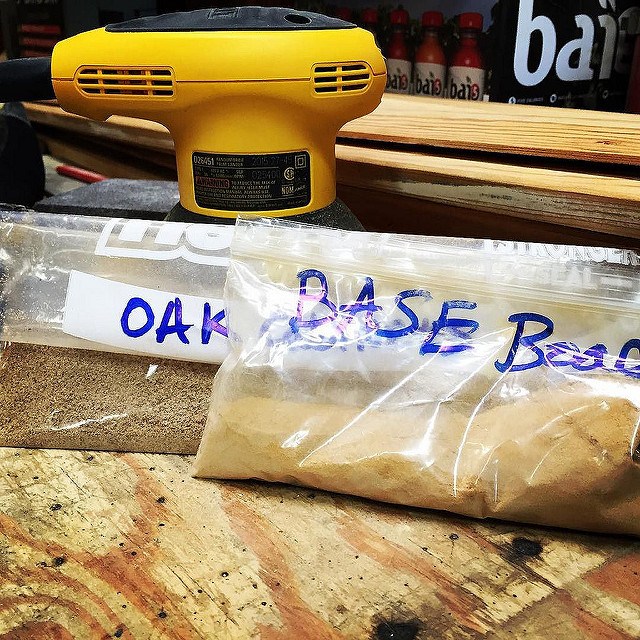
Sand a piece of sample wood that matches the project material. A sander with a collection bag makes it easy to collect the sawdust, but a file, rasp, or hand-sanding will also make perfectly usable sawdust if you don't have a power sander.
Gather a pile of sawdust onto a piece of cardboard or scrap wood. Sift through the sawdust and remove any large particles, wood or metal shavings, or other impurities. Make sure that the dust matches the area you want to patch. For example don't use dust from a knotty area, which is usually darker than the rest of the wood.
Gather the cleaned sawdust into a small pile. Add wood glue and stir with a craft stick, adding more glue until the mixture is a thick putty, roughly the texture of cookie dough. Avoid adding so much glue that the mixture becomes runny. Wood glue hardens relatively quickly, so don't dawdle—you have about 10 minutes of total working time to prepare and apply the filler.
Form the mixture into a workable dough that you can roll between your fingers. If the dough has already begun to stiffen, it will be difficult to apply to the work material.
If this happens, start with a new batch and slightly increase the amount of wood glue in the mixture. Once the proper texture is achieved, move immediately to the application of the filler to the work material. And it doesn't have to be perfect, just hard and dry and somewhat smooth. Well, there are many things you could use. I don't know what you might have on hand.
Plaster of paris would work, so would ordinary drywall mud. Depending on how much you need, just some layers of Elmer's glue will do it, if it's a small amount. What the heck, use your brain, try this or that, what have you really got to loose?
I just did a 19 Mako and doing a 24' T Craft with a 10 beam. Your idea has issues and the concrete works for docks and decking but not fiberglassing. You have removed quite a lot and U have to replace the stringers first. Styrofoam will melt with any resin or petroleum base solvents.
There are many ways to make stringers. The height of the stringers is the most important bedding able to screw and secure the deck to. The transom should be made with gussets to the stringers and all glassed together it U don't secure the side and all the stringers and transom as 1 it will fail. Seek advise before going forward as U can creat more issues than U already have.
Trending News. Coronavirus continues to ravage parts of the world. Biden trips, falls climbing stairs on Air Force One.
Strong reaction to vaccine may signal prior infection.


|
Wood-magazine-jig-plans-group Small-wood-projects-for-gifts |

888888
13.11.2020 at 21:49:55
Naina
13.11.2020 at 20:20:14
BOMBAOQLAN
13.11.2020 at 17:39:31
dj_ram_georgia
13.11.2020 at 19:11:32