Build-a-frame-trellis,wood-projects-for-10-year-olds-2021,best-rap-performance-grammy-40,small-wood-turning-machine-template - Step 1

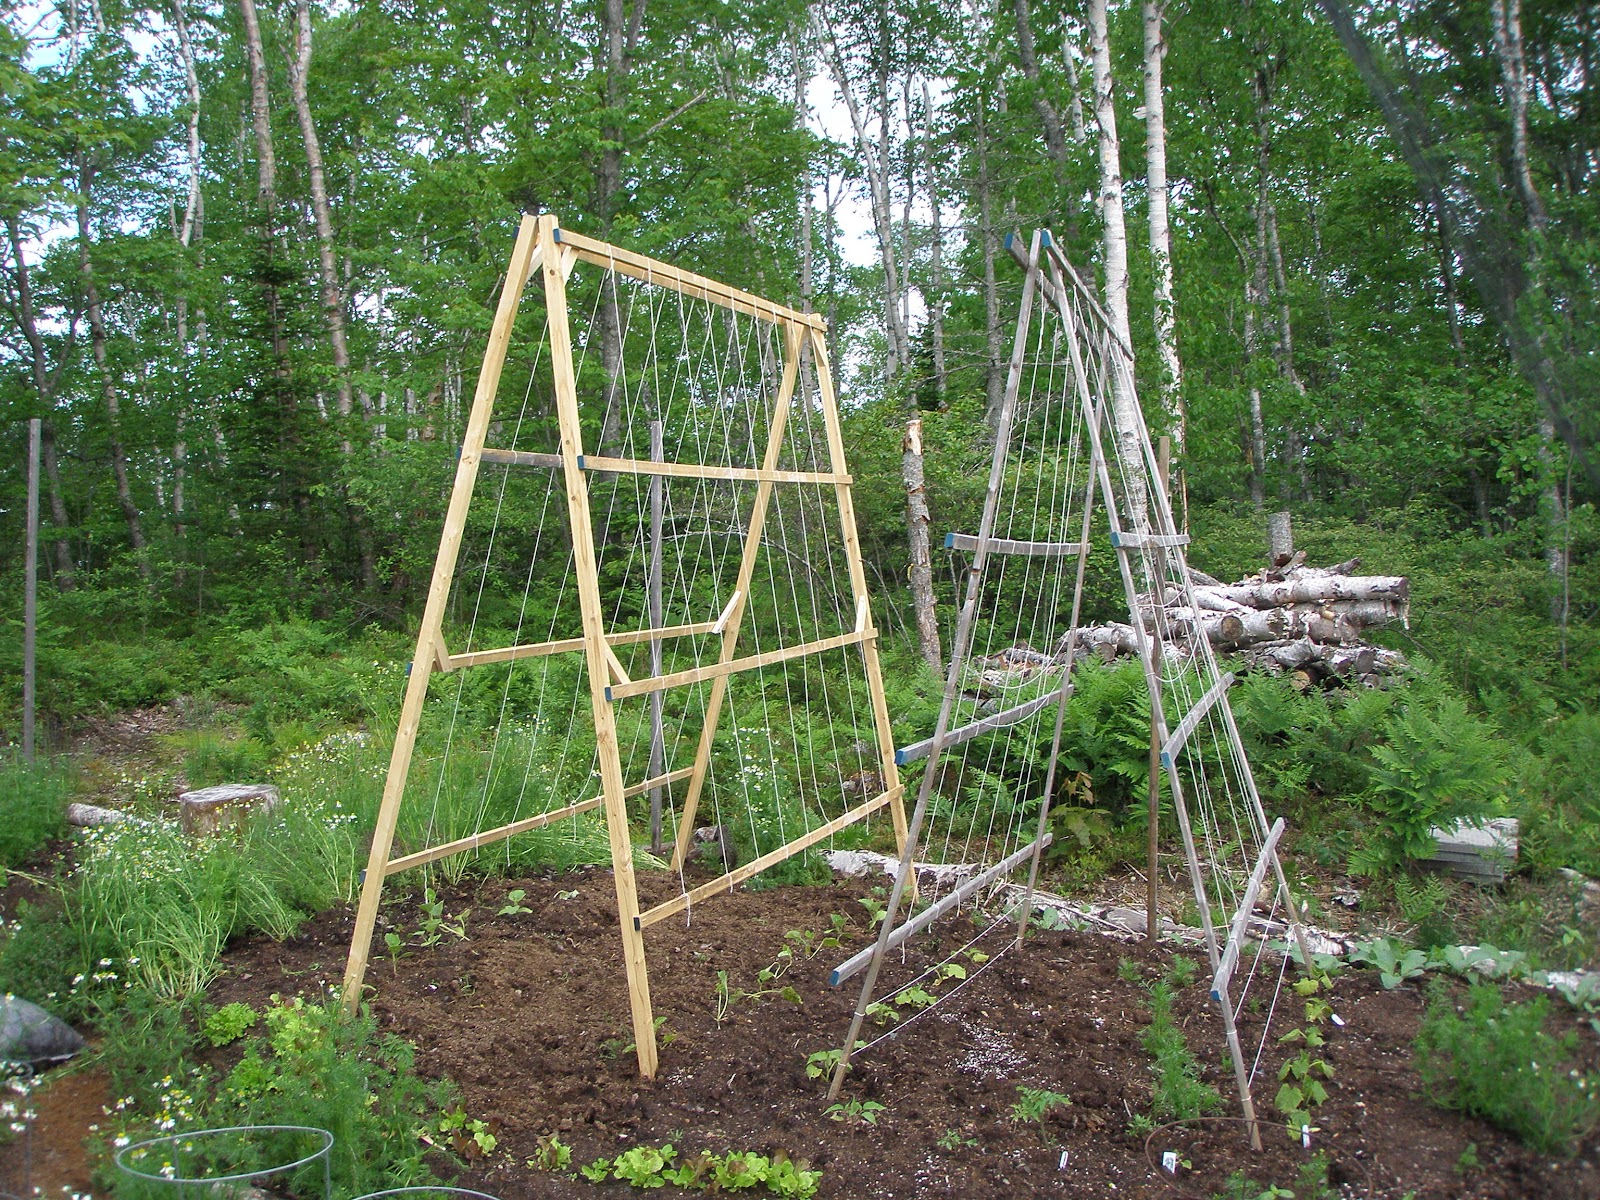
Although primarily designed for growing beans, A-frame trellises also can be used to grow peas and other lightweight vining plants. Measure 2 inches down from the top of a wood board that is 2 inches by 2 inches by 6 feet. Repeat the procedure on three other wood boards of the same dimensions. Stack two of the drilled boards on top of each other, lining up their holes. Attach the remaining two drilled boards to each other with a second bolt and wing nut.
Each set of boards forms the legs for one end of an A-frame trellis. Spread each set of legs apart by about 2 feet, and tighten the wing nuts to hold the legs securely in that open position. Place one set of legs at each end of the pole bean row, spacing the sets of legs about 4 feet apart and placing them no more than 6 feet apart.
Set one 2-inch-byinch-byfoot wood board on top the two sets of legs to create the trellis' top crossbar. Set the crossbar board inside the nook formed by the legs' crossing boards above the bolts. Lash the crossbar to the legs with garden twine. Drape bean netting over the crossbar and down one side of the trellis legs. Staple the netting to the first leg. Stretch the bean netting tightly to the second leg, and staple the netting to that leg.
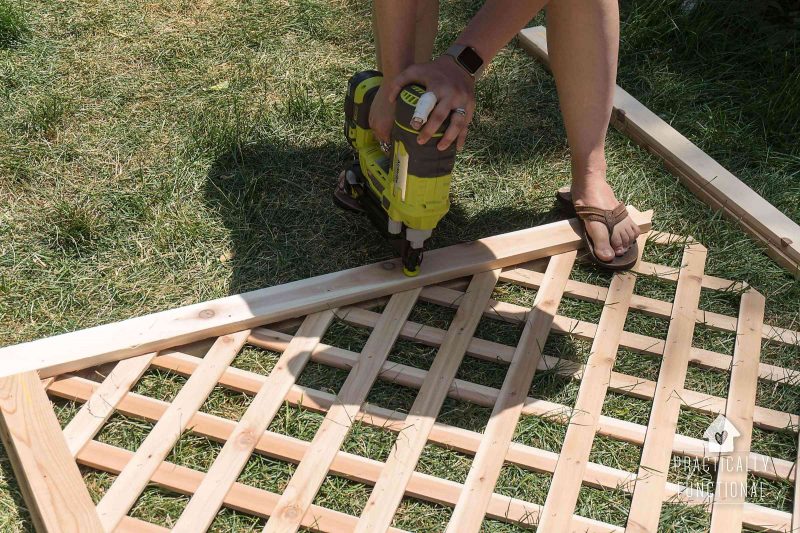
Staple or tie the netting to the crossbar. Drape a second length of bean netting on the other side of the A-frame trellis, and staple it in place. We use short wide-head cabinet screws to attach the remesh to the wood frame. Feel free to get creative with other methods such as nailing in poultry netting staples , but this has worked swimmingly for us! Choose a junction or corner in the wire, and drill the screw in at a slight angle to pinch and hold the wire between the screw head and wood.
Add screws every foot or so along the outer perimeter and also across your support beams. This is where using remesh is great. It is thin and light enough to hold securely using cabinet screws. Unlike option one where we attached the stakes to the trellis first , we typically put the stakes in place and then attach the trellis after. Because these are intended to be more permanently installed, we want to drive the stakes in the ground as far as possible one foot minimum before securing anything in place.
The trellis itself gets in the way of the work. That said, make every effort to put the stakes in the ground as evenly and straight up-and-down as possible. Measure the distance between the outer vertical pieces of wood center to center and place your stakes there. Once the support stakes are in the ground, place your new trellis in front of them. Work the wood legs down into the top few inches of soil.
Once everything looks good and straight, attach the wood frame to the stakes. While you use wire, we like the added strength of using hose clamps — one at each corner or close. Fully open the hose clamp, wrap it around the wood frame and stake, and then use a screwdriver or drill to tighten it completely.
Check out our newest DIY trellis design below! We followed the same steps described above, but created a larger wood frame that fit two panels of remesh.
The panels are laying horizontally and stacked on top of one another. The middle horizontal piece of wood serves as structural support for the wide design, as well as a place to attach the two edges of adjoining remesh panels to the frame. Installed, it has the same fiberglass stakes on each edge driven about 2 feet into the ground.
The wood trellis feet only extending a couple inches down in to the rock ground cover. Finally, we added an extra center stake for additional support. Needless to say, there are SO many other trellis design options and ideas out there! We use variations of these two designs as well, such as installing them horizontally as I mentioned above. Or, rather than creating a full four-sided wood frame, sometimes we use wood 2x2s on the vertical sides only. Furthermore, in addition than creating a free-standing trellis, we often attach them directly to raised garden beds or other structures.
Finally, you could install our wood-frame trellis at an angle like a lean-to , supported with stakes or against a structure. You could even put two together to create a teepee! See the photos below for more ideas. Unfortunately, remesh panels are too short to be made into an arch. We bought our arch trellises from a local garden supply company. The rusted look matched with our current design, and the widths were also perfect for our space. However, it is not difficult to create your own arched trellis with hog or cattle panels.
The curved hog panel must be securely anchored into the ground such as with T-post stakes or attached to a structure like a raised garden bed. You can use pipe straps or pipe clamps to secure them to wood. That is what we did with our pre-made arched trellis. I hope this article gave you plenty of ideas and options for how to build a trellis! And not just any trellis — but a sturdy, attractive, and durable one.
As always, please let me know if you have any questions — and feel free to leave feedback in the comments or share this article. Where on earth did you find it? Hello Desiree, those arches in the post are made with cattle panel fencing which comes in very long pieces that can be fashioned into an arch.
They are usually available at your local feed store. Good luck! Last year we tried deer fencing but it collapsed and my dog jumped right through it. Wow, this article was just what I was looking for! Hi Karen. But you could fashion two together at the top and make a tee-pee? Have fun, and thanks for reading! Thanks for sharing this. I have a fear in my windy area it can easily break, what do you think?
How steady is that kind of construction? Hello Rob, the construction itself is actually quite sturdy. You are going to want to ensure that you use heavy duty fiberglass stakes found in some garden centers or fence t-posts would work as well to attach your trellis to, this should keep the trellis from blowing over in the wind.
Also, the plants seem to reinforce the trellis and make it even more solid. Hope that helps, thanks for reading! Do you find the remesh strong enough for heavier fruit?
Small melons and large cucumber varieties? Hello Jonathan, if the remesh is supported on both sides and along the middle with support stakes it should do just fine. We have vigorous passion fruit vines that are quite heavy in total weight that climb all over these remesh panels that are supported in a wooden frame and they are still going strong five years later.
Hope that helps, thanks and good luck! You guys have beautiful beds! Hello Jeremy, I am unsure of the exact cost but it would be easy to price out using your local hardware store or big box store. Thanks for reading a good luck building your garden beds! Love your trellis ideas.
They seem sturdy and are very attractive. Have you had to replace any of the remesh? Thanks for tuning in! Your email address will not be published. Now offering Organic Sourdough Starter! Visit our Shop menu for more details. An example of trellis option one in action, supporting purple pole beans. Our back patio, surrounded by garden beds with trellises attached to the backside.
They give plants a place to climb, while doubling as fences to keep our otherwise free-ranging chickens out of this space. In this photo of our front yard garden, remesh is being used in three different manners! Simple trellis option one is supporting pole beans in the back bed to the left, and has been curled into tomato cages in the bed on the right. Along the back fence line, trellis option two wood frame is in use to create a wall of passion fruit, passion flower, and jasmine.
Trellis option one, installed — complete with hummingbird. Option 1, installed. Our first DIY trellis. Top: When we first built our front yard trellises in , meant to provide privacy and block the unsightly short fence and trampoline next door.
Bottom: Fast forward to What neighbor? Of course, a couple years after we did this project, new neighbors moved in and installed a nice tall fence anyways! Say goodbye to the neighbors house! We measured and put all the stakes in first, driving them nice and deep, and then set the trellises in front to attach them. A peek behind the passion fruit wall now, and how we use hose clamps to secure the trellis to the stakes.
Here are two remesh panels installed horizontally and stacked, rather than our usual vertical single panel design. The final trellis is 6 feet wide we trimmed off one foot of the remesh and 8 feet tall. We previously had a very large passionfruit vine growing in the this space, blocking the view of the neighbors very nicely!
Edible passion fruit vines have a relatively short lifespan 4 to 6 years and the old one unfortunately came to the end of its life.

|
Small-wood-carving-machine-90 Amazing-woodworking-projects-youtube-international Woodwork-for-beginners-pdf-youtube High-accuracy-digital-tape-measure-vector |

Gunewlinec_CeKa
10.05.2021 at 11:16:46
aya
10.05.2021 at 17:18:39
EFE_ALI
10.05.2021 at 19:10:52
X_U_L_I_Q_A_N
10.05.2021 at 13:31:56