Woodworking Vise Placement Worksheet,Miter Gauge Shooting Board Online,Wood Toolbox Plans Pdf Viewer - Step 2
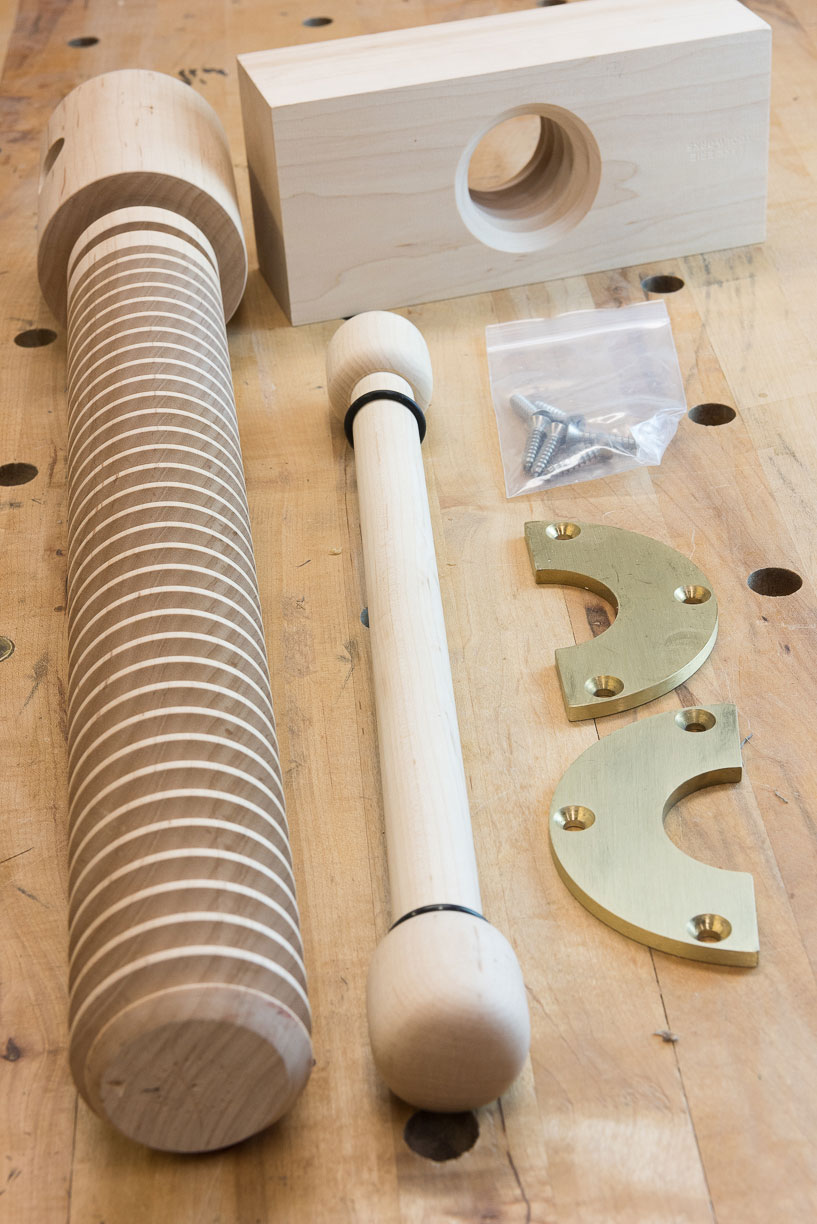
Then crosscut it to fit the benchtop notch. Countersink the holes on the rear jaw and attach the cheek as shown in Photo F. Position the vise on the spacer block with the cheek nestled in its notch.
Mark and drill pilot holes, and attach the vise with washers and lag bolts Photo G. Use a straightedge to ensure the face of the jaw is flush with the edge of the bench.
Make the front cheek, and attach it with washers and roundhead woodscrews, reassemble the vise, and turn the benchtop over. Hand-plane the cheeks flush with the benchtop Photo H. My bench had radiused edges, so I chiseled away the sharp point at the corner of the cheek. Finally, apply a couple of coats of wipe-on finish to all raw wood surfaces. Craig Bentzley has been restoring antiques and building furniture for nearly 40 years.
In addition to writing, Craig also teaches at guilds, woodworking shows, and at Woodcraft stores. Quick View. Add to Cart. Eclipse - 9" Quick Release Vise. WoodRiver - 7" Quick Release Vise. WoodRiver - 9" Quick Release Vise. WoodRiver - You must be logged in to write a comment. Log In. Find a Store. My Account. My Cart. Go to Home Page. Mobile Navigation.
Same Day Shipping Woodworking Vise Placement Fee Find a Store. Search Go. Topics Cabinetry. Choosing Hardware. Dust Collection. Friends of Woodcraft. Getting Started with Woodworking. Make Something. Pen Kit Reference Chart. Press Releases.
Resin Casting. Shop Talk. Woodcraft Magazine. Woodworking Adventures. Download PDF. Give your workbench the holding power it deserves. Countersink the through-holes on the back of the rear jaw to allow attaching the cheek with flathead screws. Install the vise with washers and lag screws that project through clearance holes in the two spacer blocks. Simple mounting The easiest installation entails making spacer blocks to set the tops of the metal jaws below the bench surface while screwing the vise to the underside of a bench.
Drilling Dog Holes Because most vises include an integral dog, it makes sense to incorporate a row of dog holes into your benchtop. Flush-Mount A flush-mounted face vise offers the most versatility, but it requires more work to install. Attach the spacer block with lag screws through counter-bored holes. Snug the rear jaw assembly firmly in place while tightening the lag screws. Plane the cheeks level to the benchtop, and relieve any sharp corners with a chisel inset.
About Our Author Craig Bentzley has been restoring antiques and building furniture for nearly 40 years. A leg vise moves via a single screw with a pinned sliding guide rail to maintain parallelism. The guide-rail pin rests against end-grain hard-maple pads that prevent compressing the softer alder leg of this bench.
However, you can build up some legs to make a leg vise work. These mount to the end of the bench and typically work with bench dogs along the length of the benchtop. If you prefer rectangular dogholes, cut those notches in the boards before gluing them to the benchtop; round holes can be drilled before or after assembly.
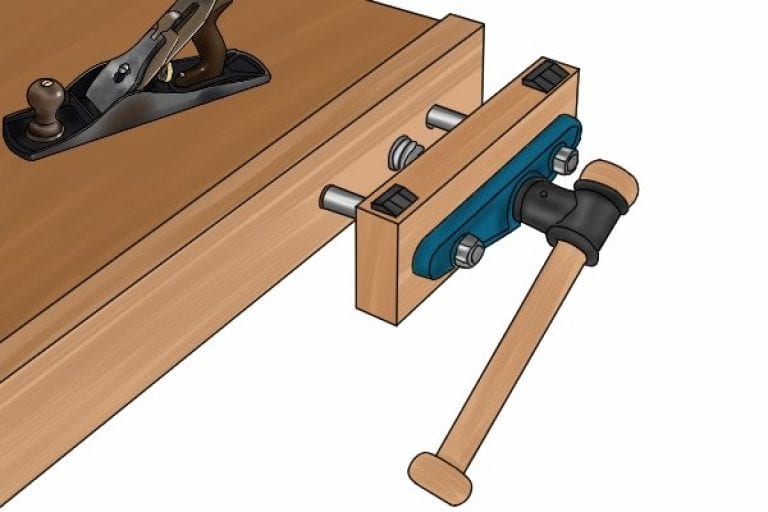
A traditional tail vise [ Photos H and I ] consists of a rectangular or L-shape block of wood the jaw fastened to a steel or cast-iron fixture that slides back and forth in a cutaway corner of the bench. A long mortise accepts the screw and threaded fixture, and the upper guide rail fits in the slot.
A lower guide rail, not shown, mounts beneath the jaw. The tail vise slides back and forth along the guide rails, held in place by the screw assembly. Too much clamping force, however, can cause boards to bow up. Typically, you use two rows of bench dogs to hold long or wide stock. The timing chain on a twin-screw end vise syncs the screws.
You can adjust either screw should the vise jaws get out of parallel. You can intentionally make the jaws unparallel for clamping irregular-shape workpieces. You need to cut a big arc or wheel out of a sheet of plywood, but you know that a handheld jigsaw Skip to main content. Bench Vises. Facebook Pinterest Twitter Text. Printer-friendly version.
Read more about Workbenches or Clamps and Clamping. More Workbenches All Workbenches. Where should you position bench-dog holes? Tool-tray system adapts to your changing needs. Buying a Workbench. For more related content, subscribe to our newsletter!
Multipurpose Smith Shop. Make the Most of Your Garage Shop. Router Jigs. Century-old Converted Workshop.


|
Buy Heavy Duty Cabinet Hinges De Make A Frame Photo Online Shop Woodworking Jig |

UTILIZATOR
15.08.2021 at 17:15:26
ToXuNuLmAz0077
15.08.2021 at 10:36:50
Drakon_666
15.08.2021 at 11:43:16
Tenha_qizcigaz
15.08.2021 at 13:28:12
SEXPOTOLOG
15.08.2021 at 18:33:25