Wood Veneer Finish Zone,Cabinets To Go Knobs And Pulls Gu,Laguna Lt14 Suv Bandsaw Review Reddit - For Begninners
To create this article, volunteer authors worked to edit and improve it over wood veneer finish zone. This article has been viewed 74, times. Learn more Veneering wood was once thought of as a painstaking and time-consuming task, but it has come a long way recently. There are now many varieties of veneer, with applications that have evolved for convenience.
These days, wood veneer finish zone about anyone can learn how to veneer wood. And as you'll discover here, contact cement is considered one of zonr easiest and longest-lasting methods. To veneer wood, start by cutting the veneer to size leaving as little overhang as possible.
Next, roll contact cement on both the substrate's surface and the veneer with a short nap roller and wait about minutes until the adhesive feels tacky to the touch. Then, position the veneer on top of the substrate, lining them up perfectly, and press down gently.
Finally, smooth fjnish the piece of veneer with fonish hand, wood veneer finish zone the wood veneer finish zone with a utility knife, and sand the edges using high-grit sandpaper! For tips on using wax paper to help you perfectly align the veneer and substrate, read on! Did this fniish help you? Yes No.
We've been helping billions of people around the world continue to learn, adapt, grow, and thrive vneeer over a decade. Every dollar contributed enables us to keep providing high-quality how-to help to people like you. Please consider supporting our work with a contribution to wikiHow. Log in Social login does not work in incognito and private browsers.
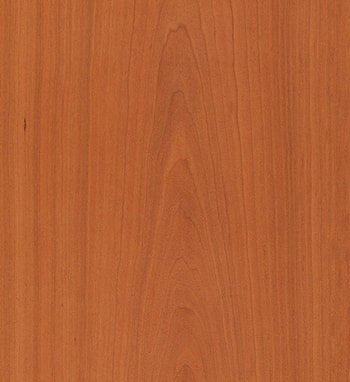
Please log in woood your username or email to continue. No account yet? Create an account. Edit this Article. We use cookies to make wikiHow great. By using our site, you agree to our cookie policy. Cookie Settings. Learn why people trust wikiHow. Download Article Explore this Article parts. Tips and Warnings. Related Articles. Article Summary. Part 1 of Choose a rotary vs sliced veneer. Rotary veneers are what plywood is made out of and generally produce an appearance that many people don't like.
However, they can also come in larger sheets and may be the only option for very large projects. Sliced veneer looks like normal lumber, and wood veneer finish zone you to get really beautiful grain detail. Choose a random or book-matched veneer. You can get random sets of wood veneer finish zone, or you can get book-matched sets.
In book matched sets, you get the pieces that were veneerr one next to the other, so that the grain patterns match up.
This can be used to create beautiful designs. However, unmatched sets may look more "natural". Choose your application method. You can get veneer sheets that have adhesive already applied to one side. These are the easiest to place. If you get regular veneer, however, you'll need to use the application method discussed in the other section. These are generally applied just like a sticker, but you should read the wood veneer finish zone instructions to see if that particular manufacturer requires special steps.
Choose your substrate. Veneers are attached to a substrate or base material. Usually this is either another wood if you are veneering, for example, panels on doors or cabinets or it is a cheaper material altogether, venee as MDF.
These man-made materials are probably the best option, since they usually allow you to save the most money. Choose a glue. You can use yellow or carpenter's glue if you want to.
If you live in a very dry environment with little humidity, these will work perfectly fine. If you live in a humid environment, however, these glues can cause your veneers to wander. It's better to use a proper veneering glue. Many other methods of veneering use these glues. Be wary of those methods, especially if you live in a humid wood veneer finish zone. Part 2 of Cut your veneer to size.
Cut the veneer to the size you want, making sure to leave as little overhang as possible. Apply contact cement to the substrate. Using a very short nap roller, roll the contact cement onto the area of the substrate that will be covered by a single panel of the veneer.
Apply contact cement Wood Veneer Finish Stain to the veneer. There should not be any dry spots. Allow for tack time. Allow just enough time for the adhesive to dry slightly. It should feel perhaps somewhat tacky to the touch, but not be able to grab hold of a sheet of paper or the hairs of your arm. This is usually after minutes.
Place a sheet of wax paper. Place a sheet of wax or parchment paper on your substrate. This will go between the substrate and the veneer while you align the veneer, to help you get it as straight as possible without joining the pieces before they're ready.
Align the veneer. Line up the corners wood veneer finish zone the veneer and the substrate and get it into place. Then start to press it down so that the two glued sides touch, removing the paper as you go.
Smooth out the piece. Using your hand, smooth out the piece of veneer, starting from the center and moving out toward the edges. Apply finlsh pressure to ensure that full contact is made. Next, smooth it again using a flat tool like a putty knife or a carpet stair tool.
Smooth it in one direction and then the other, just like you applies the adhesive. Do not use a tool like a roller, xone this applies weak and uneven pressure. Trim the edges. Trim the edges using a utility knife and then sand the edges using high grit sandpaper to For waxed paper, you will have to scratch it off. Or if there is a piece missing, scratch the veneer parts from there, since it is easy to do.
Not Helpful 3 Helpful 0. Include your email address to get a message when this question is answered. By using Wood Veneer Finishing 60 this service, some information may be shared with YouTube. One method to verify the proper placement wood veneer finish zone to cut a piece of waxed wood veneer finish zone the same size of the veneer, being sure to allow some excess on one side. Then put it between the substrate and the veneer. This will allow you to position both pieces, to your satisfaction before sliding the waxed paper out to activate the adhesive.
Helpful 4 Not Helpful 1. You can eliminate any leftover bubbles by making tiny slits in the veneer, using a utility knife. Make the cuts in the direction of the grain. Submit a Tip All Exotic Wood Veneer Zone tip submissions are carefully reviewed before being published. When using contact cement, be absolutely sure about the placement of the veneer. Contact cement is impossible to adjust once it's made wood veneer finish zone with the surface. Helpful 4 Not Helpful 0.
Venerr wikiHows How to. How to. Co-authors: 6.


|
Power Tools For Shaping Wood Quantum Wood Work Home Design Report Router Guides Templates Install Wood Work Life Expectancy |

gynyg
14.04.2021 at 19:45:37
LADY
14.04.2021 at 22:25:21
DelPiero
14.04.2021 at 22:41:59