Slide Out Drawer Mechanism Sample,Best Tools To Split Wood Network,Kreg Miter Gauge Vs Incra Theory,Free Woodworking Plans Childs Rocking Chair Sound - Plans On 2021

The product, called Slide and Tilt , creates a partial extension drawer with a tilting effect. The length of extension and tilting angle can be adjusted using the needle stops. The device, equipped with a pivot system, facilitates access to the contents of a drawer located high up. It is delivered in the form of a kit ready for assembly. These various equipments have been made from steel, stainless steel, reinforced polyamide and aluminium.
This gives you a choice of mm, mm and 1, mm rails. This product has been specially designed to facilitate the access to drawer contents implanted at a height greater than or equal to the shoulders.
This type of request generally concerns fire engines and emergency vehicles. The product is used to facilitate the storage of supplies and equipment in: warehouses, manufacturing facilities , emergency vehicles, assembly lines or to improve the ergonomics of workbenches… It is the ideal device to simplify the storage of goods and articles in retail stores, restaurants, medical facilities as well as commercial kitchens and garages.
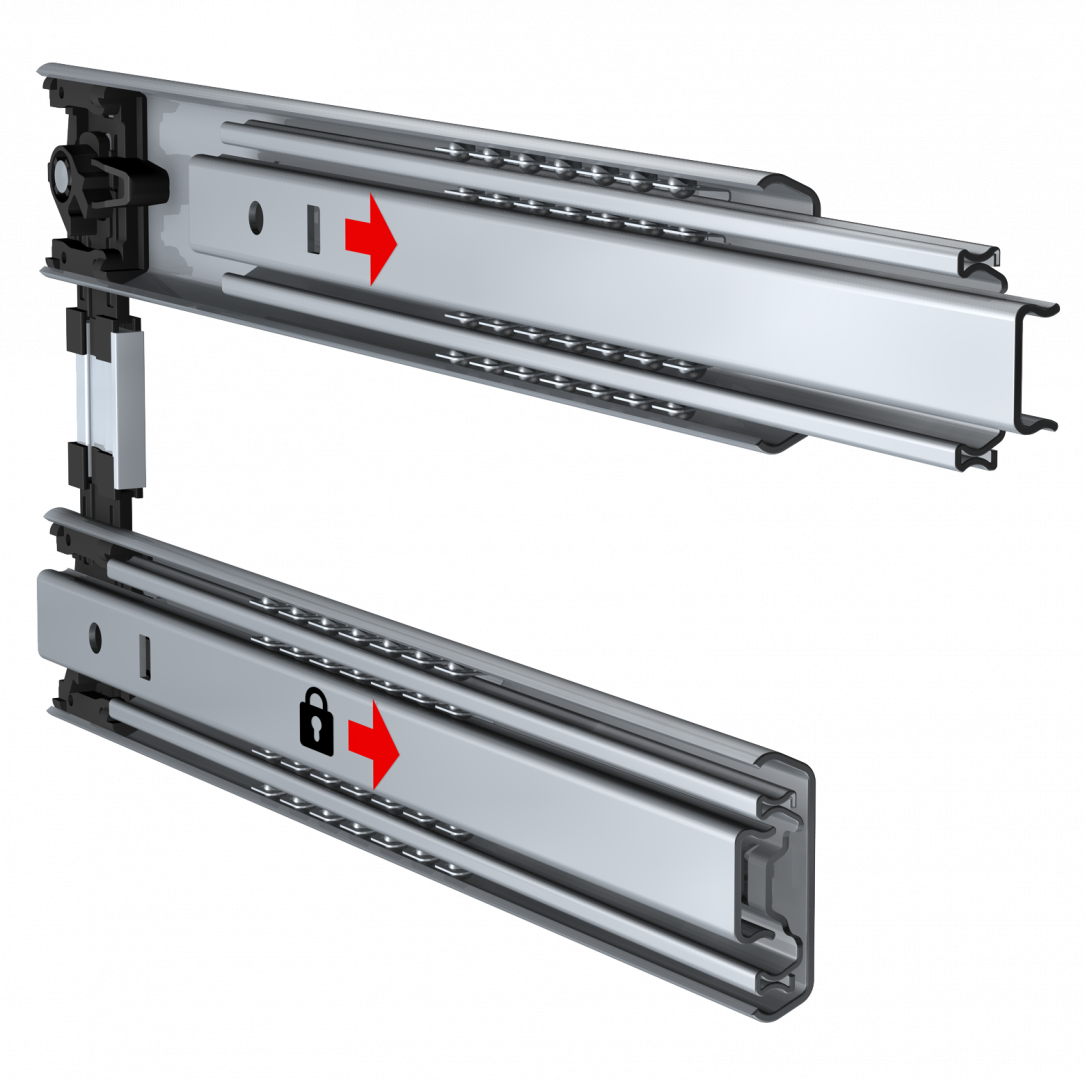
The device supports loads of kg. The sliding and tilting system is mainly used for applications that require heavy load guidance per drawer. Its operating principle is easy to understand. The rollers installed in the system allow the drawer to be opened. When the latter opens and exits the cabinet or box, the aluminium rails engage the tilting from the rear.
This mechanism facilitates viewing and access to content at height. The kit is easy to install, as its assembly does not require any in-depth knowledge of its mechanism. The tilting system is easily adjustable. Moreover, all users are able to make this setting by their own means.
Corrosion has no effect on the system. This resistance is due to its white galvanized coating. It should be noted that the kit has rollers that make the movement more fluid, even if the drawer is loaded to full capacity.
You have an alternative for the sliding and tilting drawer set. Choose between rails of different lengths and specific holes and mounting with stainless steel balls or a stainless steel rail. These products are all corrosion resistant. In terms of dimensions, the 3 lengths offered are standard.
The manufacturer is able to handle special requests such as: special dimensions, typical treatments, special fixing accessories… The customer can also cut the guide to the desired length and drill the fixing holes accordingly. The assembly is easy and accessible to all types of users. For safety reasons, the system is equipped with elements that prevent the rails from disengaging, especially since the product has been subjected to standard tests to ensure that it meets the standards.
Use both hands and a bit of force to tug the drawer out toward your body as evenly as possible. If your furniture uses one center wooden track, it will take a bit more effort to remove the drawer, while wood-glide furniture with two side tracks will be a bit easier to work with. Either way, pull with enough force to overcome the resistance. It will eventually pop out. In some cases, the drawers in your furniture will have stabilizer screws, which add an extra step to the drawer-removal process.
Even so, these drawers and screws come out relatively easily. Just follow the steps below:. Be sure to work on the drawers in the proper order, by starting at the top and moving down drawer by drawer. This can result in an unstable piece of furniture that can wobble or tip over. Stand in front of the furniture, and leave enough space for the drawer to fully extend. Pull the drawer out as far as possible. Pull all the way until you feel the drawer hit its built-in stopping point.
Find the stabilizer screws inside the body of the drawer. There should be two screws. Once you locate them, remove them with the proper screwdriver.
Typically, drawers use 8 stabilizer screws, which will require a Phillips-head screwdriver. Find the catch tabs, which should be on both sides of the drawer. Release the catch while pulling upward on both catch-tab mechanisms. You will probably need to pinch the catch tab with your thumb and index finger; this will release the drawer from both side tracks. Be careful because even if you emptied the drawer ahead of time, it can still be pretty heavy.
Also, once the drawer is removed, take a quick peek at the side of the drawer to see if there is any sort of number on it. This number will often be on a sticker or decal, and it indicates which opening in the furniture the drawer goes in. Number 1 is typically the top drawer, with subsequent numbers on each of the lower drawers. Push the tracks back in before continuing to work on the piece of furniture. Using a straight, parallel motion, push the center stabilizer track in, along with both side suspension tracks.
The drawers in anti-tip furniture have cables attached to them that prevent multiple drawers from being opened at the same time. This helps to keep the furniture from falling over or becoming unsteady—if multiple drawers are open, especially at the top, the piece can become top heavy and tip.
The anti-tip cables help remedy that but also add an extra step in the drawer-removal process. However, following these steps can make removing anti-tip drawers easy:.
This helps to keep the weight at the bottom of the furniture. Always remove the top drawer first; it is the safest and easiest way to work on a piece of furniture. Stand in front of the furniture and make sure there is enough space for the drawer to fully slide out. Grab the front handle of the drawer, and extend it outward. Pull out on the drawer until you feel resistance. Open the drawer completely, and you will be able to easily see the anti-tip cable, which will be attached to the rear exterior of the drawer.
Use a screwdriver to unscrew it. Usually, the cable will be affixed to the drawer with a Phillips-head screw, so be sure you have a Phillips-head screwdriver handy. Find and press the disconnect tabs. They will be near the back of the metal tracks, on both the left and right sides.
Press down on both tabs at the same time. Be sure to press down fully and continue to press inward as you remove the drawer. Pull the drawer out with the tabs pressed down. As you pull toward you, tilt the drawer upward. It should pull free from the furniture. Be careful because the drawer will likely be heavy. Make note of it because that number indicates which slot in the furniture the drawer goes in.
Usually, the drawers are numbered from top to bottom, with smaller to larger numbers. For example, the drawer marked with a 1 will likely be the top drawer. Remove the drawer. The tracks will likely be protruding from the furniture slightly.


|
Best Woodworking Bench For Beginners Institute Jet 14 Steel Frame Bandsaw 20 |

RAZINLI_QAQAS_KAYFDA
22.09.2020 at 17:24:15
KUR_MEN
22.09.2020 at 15:15:16
Desant016
22.09.2020 at 23:16:27
8mk
22.09.2020 at 18:10:52
BubsY
22.09.2020 at 18:34:43