Marking Knife Plans Guide,Wood Sanding Machine Malaysia Year,Milwaukee 5625 Router Motor Only Program,Stiklind Wood Blueprints Fixer Work - Test Out
I tried to make this Instructable as clear and easy as possible if you have any questions or requests for clarification don't hesitate to comment. I hope you liked it and if so please vote and like, share and watch the videos.
See you soon for my next Instructable! Great build! You really broke it down in easy and simple steps. I made a marking knife a while ago using a dull planer blade and it was very difficult to work. I might make another one using your method. Reply 4 years ago. This message facility really sucks!
Hi Mr. Redsmith, sorry I got you name wrong. Thought I heard 'David' during your video. Anyway, what do you charge for your knives? Please advise. Hello John. No worries about my name ; The "David" during the video is actually David Piccuito, from the "Making it" podcast. If you are interested, could you send me an email theredsmith hotmail.
Redsmith - and his amazing work - here is mine no video but I do have some left over stock so maybe one day. Thanks Jimi! I like yours too! How did you put the blade into the handle? And more importantly, why no video? I cut a dado out and epoxied the blade into place. I made a few major mistakes on the metal. Namely, I only did stock removal thinking that the metal was hard.
Overall, the metal can't hold an edge. I will be making some knife in future - just don't know when. Tragically, not this year it seems.
Viewing your artistic workmanship, you make me want to increase my abilities to try and become a better maker. Thank you very much! It means a lot to me. I'm very happy to be an inspiration as many were and still are for me. Thank you, I too, try and give inspiration to, the least of, my grandchildren of which when seen, has it's most rewards.
Again Thank You. Making something for your children or grandchildren is the most satisfying thing I know. Thanks again! Introduction: Woodworking Marking Knife. By TheRedsmith www. More by the author:. About: Hi, I'm TheRedsmith. I'm a maker. I make stuffs. You can support my work on Patreon. I'm The Redsmith, I'm a maker. I made a full tutorial video that you can watch here : Let's get started!
For this build, you will need : High carbon steel : I used XC75 High carbon stee because that's what I can easily find in my country. Be sure to use the right material and refer to the factory specifications of the steel you use.
Then, clamp a piece of wood to use as a straight edge optional but helps a lot. Use a cutting wheel on your angle grinder to cut the steel to width. If you decide to make two or more knives at once, follow the next step. If you're making just one, you can skip this one. Use double-sided tape to hold your pieces together. For more safety, I also used two F clamps. Use a file, a belt sander or a 2x72" belt grinder or even a hand file to straighten the edges and obtain perfectly identical pieces.
Draw a line in the middle of you blade. Then draw a triangle. The shape entirely depends on you and the angle you want for your blade. Right: A sharp wheel cutter in a marking gauge can clean a shoulder accurately like a chisel. Some believe that a woodworker is only as good as his or her scribing tool. Charles Mak, now in retirement, is an enthusiastic hobby woodworker, teacher, writer and tipster.
He formerly worked part-time at his local Lee Valley Tools store. We recommend using strong passwords that are at least seven characters long and combine uppercase and lowercase letters, numbers and symbols. An Error has occured, please try again. Your session has timed out. Please sign in again. Sorry, your username or password is incorrect. Please check your spelling and try again. Please enter the username associated with your Lee Valley account and we will send you an email to reset your password.
Sorry, your email is incorrect. Please try again. Please enter the email address associated with your Lee Valley account and we will send you an email with your username. An email has been sent. Please check your inbox. Yes, take me to Lee Valley Canada Cancel. Types of Marking Gauges Marking gauges come in different styles of cutting tips: a wheel cutter, knife or pin. Pin Gauge Pins tend to tear fibres, leaving a fuzzy or ragged line. Make a small pinhole on the line and stop marking when the point Types Of Marking Knife Guide drops into the hole.
Knife Gauge Also called a cutting gauge, a gauge with a knife slices the wood, leaving a crisp line. Scribing one clean line is preferred to scoring a line in two or more passes. Wheel Gauge Of all the gauges, a wheel gauge has the shortest learning curve. Placing the index finger over the extended stem to guide the cut.
Left: Transferring dimensions. Source: Lee Valley Tools Right: A sharp wheel cutter in a marking gauge can clean a shoulder accurately like a chisel. Sign me up to receive the latest news and promotions. No, go ahead and use your hacksaw to cut off most of the waste, then use your file to bring it right up to the line.
Take your time, you can take more off but you cant put it back. Consult the pictures to get an idea of the shape, if you don't already have one.
Now you've got the rough profile of the Make A Marking Knife Guide blade down, so lets put in some bevels. Since the angled edge, the one you just cut, is going to be the cutting edge, we'll be putting the bevel there. The angle were shooting for here is about 25 degrees.
Once you've got that line draw, go ahead and use your file to remove the metal between that line and the edge, but don't go all the way down. Leave about the thickness of a dime on the edge.
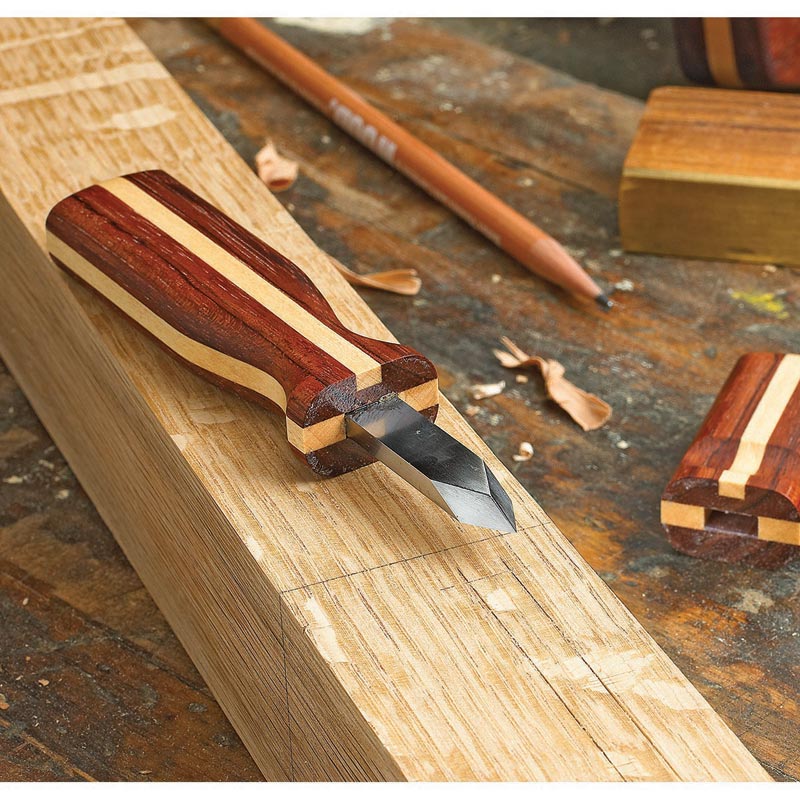
It sounds a lot harder than it is, just take it slow and work to the lines. A word to the wise, the side of the blade you put the bevel on does matter. The knife shown is a right-hand bevel, meaning that when held Marking Knife Plans Ltd the flat side of the blade will be on the left, and the bevel will be on the right. South paws should put the bevel on the other side. Now, i used my belt grinder for this, so it took me about a minute and a half, taking my time. With a file, this shouldn't take more than 15 minutes.
If you have one, a belt sander with a 60 grit belt will put in a decent bevel in less time, but I'm keeping my instructions simple. At any rate, once the bevels have been roughed in, meet me at the next step! Here's the easy step, drilling some holes for the pins that hold on the handle. First, youll want to draw a line down the center. I coated mine in layout fluid, then used my calipers to scribe a line dead center, but a ruler and a steady hand with a sharpie works too.
Now, on that center line, make a mark half an inch from the back of the blade the side opposite the cutting edge , then make a mark an inch and a half from the first one, then another mark an inch and a half from that. Check the pictures if that didn't make sense, it barely made sense to type it A drill press works best, but a handhel drill works fine too.
Heck, use a brace and bit if you want, itll give the same results, it just takes longer. This is the step that takes this from a lump of steel to being an actual knife. Forewarning though, this step involves extremely high heat and flammable substances.
If you don't have the facilities to safely proceed, lack the necessary equipment or this just makes you nervous, don't do it. Instead, you can send out your knife to a commercial heat treatment service. Tru Grit is a delight to work with, just download the packing slip, write down the steel type O1 and desired hardness 61HRC and ship it out, then join us at the next step. Pretty simple process really. O1 is extremely easy to heat treat, use a blowtorch to heat the cutting edge to about f, which will make the steel glow cherry reddish in a dim room, and keep it there for about a minute.
After that minute is up, dunk the blade in some warm oil, canola or peanut oil both work well. Hot tip, hold the blade in a set of pliers instead of by hand to avoid an ER visit! Now, after quenching, the steel is extremely hard, harder than glass and just as brittle. It will shatter like glass if you drop it, so don't bloody drop it! Instead, wash off the oil and pop the blade into an oven preheated to f and let it bake for an hour. Take it out, let it cool, then send it back in for another hour.
Do this one more time. This is called tempering, and doing this will soften the steel and toughen it up, so you'll actually be able to use your knife without cracking it.
Once you're done tempering, proceed to the next step! A quick note, heat treating steel is an extremely complex process, and this is the bare minimum of information needed. If in doubt, consult the data sheets for your grade of steel, O1's can be found here. Alrighty, now that you've got your heat-treated blade, time to finish up the metal part of things. First things first, you need to flatten the back the side opposite the bevel , so it sits nice Marking Knife Sizes Guide against a straight-edge and makes a sharp edge.
To do this, stick a piece of sandpaper on a flat surface table saw top, kitchen counter, granite surface plate, piece of mdf , mark all over the blade with a sharpie and scrub it on the sandpaper until the sharpie disappears. Repeat with higher grits of sandpaper, up until you hit about grit. Flip the flade over, repeat with the top side to make it look nice. Nows also the time to fully finish the bevel.
Use your file to bring it down almost to a sharp edge, then go back to the sandpaper to sharpen it. If you've ever sharpened a chisel, its the same process. The key things here are to keep both the back of the blade and the bevel as flat as you can, and to polish both those surface as high as you can, so make for the best edge. Its a lot easier to do these steps before you get the handle on, so get it right now and make your life easier later!
Alrighty, now that the blades cleaned up, time to attach the handle scales! First, lets drill the pin holes in the handle material, which is hopefully oversize. First, stack the 2 piece of handle material on top of each other, then center the knife on the scales.


|
Carpentry Marking Tools Tutorial Jointer Plane Meaning In English |

SuNNy_BoY
17.02.2021 at 19:56:30
Azerinka
17.02.2021 at 12:18:35