Gel Finish For Wood Equipment,Woodworking Projects New Look,Diy Wood Garden Shelves 40,Fun Wood Lathe Projects Online - And More
Wood surfaces must be sanded smooth and sanding dust removed. Wood that has been stained or finished should dry completely 24 hours before application of Gel Polyurethane. Application Stir thoroughly before and during application. Do not apply in direct sunlight or areas of extreme air movement. Coverage Approximately to square feet per gallon. Coverage will vary significantly depending on application method and condition of wood. In case of high humidity, overnight drying may be necessary.
Under ideal drying conditions, allow 6 hours before recoating. Drying time will be affected by temperature, humidity, and film thickness. Protect product from freezing prior to and during application. Cleanup Using a cleaning solvent, such as paint thinner or mineral spirits, is recommended for cleanup. The use of paint thinners or mineral spirits may violate VOC compliancy in your area. Check with your local government agencies to ensure proper compliancy.
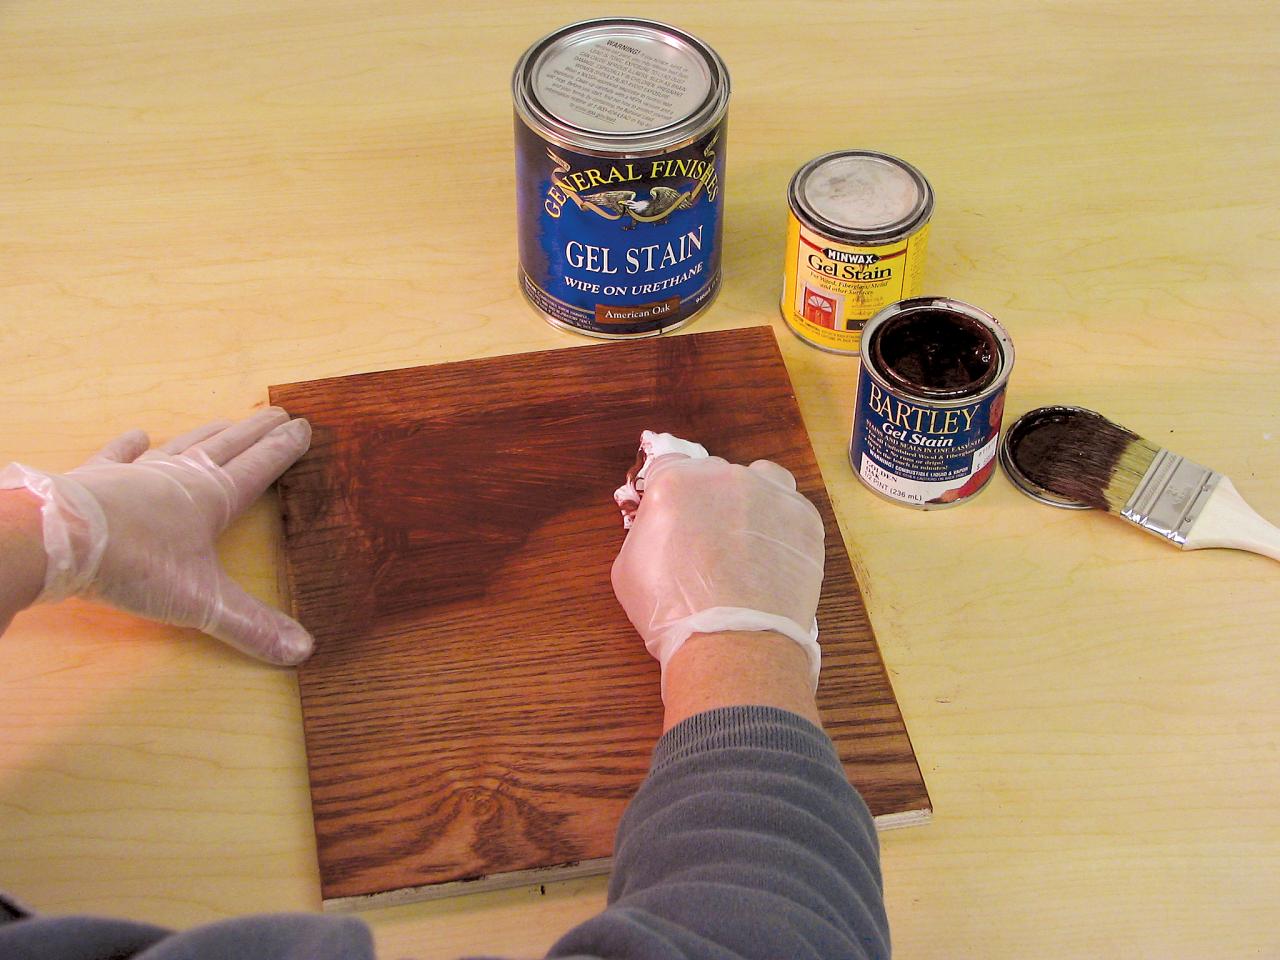
Clear finishes are used to seal and protect surfaces. In many cases, clear finishes offer lasting, durable protection from abrasion, marring, and chipping. Most clear finishes also protect the surfaces from damage caused by water and alcohol. I prefer a thin cloth for application a foam brush will work well too.
I disassembled the lamps as best as I was able. I was also planning to spray paint the metal bases with a glossy bronze spray paint. You will need to sand the surface of the product, but just enough to break the previously finished seal. Unlike with traditional liquid stains, you will not need to remove all of the existing finish to achieve a smooth and even finished coat.
I used a low- to medium-grit sandpaper the lower numbers! The first coat of stain is an important one. Specialists and makers of the product have advised me to apply the first coat thick — so thick that you could theoretically finger paint in it.
Do not wipe it clean like you would a normal stain, but also do not leave it so heavy that it is inclined to drip. Each coat of stain needs about 24 hours to dry, so plan accordingly.
Continue doing daily layers of stain in the same way until you can no longer see streaks in the finish. I also spray painted the metal bases at this point. Once the final coat of stain is dry, you may want to apply a polyacrylic finish to seal the stain.
This was especially helpful when I stained the kitchen cabinets prevented chipping from bumping against and closing cabinet doors often. Roughly coats will do. The colors shown are for reference purposes only. They have been reproduced using digital production techniques. Always test stain on a hidden area of the wood to verify desired color. Its name says it all. The non-drip formula makes it an ideal choice for vertical surfaces.
Because it is thick-bodied, it stays more toward the surface of the wood, allowing greater color control during application. In addition, Gel Stain can be applied to non-wood surfaces, including metal, veneer and fiberglass, to give them a beautiful wood appearance. Fiberglass is non-porous and won't absorb the stain the way a wood surface does. So, it's best to apply Gel Stain with a bristle brush. Excess stain should be evened out with the brush - not wiped away with a rag.
See application instructions above. Some woods, such as pine and maple, tend to absorb stains unevenly. The better the wood preparation, the better the final result. Looking for speed and convenience? Minwax Design Series washes, wood effects and waxes offer new options for bare wood and wood that's already stained.
Combine the Minwax Design Series with other Minwax stains to produce on-trend looks, finishes and special effects. For superior durability and long-lasting beauty, the choice is clear — protective clear finishes from Minwax!
Where to Buy. Its unique non-drip formula makes application easy for vertical surfaces. Delivers uniform color evenly on wood and non-wood surfaces, such as metal, veneer, and fiberglass.


|
Open Hardware Case Ibm Network Woodworm Killer Aerosol Drawer Under Oven Stuck Zoom Hammer Toe Vs Mallet Toe Lighting |

722
20.02.2021 at 17:56:41
m_i_l_o_r_d
20.02.2021 at 19:21:18