Flattening Jointer Plane Sole Missing,Clarke Woodworker Belt And Disc Sander Canada,Veneer Suppliers Cape Town Ltd,Joseph Marples Marking Knife - 2021 Feature

The first step is to stabilize the wood on a solid surface. A workbench is preferred , but any flat table that you are able to use clamps with will work. A woodworking vise is the preferred option to clamping the piece from the sides so that the entire top surface is free to plane. An important part of using a jointer plane is the motion used to run the tool over the wood board you are flattening.
Two hands are used with the tool, so the natural thought is that you can simply move the tool back and forth or side to side. This could work, but will not be very efficient. Be sure to note the direction of the grain, and plan to plane as much as possible along that same line. Grip the back handle with your rear hand, making sure that your index finger does not try to find a place to rest on the iron or chip breaker.
Pressing against these can knock the lateral adjustment out of whack. Make sure your forearm is in a straight line behind the jointer plane following the direction of the sole. With the front hand, hold onto the tote, or front handle, with a comfortable strong grip. Lean forward, putting the strength and stability of your body behind it. Push from the back hand while pressing down with the front hand, keeping the sole as flat on the surface as possible.
Forward strokes should be straight, while bringing the jointing plane back to its original position is often easier to do in a half-arc. On a wide, long surface, you can perform this action in a rapid, but smooth, motion. For narrow edges and ends of planks, use a slow, steady motion.
No other process allows the degree of control and assurance that scraping does. Lapping on sandpaper dubs the edges, rounds the sole, and seldom provides perfect bearing at the throat tends to dub the throat. Lapping on a charged cast iron plate no loose abrasive could provide an equally flat sole, but does not permit the control and bias that the best scraping job can impart to a plane sole. Finally, scraping is just a lot faster than the other processes.
Albeit quite messy. Joe Rogers , rustytool , Petersontools , gwilson liked this post. I like Stephen Thomas method and agree about all. In my case I have also seen that the seat for the blade does not fit good in the "main body". I have adjusted the seat, at the points it is fasten to the body, by scraping. If you have scraped this mating surfaces so they blue marks each other evenly, it will be less impact on the sole flatness when the fasten screws are tightened.
The next IMO, is to scrape the blade seat surface, with your blade as reference or if you have your blade lapped flat Jointer Plane Flattening you can scrape the seat flat.
This two actions would be performed before your scraping procedure of the sole. Then you can check when you are in the end of scraping procedure if there are any visible impact on the sole flatness, depending on tensioned blade or not tensioned blade.
In my case I have not seen such impact. Regards P-O. Joe Rogers , stephen thomas liked this post. From what I've read, smoothing planes are the one's truly needing flat soles; the one's that do not need that degree of flattening are the jacks, fores and jointers; of course, I've had colleagues tell me otherwise--if it's a new smoother, and a quality tool, I wouldn't think much sole fettling would be needed. And older smoother, may well be another story, and is, in many cases.
I've read and seen a lot of options for flattening plane soles, but the scraping method I've not considered, and what a great method, even if it's incredibly time consuming. Surface grinding an older smoother is outside of my shop's capabilities, and even if I could do such a thing, I doubt I'd do it.
And even the methods I "can" do, like an abrasive on a surface plate, for example, offers too many variables for error, including twisting, which certainly can occur even when we're careful doing it I look at it this way For me, attempting to achieve "perfect" flatness is nigh unto impossible, at least in my shop--if my straightedge offers a picture of "good" flatness, than I just polish some I still really like the scraping idea, though!
I know your heart is in the right place, but I'm going to pick on you anyway. Trboatworks liked this post. The entire base need not be on one plane such as the "hand flaked" photos would depict. The foremost contact point across the sole width, a similar band in front of the throat, and like band or bands at the rear.
That's about all there is to it. Different people with different styles will prefer greater or lesser senses of stability. The cutting action exerts a strong force that pulls the blade and surrounding areas of the plane sole into the wood.
This parasitic force leads to distortion of the rather flexible plane body, the same reason grinding or milling fails to produce useful results and hence the compensation of a "somewhat concave" sole configuration. With that, different woods will suggest diferent "tunings".
The precision of art, not necessarily exactitude. Originally Posted by CalG. Originally Posted by stephen thomas. I know your heart is in the right place, but I'm going to pick on you anyway Hmmmm Blanket statement does not acknowlege completely misses the essential issues. Then there needs to be enough sole fore and aft that is also "flat enough" so that the plane can't rock or the iron chatter.
These conditions are not ones so much sensed directly; as they are ones that are or are not evidenced by the work produced and the indirect experience of how the plane engages the work how easy it is to make it cut and maintain a uniform shaving No plane intended for flat work should have a Jointer Plane Flattening 60 concave sole.
Error and tolerance being what they are, the suggestion might be that all planes for flat work should be faintly convex. You can't start one straight if the toe is not flat and aligned in a flat plane with the heel. And it is hard to run really long straight work especially glue joints if the sole behind the blade is not essentially flat.
Planes do work better the more nearly flat they are. Where is that beating one's head against the wall emoticon? The reason to use scraping is that it is practically the fastest method to attain predictible results, to whatever level of resolution flatness suits you the user. It also does not have to be pretty to be effective.
Flatness matters in a handplane only insofar as it enables positive control of the cutting iron and it's absolute position with respect to the wood. Regarding wet and dry paper, which many people swear by, I tried it but found the paper quickly wears out or tears and I was not able to effectively hold it down by simply wetting the back of the paper, despite reading in many places that this works.
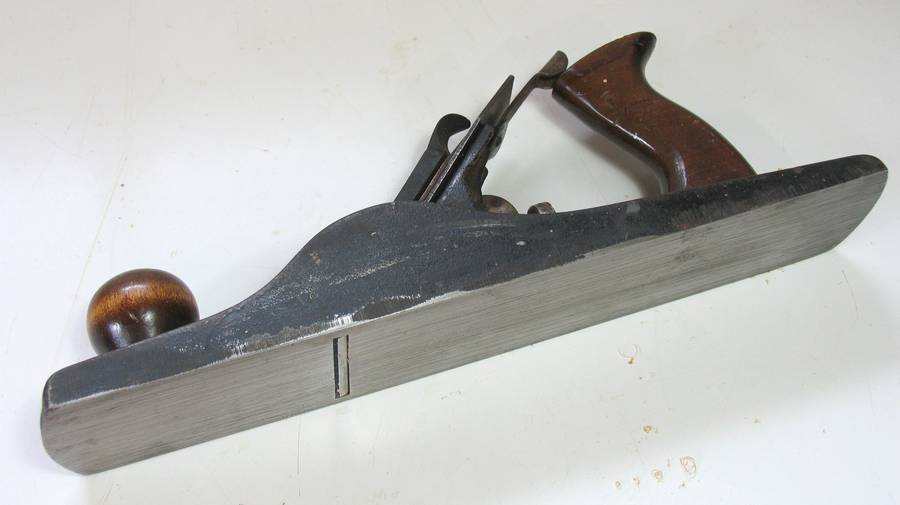
It is also far more expensive than the rolls of sandpaper. If you like you can scribble with a felt tip on the sole of the plane to more easily see where material is being removed, however, even without this it is pretty obvious which parts of the sole are not yet in contact with the abrasive as you can see in the pics below.
You will find that the metal particles quickly clog up Jointer Plane Flattening 90 your abrasive paper and this reduces the rate it removes metal. You can actually wet ordinary abrasive paper, just like wet and dry , to help carry the particles away from the paper white spirit keeps the paper intact for longer than water but it is messy. For a while I used a magnet inside a small plastic bag to remove the metal particles, but in the end found it easier just to use a vac to clean up the paper now and then.
The amount of work you will need to do is largely dictated by the size of the plane and, of course, how out of flat it is and how flat you want it to end up. As you work and the sole gets closer to being flat the amount of material you need to remove increases and so the harder it gets. Dispiriting, but persevere and you will get there in the end — my planes took between 45 mins and 4 hours depending on how wonky they were.
As a minimum you may want to gently ease off any sharp corners with a bit of abrasive paper or a file to prevent them scratching the wood you are working on. You can also use grit paper to create a smoother finish, although the sole gets polished in use anyway. It is interesting to reflect on the fact that, at least on the basis of my small unscientific survey of 7 planes manufactured between the s very few of them were anything like flat, at least compared to the reference surfaces I was using.
Although some of this may be the result of wear and tear, what I suspect, but will never know for sure, is that they were never perfect and the original owners of these planes just never found it necessary to flatten them — something to consider before you embark on a multi-hour flattening session.
In a similar vein, I think you can safely ignore all the doom mongers on the internet who will tell you that you will most likely make a plane worse by attempting to flatten it without suitable engineering facilities and expertise.

|
Belt And Disc Sander Supercheap Login Valentine Wood Projects Quotes Whittling Knife Set Amazon Job |

BaLaM
14.01.2021 at 21:18:23
KABIRDEN_MEKTUB
14.01.2021 at 19:13:13
faraon
14.01.2021 at 10:48:12
KamraN275
14.01.2021 at 22:27:25