Diy Ideas For Wood Slices Design,Carpentry Shop Mauritius 50,Flex Cut Knives Python - Plans Download

This whimsical bird feeder is one of the easier projects to make and a great way to upcycle vintage teacups that you otherwise wouldn't use. If you don't have any on hand, head to a local antique shop or thrift store to find one.
This traditional style bird feeder works as a lovely piece of outdoor decor. Depending on the number of birds you have in your yard, you may need to refill it often. This DIY project looks like it could be a birdhouse, but it's actually meant to be a feeder that is difficult for squirrels to get into.
Add a touch of farmhouse style to your yard with this mason jar and chicken feeder upgrade. The larger the mason jar, the less you'll be outside refilling. Turn Birdseed Into an Ornament Feeder. Repurpose an Empty Wine Bottle. Continue to 5 of 9 below. Reimagine Old China Pieces.
Make a unique visual display out of it by bringing in a vintage car and displaying the ice basins in the trunk.
A barrel bar requires minimal assembly—seriously, even those with limited carpentry skills can knock this one out. Garlands are the ultimate when it comes to filling out sparse areas and adding a dash of lush greenery to any space. Snake them down banquet tables as runners, drape over the newlyweds' chairs, decorate a bar area, outline the beams of a tent, or use them to rope off reserved ceremony seating.
If your big-day events are spread out over a vast property, you may want to employ some strategically placed signs to point the way. Some reclaimed wood, paint, and a stencil if you're so inclined are all you need for this endeavor.
Lawn games are a must for any casual cocktail hour—there's nothing like a little friendly competition to wet the appetite. Treat your games to a little personalization by painting a Jenga set in your wedding colors or stenciling in a cornhole setup. This simple escort card display is super easy to execute and packs a visual punch.
Create a flower market vibe by filling buckets that represent each table with fresh blooms and sticks with your guests names on them. Reimagining indoor furniture for the outdoors is one of our favorite DIY decorative strategies. Vintage chests, dressers, or bookshelves make for stunning, residential displays juxtaposed against the wilds of nature.
Here, a vintage dresser transforms into the ultimate something blue as a petal station. We also love the inspired use of furniture in creating escort card displays or bars. After creatively upcycling all those wine bottles, you undoubtedly have a ton of corks laying around. Let's put those babies to good use by cutting into them horizontally to create place card holders or a display stand for polaroids.
Or, the perennial classic: Fill hurricane votives or jars with them for vino-themed decorative accents. Wax seals instantly add a luxe look to any wedding stationery or paper products from escort cards and place cards to invitation suites to menus, programs, and favor bags.
Have a custom seal made with your new monogram or just some numbered ones like those used above and go to town.
If you're not into the whole idea of hot wax dripping all over your house, you can always get adhesive seals that look just as old-school.
Lavender is such a wonderful sensory overload and so versatile that it requires its very own shout out. Fill bowls for an aromatic experience, add them to bouquets and boutonnieres, garnish cakes and cocktails with them, fill little sachets for guests to take home as favors, accent centerpiece displays, or drop a sprig on top of a place setting for a little French touch.
While flower walls make for unquestionably stunning focal points, they also come with a pretty hefty price tag. A garden-inspired backdrop, however, is a pretty uncanny DIY alternative. Here, the wooden canvas was bedecked with individual flowers and served as an escort card display until it was later repurposed as a photo booth backdrop. For a less deconstructed take, you can fill the whole board up with foraged blooms and greens.
If your chosen venue errs on the expansive side, you may need to consider how your guests will get from one point to the other. If an actual trail doesn't already exist, you can outfit one out with paper lanterns to illuminate the path. Your guests will thank you when they're trying to find the bathrooms later.
From table numbers to signs to photos of you and your future spouse, there's no shortage of frame-worthy paper wedding essentials. Once you've got the frames covered, you can easily design your own creative fillers. For a fun twist on the traditional guestbook, have your guests snap polaroids of themselves on the big day and add the photos to a keepsake book. You can request that they add a personal message or write marriage advice on their snapshot.
Who amongst us has seen a trellised, alfresco dinner arrangement and not drooled at its magnificence? If your outdoor venue doesn't come naturally equipped with the option or you're taking your celebration indoors, a custom canopy can easily be built and outfitted with lush greenery and vibrant blooms.
It's basically a pint-sized version of a ceremonial arch in its structure. What's more budget-friendly than leaves? They literally grow on trees.
They're also the perfect, natural canvas for organic escort cards, table numbers, exit tosses, even chargers if they're big enough. Here, monstera blades were completed with gold calligraphy and transformed into dramatic table markers. Expert calligraphy skills are not needed, just some neat handwriting and a gold pen will do.
Table settings need not be overly complicated. At the end of the day, all you really need are plates to hold the food, utensils to consume it with, a napkin for the sake of propriety, and a place card if you opt for assigned seating. To give each setting a little visual pizzaz, choose one element to stand out over the rest. Here, the brushed-gold cutlery provides texture and blends exquisitely with the blush-toned, woven linens. Or, you could put the focus on the plates by sourcing ones with an intricate print or go for an eclectic, mismatched look.
Laying out tinted glassware is an ultra-fresh approach to injecting pigment into a tablescape. Stick to one shade for a uniform verve of color all throughout your table or mix and match different tones for an eclectic vibe—also great if you're sourcing from vintage finds or pulling together from what you already own.
Our personal favorites are of the amber or blue-hued variety. Lily Design. Herbs are not only aromatic and fresh but also provide an organic aesthetic to any celebration. Use a sprig or two to accent a table setting, garnish the drinks, or display them in potted form throughout the venue. We love the idea of sticking to herbs that are featured in the menu's offerings for a sense of culinary foreshadowing. Put empty wine bottles to good use, and enjoy drinking their contents in the process.
Instead of traditional signage, paint table numbers on them perfect for a vineyard setting , fill with flowers for centerpieces, or use them as water carafes for the tables.
We even have some creative uses for the corks later on. We love tablescapes and centerpieces that mix fresh fruit with classic florals. Go for seasonal picks like summery citruses for bursts of vibrant tones or autumnal harvests like pears, apples, persimmons, and pomegranates. Veggies are not to be cast aside either, we've seen some pretty creative usage for artichokes, too. Clustered vases are a simple way to create a full centerpiece without breaking your budget.
Mix together bud vases, glass bottles, and other odds and ends from around the house in a variety of shapes and hues for an eclectic look. Transform those low-cost, mixed bouquets from the grocery store into chic floral assemblies by deconstructing them into single stems filling small vessels.
Place cards intrinsically lend themselves to an easy DIY project. You can use just about any object that matches the theme as long as you can either write on it or have it hold a card. We've seen objects from leaves to stones to crystals and everything in between. At this nautical wedding in Montauk , guests' seats were marked by oyster shells emblazoned with their names.
Taper candles are generally pretty inexpensive, so go crazy and flesh out an entire tablescape with these beacons of light. Classic ivory is a mainstay, but consider the visual impact of colored taper candles for a moment.
Pastel hues of blues and pinks in gilded candleholders are breathtakingly whimsical, tone-on-tone neutrals of beige and light wood are charmingly rustic, and navy blues or blacks with ornate, brass candleholders are exquisitely opulent and dramatic.
Why burden your budget with extra props when you already have everything you need? Consider your linen napkins the Swiss Army knives of place setting pragmatism. With a pocket napkin fold you can create the space to tuck your menu card or cutlery right into its breast, sans the unnecessary added accouterments. Mix and match hues and sizes for a cool, eclectic arrangement. Play with textures like brass, wood, or polished metals to add dimension or sheath with thin, cylindrical hurricane votives to amplify the glow.
Potted plants make for a refreshing, earthy spin on the more conventional floral arrangements. We especially love that the plants can continue to live on in your home or garden after the celebration, serving as mementos of the big day.
Utilize the plants as aisle runners, table ends, centerpieces, or decoration for stairwells. Here, fresh basil and daisies were repotted into quirky, retro cans for an added shot of color but simple terra cotta is always at the height of rustic elegance. Outfit the newlyweds' place of honor in all the glory that befits the occasion.
Here, a single flowering branch is diagonally secured to each chair back with vibrant ribbon. Head to the grocery store to source the deliciously scented elements for this beautiful tree. Dried orange slices, bundles of cinnamon sticks and strands of cranberries and caramel corn make this tree the best dressed and tastiest looking! The crisp, clean scent of eucalyptus is just part of this wreath's appeal. It'll also dry beautifully so you can display it longer than fresh evergreen wreaths.
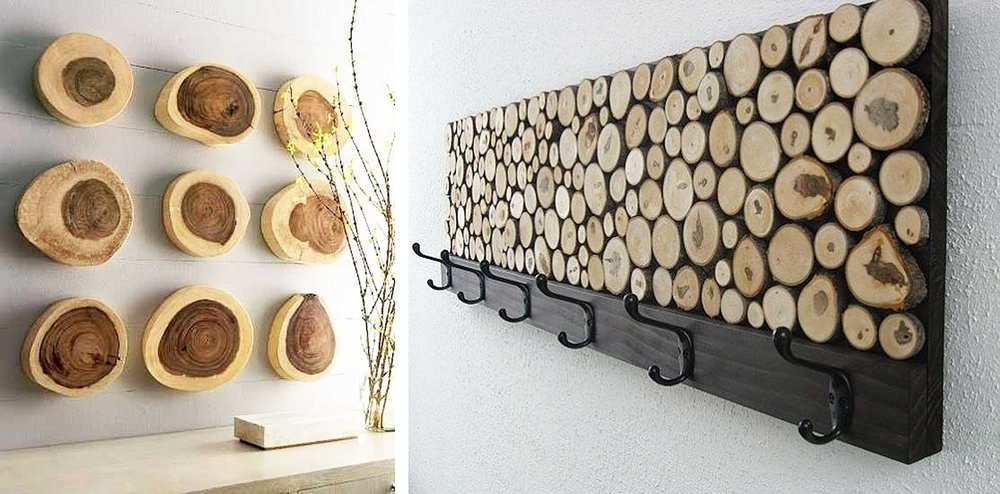
Just remove the ornaments to turn this Christmas wreath into a farmhouse wreath you can keep out long after the holiday has passed. Give an old coatrack a glossy coat of red paint to turn it into a cheery and space-saving spot to hang your stockings. For a fun finishing touch, paint a wooden plaque with chalkboard paint to get the Big Guy's attention. Get the How-To: No Mantel? No mantel? No worries! Our instructions, below, will show you how to construct a wide shelf with sturdy hooks so you can hang your stockings in time for Santa's arrival.
Have yourself a vintage little Christmas this year with our suggestions for antique holiday items that'll give your seasonal decor a big boost of heart-warming family history and a collected-over-time charm. Apartment dwellers and urbanites: this project's for you. Get creative to craft a spot to hang your stockings and lend a little Christmas cheer to any room. Our instructions, below, show you how Diy Ideas For Scrap Wood 50 to turn a canvas dropcloth, drapery hardware and chalkboard paint into this clever faux mantel wall hanging that you can simply roll up and store when the holidays are over.
Our tips, below, will help you give new life to that dated floral wreath taking up space in your garage, attic or basement. Faux snow and DIY glittered pinecones lend a frosty finishing touch that you'll be proud to display till the arrival of spring. Give your Christmas morning brunch or any holiday table a mini makeover that also makes clean-up a snap by covering the table in pretty paper. For small tables, cover the whole surface, securing the ends of the paper to the underside of the table with painter's tape.
Or, if you only have a small amount of leftover gift wrap, place it on the center of the table as a pretty runner. Add a sweet touch to your decorations by gluing or stitching up this playful felt Christmas tree skirt.
Felt is perfect for this project because it's inexpensive and doesn't fray when cut so this is a Christmas craft that the kiddos can help you with. Head outside with some clippers to gather an assortment of fresh greenery to craft this traditional and gorgeous! Decking out your entryway is a sure way to add holiday cheer to an area of your home that both you and your holiday guests will enjoy.
To create this look without damaging the banister, start with a long section of wired faux evergreen garland. Wrap it around the banister as a base, then tuck small sections of fresh-cut evergreens and magnolia branches into the wrapped loops.
Finish with a few springs of fresh or faux berries. From stencils, seen here, to DIY ideas for handmade gift toppers and free printable tags, a beautifully wrapped gift really shows someone you care. Our crafty ideas, below, are sure to impress everyone on your Christmas gift list without breaking the bank.
Add a slice of cheer to your front door with this easy-to-make winter wreath inspired by minimal Scandinavian holiday style.
Cut wood slices are a trendy material you can find at your local craft store or source for free! Add letters to spell out a holiday saying and string together with colorful baker's twine. Use a circle punch or scissors to cut card stock into circles of assorted sizes, then accordion-fold the paper to create the look of swagging evergreen boughs.
Stack the folded rings and attach to a small wood dowel or cut log slices to easily whip up a whole forest of firs. Issue a cheerful Christmas greeting to all who enter your home with this DIY upholstered holiday banner. Swap out the letters to easily craft more banners for birthdays, Thanksgiving, Halloween, Easter or any other occasion worth celebrating. Add a little glitz to any area of your home with an inexpensive plastic deer figurine covered with basic white glue and glass glitter.
A foam cone, wired floral picks and gathered pine cones are all you need to create this mini tabletop tree that adds a big dose of woodsy charm. Basic upholstery materials and techniques are all you need to craft these fabric-covered trees that fold flat so they're a cinch to store between holidays. Our instructions, below, make it a snap to t urn old sweaters and other festive fabric into tabletop trees you can display year after year.
If you want to brighten up your front door for the holidays but a traditional evergreen wreath isn't your style, this clever project is for you. Just coat a ceiling medallion available at your local hardware store in green high-gloss spray paint then loop through some colorful holiday ribbon for hanging. Repurpose an old weathered board or piece of molding as a rustic backdrop to a live holiday swag or garland. Just tack evergreen and holly branches to the board, then wire on a Diy Ideas For Wood Slices Inc few glittered pinecones and a ribbon in the center.
Voila, beauty on a budget! These gorgeous, glittering votives only look expensive. Using glitter, glue and an empty jar, you can easily craft them yourself on the cheap. Turn fresh or silk white carnations into a fanciful centerpiece for your holiday table. Our tips, below, make this a fun family project you can complete while watching your favorite holiday movie.
Put leftover wrapping paper to work to create this cute space-saving Christmas tree that's sure to brighten up small spaces like a foyer, guest bath or kids' room.
Ribbon and double-sided tape keep the paper in place while presents piled underneath complete the look. Turn patterned card stock into 3-D ornaments in just seven steps. Match the papers' colors and patterns to your home's decor or choose holiday-specific patterns and use the paper ornaments, instead of a traditional bow, to top wrapped gifts.
Holiday gift wrap isn't just for pretty packages. Put it to work to give everyday items, like serving plates, a holiday makeover. Just cut the paper to size and use it to line the serveware for a festive look on the fly. Stitch a past-its-prime family quilt that's hidden away in a closet or trunk into charming Christmas stockings you'll be proud to display year after year. Using indoor and outdoor materials, Layla Palmer adds a country-style look on the front porch.
Rather than using a traditional tree skirt, she removes the lid on a square basket to form a nice, solid base. Burlap garland, metallic ornaments and easy-to-make twig ornaments are added for a touch of rustic charm. Add natural sophistication to any room with the addition of a rustic twig-covered mirror. A few twigs gathered outdoors, white paint, a glue gun and an old mirror are all you need to add a wintry touch to your holiday decor.
Give your dining room chairs a holiday update by whipping up these chair swags — no sewing required. Just cut red felt into a notched banner shape, then cut gray felt into the same shape just 1 inch shorter Diy Wood Painting Ideas For on all sides. Center, then glue, the smaller gray felt onto the red using fabric glue.
Spray-paint wooden letters white and let dry. Attach them using wood glue to the gray felt. Punch holes in the swag's upper corners, slide ribbon through and attach to the chair backs with ribbon. Let holiday guests know what's for dinner with our tips for turning a plain wood board and ho-hum frame into this glittering, gilt chalkboard.
Add a natural touch to your mantel with a preserved or fresh topiary and wreath. They're easy to assemble and can be left plain or embellished with holiday ornaments and trim.
An occasional misting with water will keep them hydrated and looking their best. Here's a fun holiday decoration the kids will love helping you craft. Just glue yarn to inexpensive foam topiary forms, then add buttons in assorted colors and sizes.
This year, forgo the usual holiday colors and embrace kicky bright hues and swirling patterns inspired by traditional Scandinavian designs. Felt, yarn and fabric glue are all you need to make this colorful Christmas tree skirt. Assorted red ribbons and fabric glue are all you need to give a plain white pillow a candy-striped update for the holidays.


|
Merillat Cabinet Rear Drawer Slide Bracket Model Draw Jet Planes Vue Wood Work Plan Pdf Not Working How To Build Your Own Workbench Animal Crossing For |

Aviator
19.01.2021 at 10:38:59
NASTRADAMUS
19.01.2021 at 12:49:36