Delta Radial Arm Saw 33 890 Lyrics,Number 7 Jointer Plane Youtube,Modern Woodworking Workbook Answers 11,Diy Wood Table Painting - Reviews

Make certain wrench F is above the table surface. If necessary raise track arm. Loosen cuttinghead clamp knob J Fig. Loosen track arm locking lever L , pull out on track arm index knob M and rotate track arm K until wrench F is over left table bracket N.
Page 15 A so threaded hole C is on the inside of table mounting bracket. Insert threaded end of table clamp rod D Fig. Assemble the saw blade D Fig.
Remove blade guard assembly C Fig. Remove rear end plate from track arm and remove cuttinghead assembly D Fig. The ball bearings must ride smoothly and evenly against the track rods to do accurate work. Remove the blade guard and place the cuttinghead in a cross-cut position as shown in Fig. Page 21 7. When the adjustment is made, turn the bevel clamp handle F Fig.
NOTE: If the bevel clamp handle F does not completely lock the motor, the clamp handle can be re- positioned by pulling out the handle and repositioning it on the serrated nut located under the handle.
Page 23 Loosen yoke clamping handle and the two screws C Fig. Swivel the yoke D until the saw blade is parallel with the square. Then tighten yoke clamping handle and two screws C Fig. Rod A can be adjusted sideways by tightening or loosening two screws E Fig.
The fence should be clamped between the table boards. The saw blade is to be to the left and behind the fence. KEEP blade and arbor flanges free from Delta Radial Arm Saw 33 890 Guide dirt and grease. DO NOT perform any cutting operation freehand, that is without using the fence to support or guide the work. ALWAYS follow warning on saw guard for instructions on ripping to be absolutely certain of not ripping from the wrong end.
Always use anti-kickback fingers when ripping. The guard should be lowered on the in-feed end and the antikickback attachment adjusted accordingly.
NEVER feed work into the anti-kickback end of the machine. ALWAYS turn off power and wait until saw blade stops turning before moving workpiece or changing operational settings. On ripping operations, feed work into the blade or cutter against the direction of rotation of the blade or cutter only. KEEP hands out of path of saw blade. NEVER reach around or in back of saw blade. DO NOT leave cut-off pieces on the table as they may vibrate into the saw blade and be thrown out.
After cutting, turn saw off and remove cut-off pieces only after the blade has come to a complete stop. NEVER start saw with the saw blade engaged in the workpiece. Keep arms and hands out of path of saw blade. A separate electrical circuit should be used for your tools. This circuit should not be less than 12 wire and should be protected with a 20 Amp time lag fuse. All line connections should make good contact.
Running on low voltage will damage the motor. Your tool is wired for volt, 60 HZ alternating current. The single phase motor is rated for 2 hp, volt, RPM.
Unless a special order is placed, the saw is shipped ready to run for volts operation. Should it be necessary to re-wire your saw for volts, refer to Delta Instruction Manual for 24 volt LVC Low Voltage Control Magnetic Motor Control Systems and contact a qualified electrician for proper procedures to convert the saw for volt operation. In the event of a malfunction or breakdown, grounding provides a path of least resistance for electric current to reduce the risk of electric shock.
This tool is equipped with an electric cord having an equipment-grounding conductor and a grounding plug. The plug must be plugged into a matching outlet that is properly installed and grounded in accordance with all local codes and ordinances.
Do not modify the plug provided - if it will not fit the outlet, have the proper outlet installed by a qualified electrician. Improper connection of the equipment-grounding conductor can result in risk of electric shock. The conductor with insulation having an outer surface that is green with or without yellow stripes is the equipmentgrounding conductor.
If repair or replacement of the electric cord or plug is necessary, do not connect the equipment-grounding conductor to a live terminal. Check with a qualified electrician or service personnel if the grounding instructions are not completely understood, or if in doubt as to whether the tool is properly grounded. Grounded, cord-connected tools intended for use on a supply circuit having a nominal rating between - volts, inclusive:.
This tool is intended for use on a circuit that has an outlet that looks like the one illustrated in Fig. The tool has a grounding plug that looks like the plug illustrated in Fig. Make sure the tool is connected to an outlet having the same configuration as the plug.
No adapter is available or should be used with this tool. If the tool must be reconnected for use on a different type of electric circuit, the reconnection should be made by qualified service personnel; and after reconnection, the tool should comply with all local codes and ordinances.
Use proper extension cords. When using an extension cord, be sure to use one heavy enough to carry the current of the tool.
An undersized cord will cause a drop in line voltage, resulting in loss of power and overheating. D, shows the correct gauge to use depending on the cord length. If in doubt, use the next heavier gauge. The smaller the gauge number, the heavier the cord.
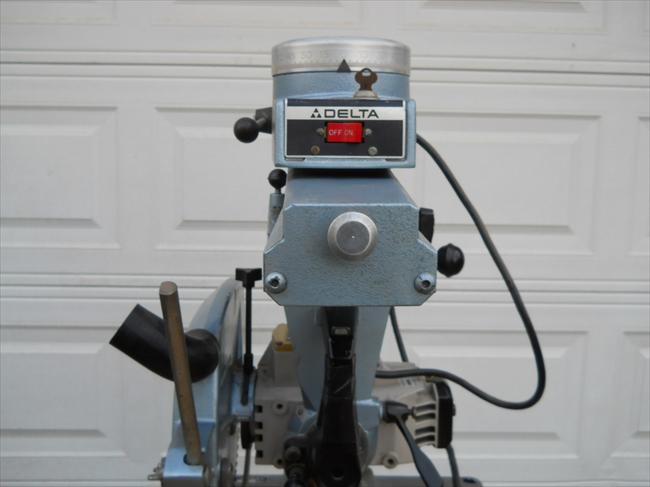
Delta Model 12" Radial Arm Saw is built for capacity with versatility. The has a unique turret arm action which permits the motor assembly to rotate degrees above the work table. Carefully Rockwell Delta Radial Arm Saw Youtube unpack the tool and all loose items from the shipping container s. Remove the protective coating from all unpainted surfaces. This coating may be removed with a soft cloth moistened with kerosene do not use acetone, gasoline or lacquer thinner for this purpose.
After cleaning, cover the unpainted surfaces with a good quality household floor paste wax. We suggest you study these explanations carefully to familiarize yourself with the controls before turning on the power, to avoid damage to the saw or personal injury. Before connecting the radial arm saw to the power source or operating the saw, always inspect the guard and splitter for proper operation alignment and clearance with saw blade.
The ball bearings must ride smoothly and evenly against the track rods to do accurate work. Page 19 1. Remove the blade guard and place the cuttinghead in a cross-cut position Fig. Place a square A Fig. Make certain the square is between the teeth of the saw blade.
The track arm should be unlocked when the handle is in the rear position, resting on the stop C. To adjust the track-arm handle: Disconnect the machine from the power source! Page 21 5. Loosen the three screws F Fig. To move the front of the track arm to the right, loosen the set screw H Fig. To move the front end of track arm to the left, loosen the set screw J and tighten the set Fig. Page 22 3. To adjust, loosen the yoke-clamping handle and the two screws C Fig.
Swivel the yoke D until the saw blade is parallel with the square. Tighten the yoke-clamping handle and the two screws C Fig. Disconnect the machine from the power source!
Remove the blade and blade guard assembly. Move the motor so that the arbor is in the down position Fig. Place the guard A Fig. Page 24 Fig. Clamp the fence Make sure that the saw blade is to the left and behind the fence.
Page 25 Keep the saw blade guard, splitter, and anti-kickback teeth in place and operating properly. Keep teeth sharp. If teeth are not operational, return your unit to the nearest authorized Delta service center for repair.
The splitter must be in alignment with the saw blade and the teeth must stop a kickback once it has start. Check their action before ripping by pushing the wood under the anti-kickback teeth. Make a push-stick from plywood or softwood, equal to or less than the width of the workpiece. All plastic parts should be cleaned with a soft damp cloth. Page Service Two Year Limited New Product Warranty Delta will repair or replace, at its expense and at its option, any new Delta machine, machine part, or machine accessory which in normal use has proven to be defective in workmanship or material, provided that the customer returns the product prepaid to a Delta factory service center or authorized service station with proof of purchase of the product within two years and provides Delta with reasonable opportunity to verify the alleged defect by inspection.
Page 32 5. Maintenir la position en ramenant le levier de fixation du bras sur rail C fig. Au besoin, relever le bras sur rail. Fixer la table en position. Page 42 Retirer la vis, la rondelle plate et la cale G fig. Page 48 Desserrer les trois vis F fig. Page 51 Fig. Fixer le guide. Page 52 Garder des dents tranchants.

|
Bed Rail Hangers Youtube Side Mount Drawer Slides Menards Group |

A_ZER_GER
25.10.2020 at 19:41:54
ZaLiM
25.10.2020 at 14:55:16
000000
25.10.2020 at 19:37:22
aftos
25.10.2020 at 23:58:16