Cnc Carving Fusion 360 Use,Wood Carving Machine Chennai Limited,Kreg Production Stop Youtube - Plans On 2021

In comparison a gcode for another wooden relief generated in LUBAN showed always negative values for Z axis how it should be. I have no idea how to get negative values from , because if you invert Z , of course X and Y also change Cnc Carving Fusion 360 App direction. Does anybody knows what happened. It is possible to set the work origin in fusion at the stock bottom or bed level rather than stock or model top and if you have no negative values this sounds likely.
In this case you will never get a minus value as all of the GCODE instructions are absolute values referenced from the work origin. Yes thats what I would do. Make sure you set it on the stock top. When setting any CNC job you move the end of the bit to that position and tell the machine in Luban or through the console that its the work origin. Where it is now you cant get the end of the bit to that position. Looks like you have got rid of all the extra stock Fusion likes to add which is good.
Sorry, only read half your question. What type of milling pass are you using. I am no expert here but understand people usually use adaptive clearing with a flat end mill to remove most of the material and that option lets you set pass depth, leaving some material to clean off with a final cut. Finish off with a ball end mill using a spiral or morphed spiral cut. As stewl said: where you set the origin in Fusion and where you set the work origin on the cnc must be exactly the same.
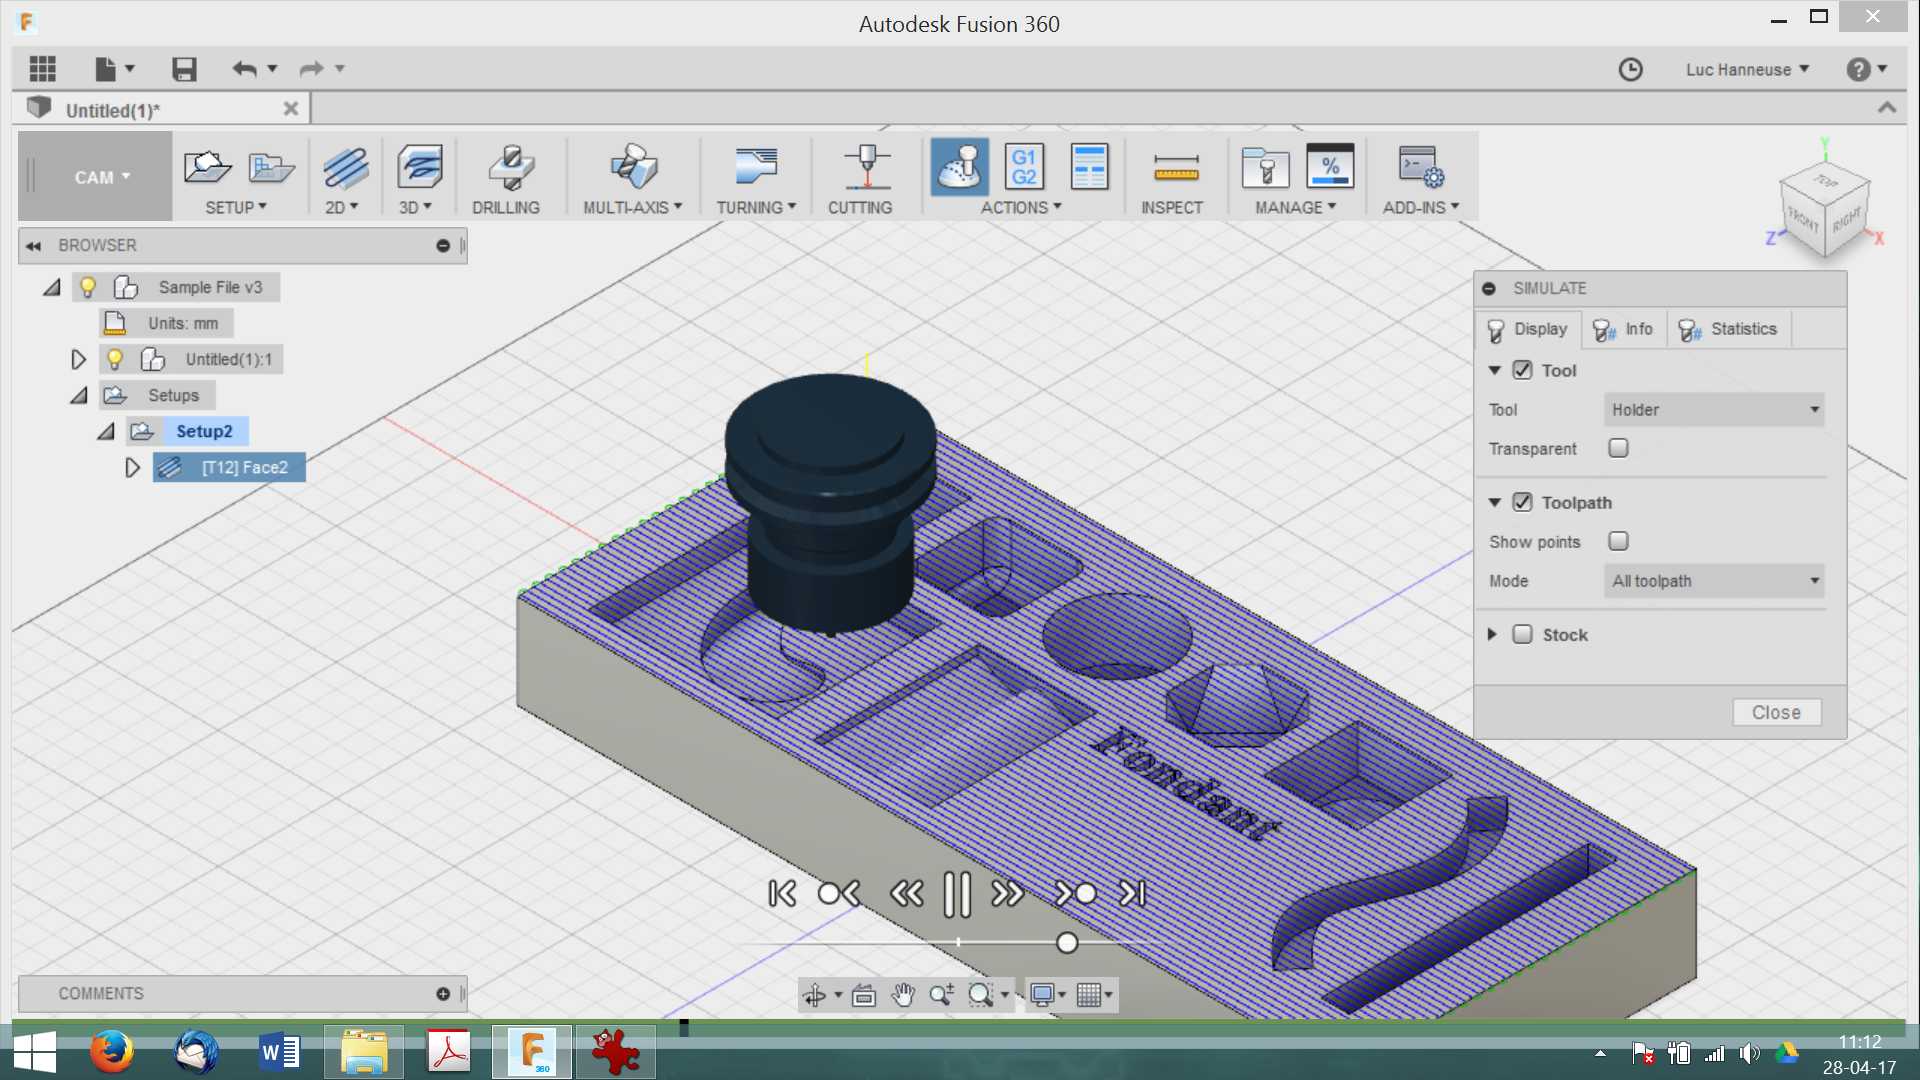
This is just a personal preference. Feel free to define your origin wherever makes most sense to you. For the first cut, we'll use an "Adaptive Clearing" under the "3D" drop-down menu. The 3D Adaptive Clearing operation will efficiently allow our machine to clear out the bulk of the material. First, we'll define the tool for the operation.
I covered in the video how to find all the information you'll need for different cutter bits. Since nobody has the exact same bits, I won't cover that step in this Instructables. Once you have the tool you want selected, I went over to the next tab, I defined the boundary for which I want the tool to cut within. Since I prefer to cut my workpiece to its final size at my table saw, I selected the outer edge of my piece to prevent the tool from cutting away the extra 1" material I added around the model.
Then under this same tab, make sure the box next to "rest machining" is selected. Rest Machining is an operation telling the machine that this is one of multiple tool paths to get to the final shape. So the subsequent steps will only cut away what's left from the previous step. Since this is our first step, be sure to select the "From Stock" option in the drop down menu.
Finally, under the "Passes" tab we'll define the speed of the cutters. While under this tab, make sure to select the "stock to leave" option. This will allow for some extra material for later operations. For the finishing pass, we'll use a "Parallel Pass" under the "3D" drop down menu. The smaller this diameter, the longer it will take to carve, but the result will speak for itself!
This tells the machine to only clear away the material that was left from the previous step. Also, because the previous operation left stairstep shapes, be sure to change "Ignore Cusps" to "Use As Computed" under adjustments. Or else the machine will only clear away the bottom of the "valley" where the angle isn't deg. Under the "Passes" tab, change the "stepover" value. But the smaller this value is, the longer it will take to machine. Since this is the last operation, be sure to leave the "Stock to Leave" option unchecked.
Alright now that the tool paths have been set up, it's time to send all of this information over to the CNC. However, Fusion cannot directly communicate with the CNC so we'll need to convert the directions to a language that the machine can understand, called "G-Code".
To do this, right click on each tool path and select "Post Process" in the menu. Thanks so much for making it through this very information-dense tutorial with us! If you have any questions just let us know we'll see them most on the the YouTube comments. This was not a sponsored project and we did not get paid to do this, BUT we do have a Patreon account if you find value in what we do and want to support us - but no pressure! Thanks y'all!
Thank you for supporting us! Too much has changed, evidently, I can't get past the orientation set up. It also doesn't help that they go so fast you are constantly rewinding. And, lastly, if you don't show the CAD part for creating the stock, and this is for beginners, why do you assume they will know how.
Either something is wrong with the cad file or there is a step missing. Just like the other comments the smiley face cad image disappears when I select "Manufacture". I think Fusion has changed a lot since this tutorial was made as I quickly got lost because what you're showing and what Fusion is showing are quite different. Great tutorial! I really want to make Kevin! Any chance you might do a follow-up? Many things have changed in Fusion and this is hard to follow with all those changes. Also not sure if post-processor still works well on Carvey It is completely possible I have just made some errors.
Question 2 years ago on Step 4. So many questions. I downloaded Kevin. When I click "Create Setup". I don't see a view that shows my stock and Kevin happily co-existing. I only see the stock with no Kevin in sight. Also, when I try to set the orientation "Z Axis" and "X Axis" I don't have something reminiscent of what the photos show here, a beige box with a blue wall that interacts with where I click to make changes.
The entire "stock box" is beige and no matter what I click it ignores the input. I have tried selecting the different mouse-cursor's on the page and clicking various parts of the stock, and I get nothing. I feel as though I'm missing a step somewhere but I've read the text tutorial and watched the video at least a dozen times and I'm not able to to replicate what I see. Question 2 years ago. How did you get your work table to show in fusion?
Is this possible at all with the x-carve? Is your material a separate file or is this another body in Fusion? If it is another body, when is it defined? Before or after you start the cam process? Question 3 years ago. If I hit tab on left for layout 2, all is gone except workspace grid. Have yet to get to any dialog box where I can enter the size of the walnut block.
Question 3 years ago on Step 4. Just beginning. Already confused. When I open up Kevin file, I see what you show in tutorial. From there, lost. I hit setup. I lose kevin. I see a block of material, I guess that's the block I will be cutting from.
In your I chose from solid option. When I exit the dialog box, it informs me I have not selected material. However, I can't seem to do that.
And where do I enter the dimensions of that walnut block. I've got a screen showing me all dim. My oldest son has bee using it. He even switched from Ubuntu to Windows so he could run it. The best thing, is that it can tell what the weight of the finished product will be. One that he is currently building is a little over lbs and the other he has been able to trim down to just under lbs.
I would be happier if he could get it down around lbs. Thank you for posting this! I've been wanting to learn it, but I failed miserably the first time I tried. Now I have restored confidence! By evanandkatelyn Click here: our YouTube channel! More by the author:. Amateur makers. Expert high fivers.

|
47 Metric Woodworking Plans Pdf Login Knobs And Pulls Hardware 90 |

Giz
19.09.2020 at 19:48:49
BERLIN
19.09.2020 at 19:33:32